
Overview
This guide walks you through enabling SAML Single Sign-On (SSO) for your Goodnotes organisation. SSO allows your team members to sign in to Goodnotes using your company's existing Identity Provider (IdP), so there's no need to manage separate Goodnotes passwords.
The setup process consists of three steps:
- Obtain your SAML configuration values from the Goodnotes Admin Console
- Configure a SAML application in your Identity Provider
- Register your IdP information back in Goodnotes
Before You Begin
Regardless of which Identity Provider you use, please ensure the following before starting:
- You have administrator access to your IdP (Global Admin, Super Admin, etc.)
- You know the domain name your organisation uses with Goodnotes (e.g.
company.com) - Your domain has been verified in the Goodnotes Admin Console. If not, please complete domain verification first.
Before testing your SSO setup, you must decide how users will join your organisation:
-
Option 1 - Auto-capture (recommended): Users who sign in via SSO are automatically added to your organisation as long as their email domain matches a verified domain. To enable this, go to Authentication & Identity > Domain Management > click the three-dot menu next to your domain > Domain control > toggle on Auto-capture users. See How to: Join an Organization on Goodnotes Teams via Sign-in (Auto Capture).
-
Option 2 - Manual invitation: Users must be invited from the Admin Console before signing in via SSO. See Adding Users to your Organization.
If you test SSO sign-in without completing one of the above steps, your account will not be added to your organisation and a new empty account will be created instead. If this happens, see Error: SSO Sign-in creates new organization.
Step 1: Get Your SAML Values from Goodnotes (All Providers)
- Go to https://org-admin.goodnotes.com and sign in as an Owner
- Select Authentication & Identity from the left-hand menu
- Click the Configure SAML SSO tab, then click Add Configuration
- Note down the ACS URL and Entity ID shown on screen — you will need these in your IdP

Goodnotes supports the following Identity Providers. Select yours to get started:
Microsoft Entra ID
📚 For more detail, see the Microsoft Entra SAML documentation.
Required permission: Microsoft 365 Global Administrator or User Administrator
Before You Configure Entra ID
To avoid sign-in issues, please verify the following in your Microsoft environment before proceeding.
1. Confirm your domain is verified in Microsoft 365
- Go to Microsoft 365 Admin Center → Settings → Domains
- Confirm the status of your domain shows Verified
2. Confirm the same domain appears in Entra ID
- Go to Entra ID → Custom domain names
- Confirm the same domain is listed here
3. Confirm user UPN and email address
Go to Entra ID → Users → select the relevant user and verify:
- ✓ The User Principal Name (UPN) is in the format
username@yourdomain.com - ✓ Under Properties → Contact Info, the Mail field is not empty
- ✓ The Mail field value matches the UPN, and both match the email address registered in Goodnotes
⚠️ The email address and UPN are not always the same in Microsoft environments. If the Mail field is empty, sign-in will fail.
For Goodnotes sign-in to succeed, these two must match:
- The email identity sent by Entra ID (email claim)
- The email address registered in the Goodnotes Admin Console
Step 2: Configure Microsoft Entra ID
A. Create the application
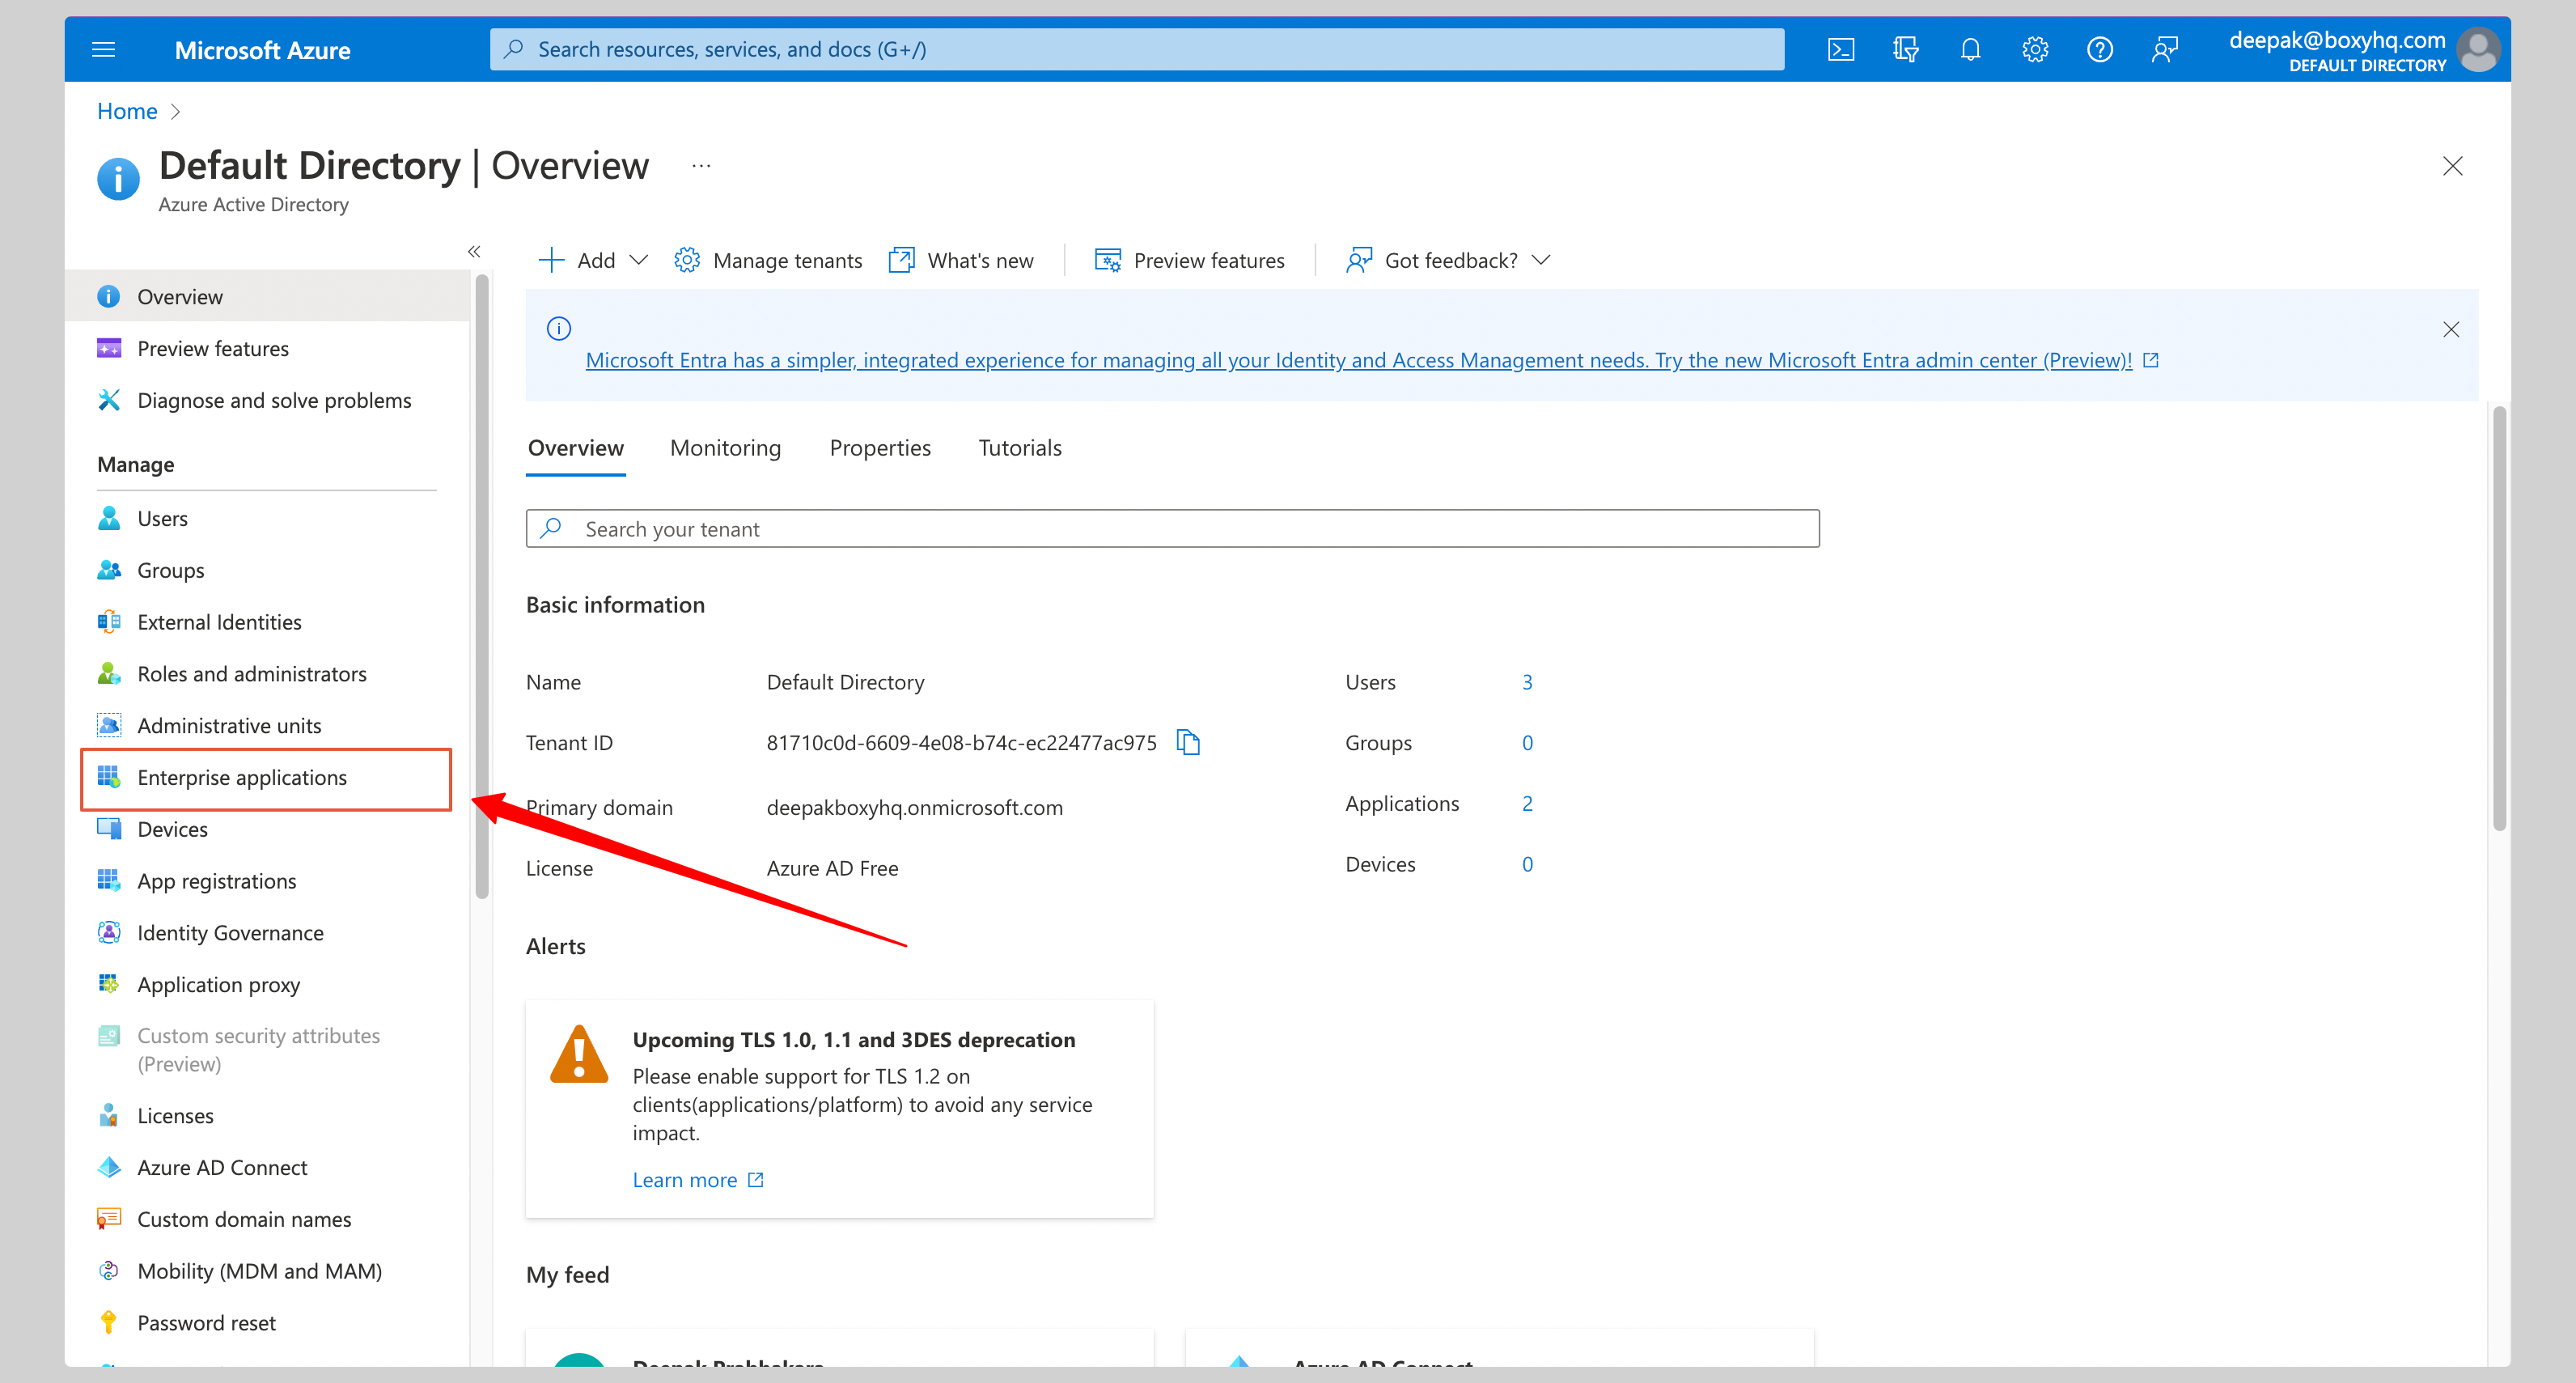
- In the Azure Admin Console, click Enterprise applications in the left navigation
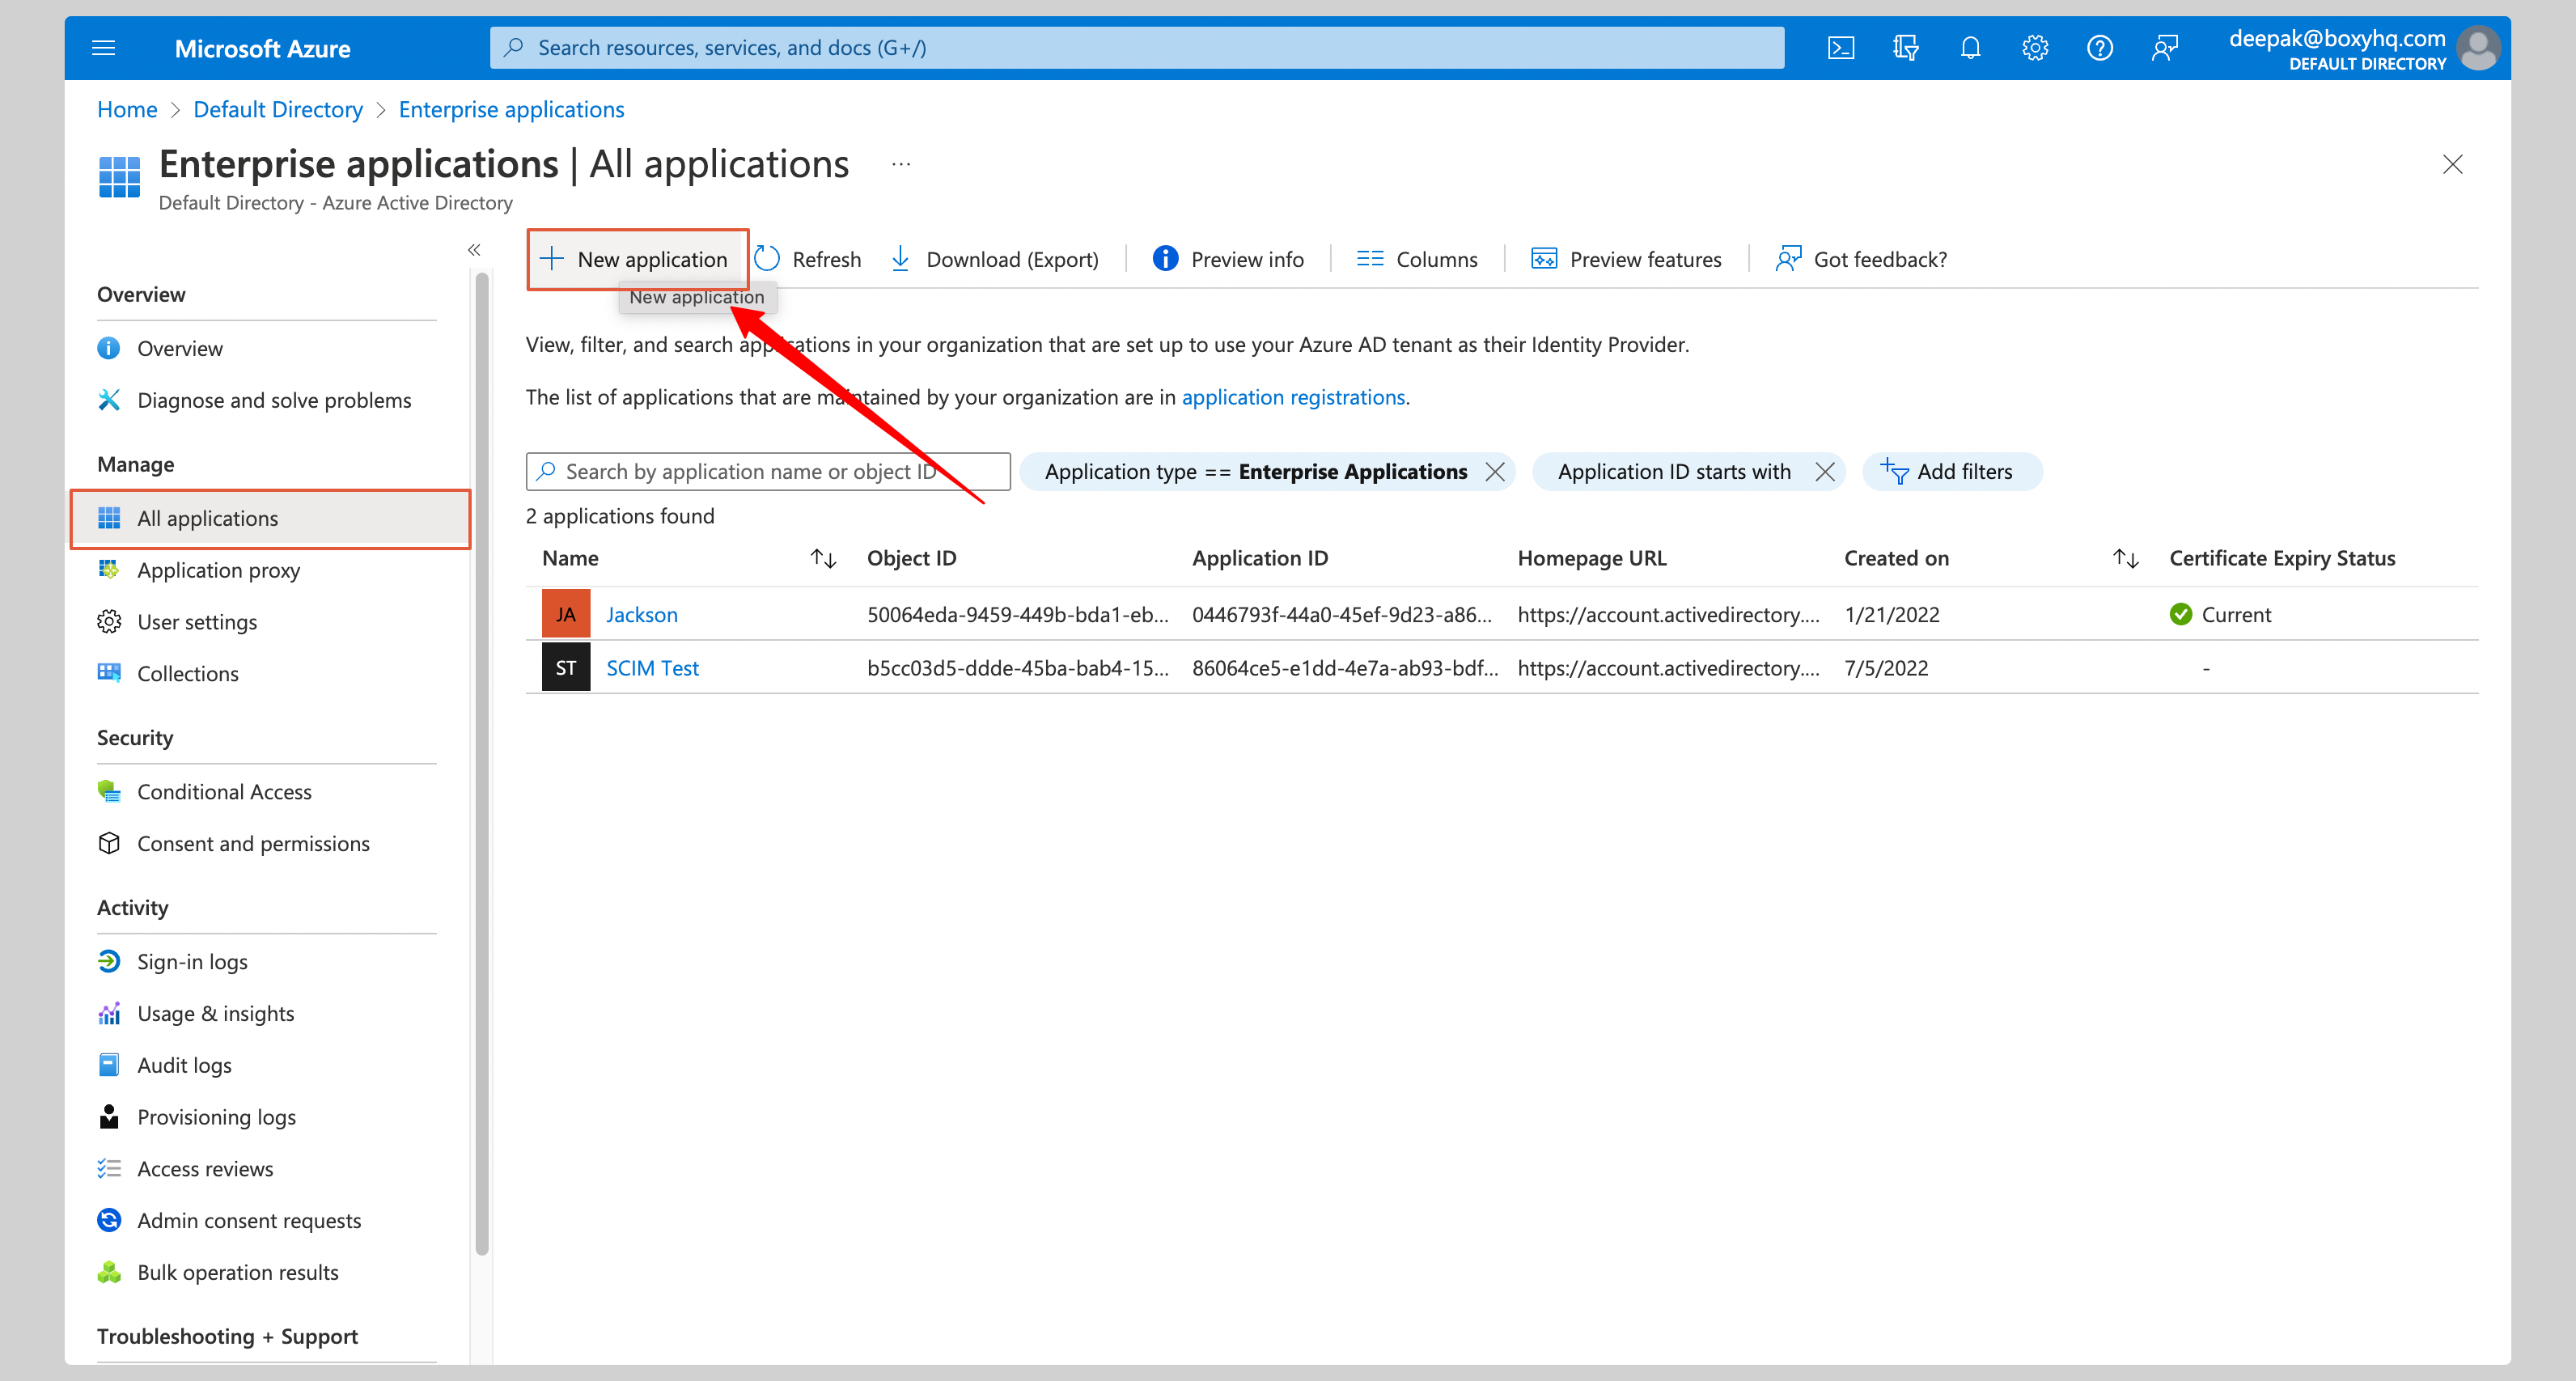
- Click New application
- Click Create your own application
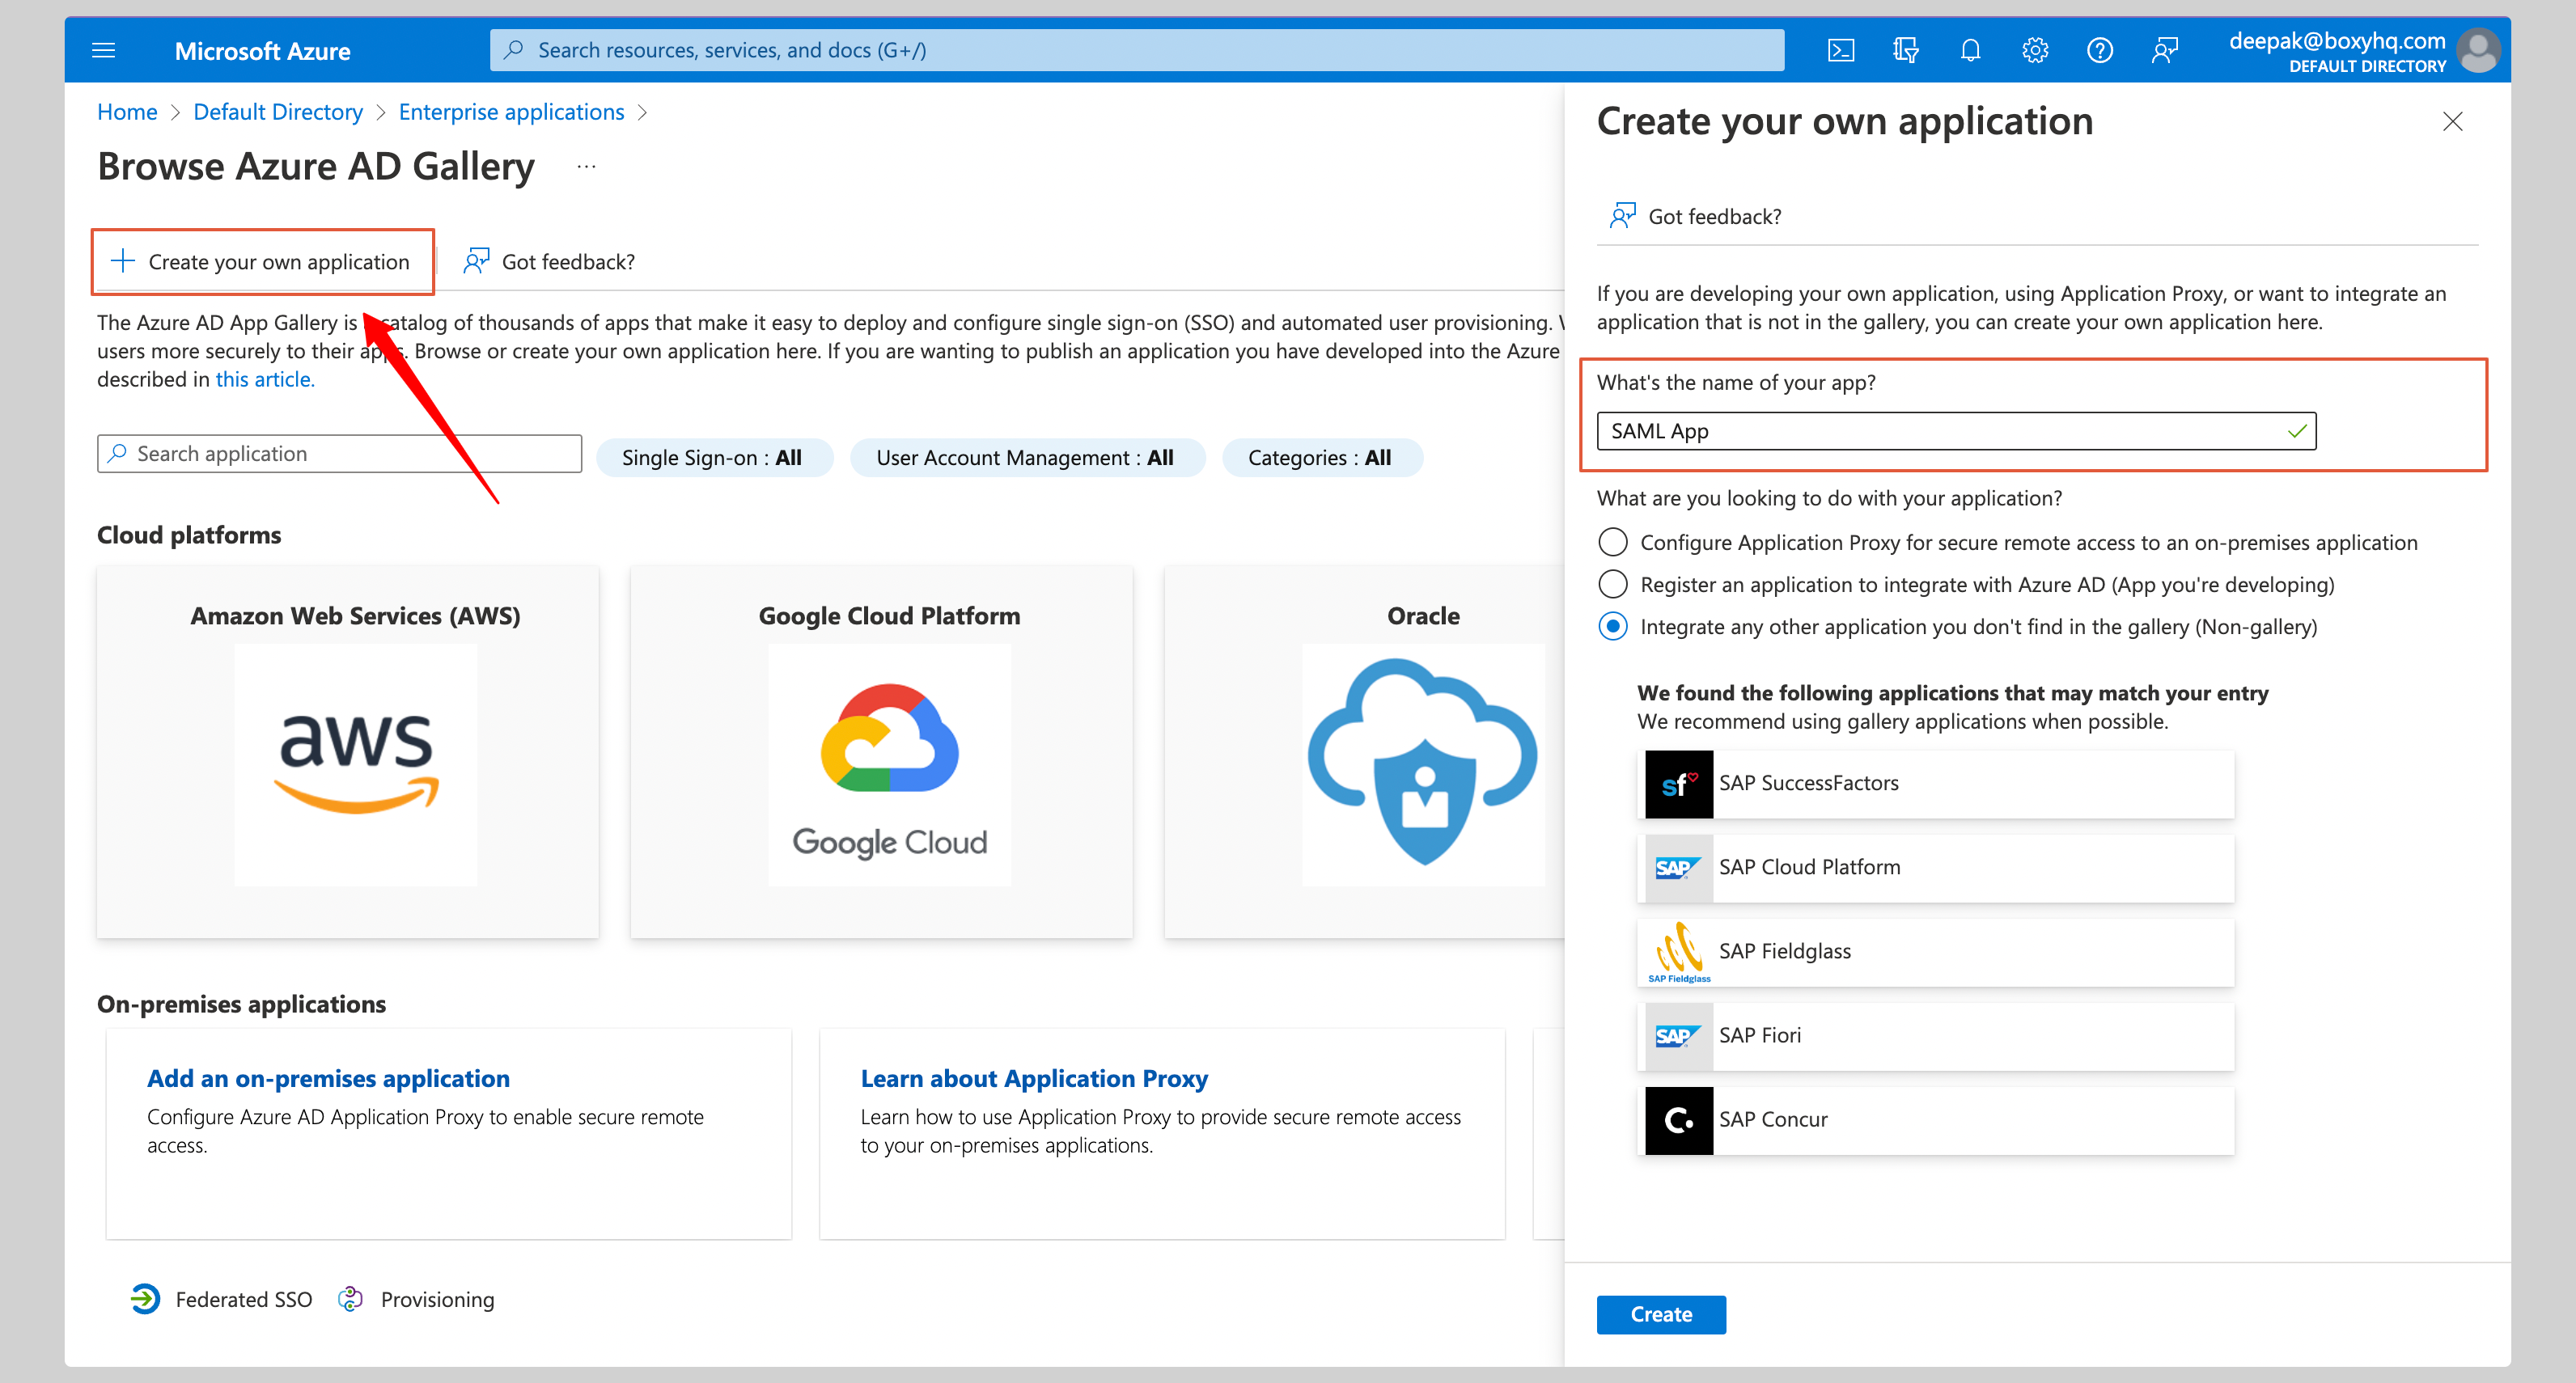
- Give the app a name (e.g. Goodnotes SAML) and click Create
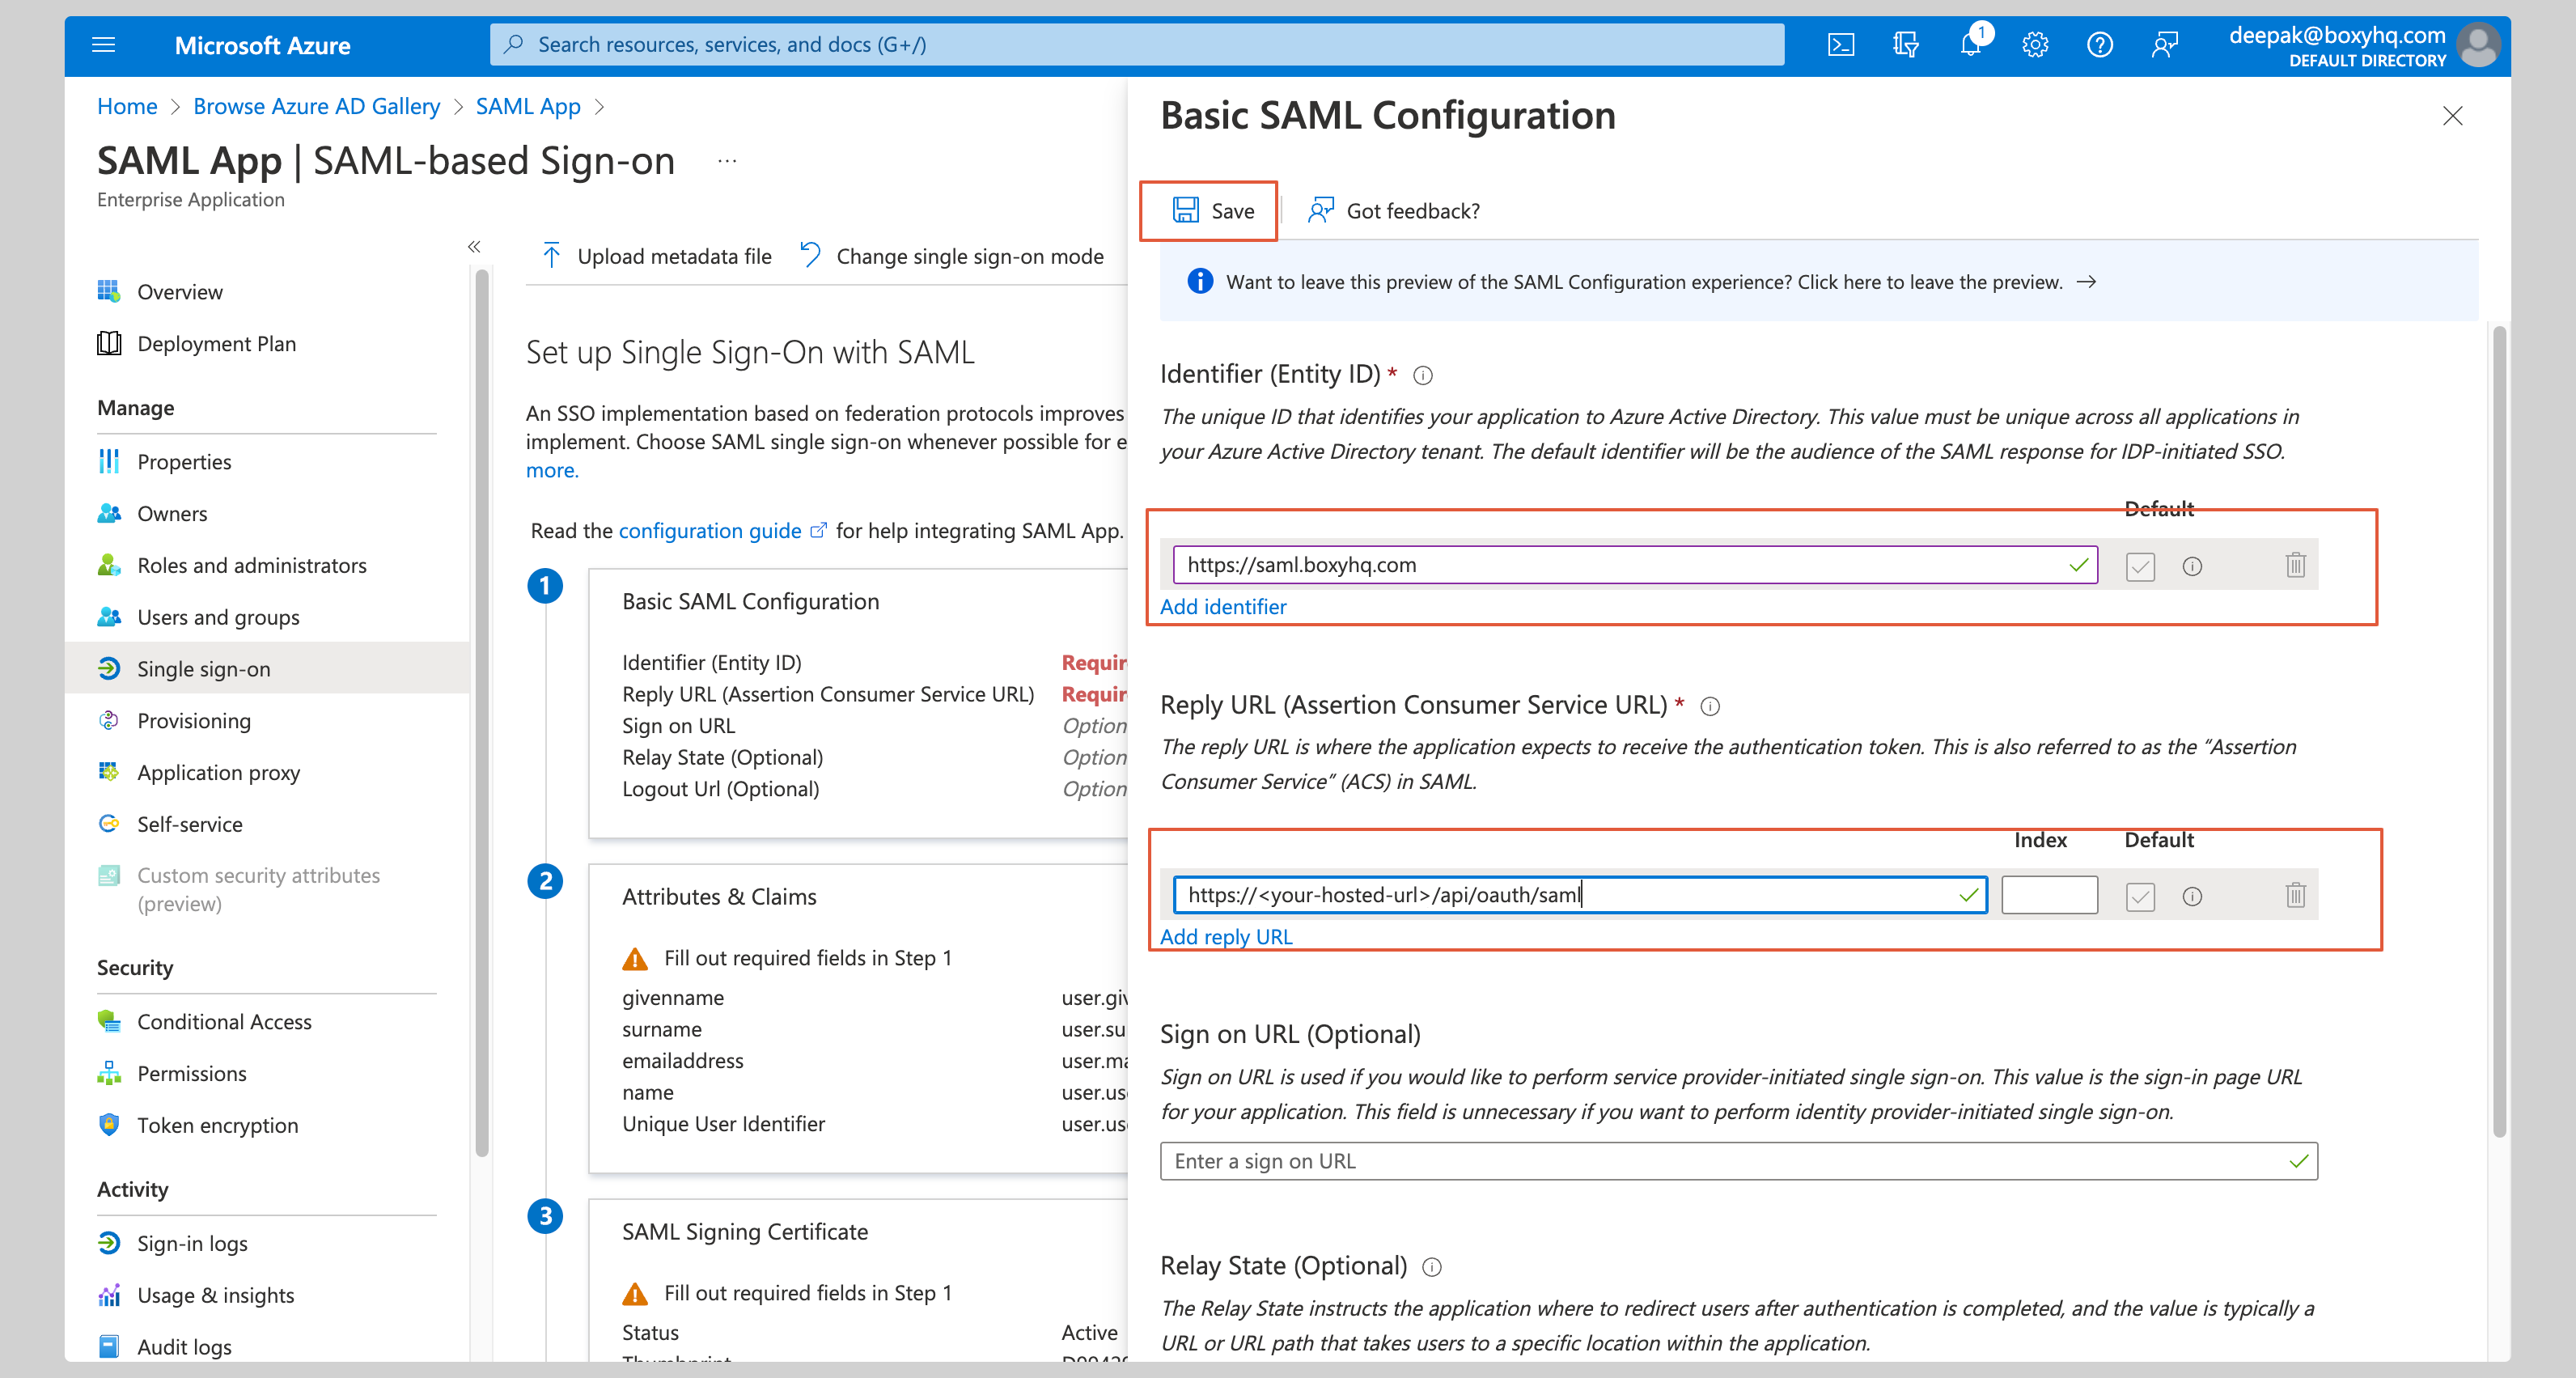
B. Configure SAML settings
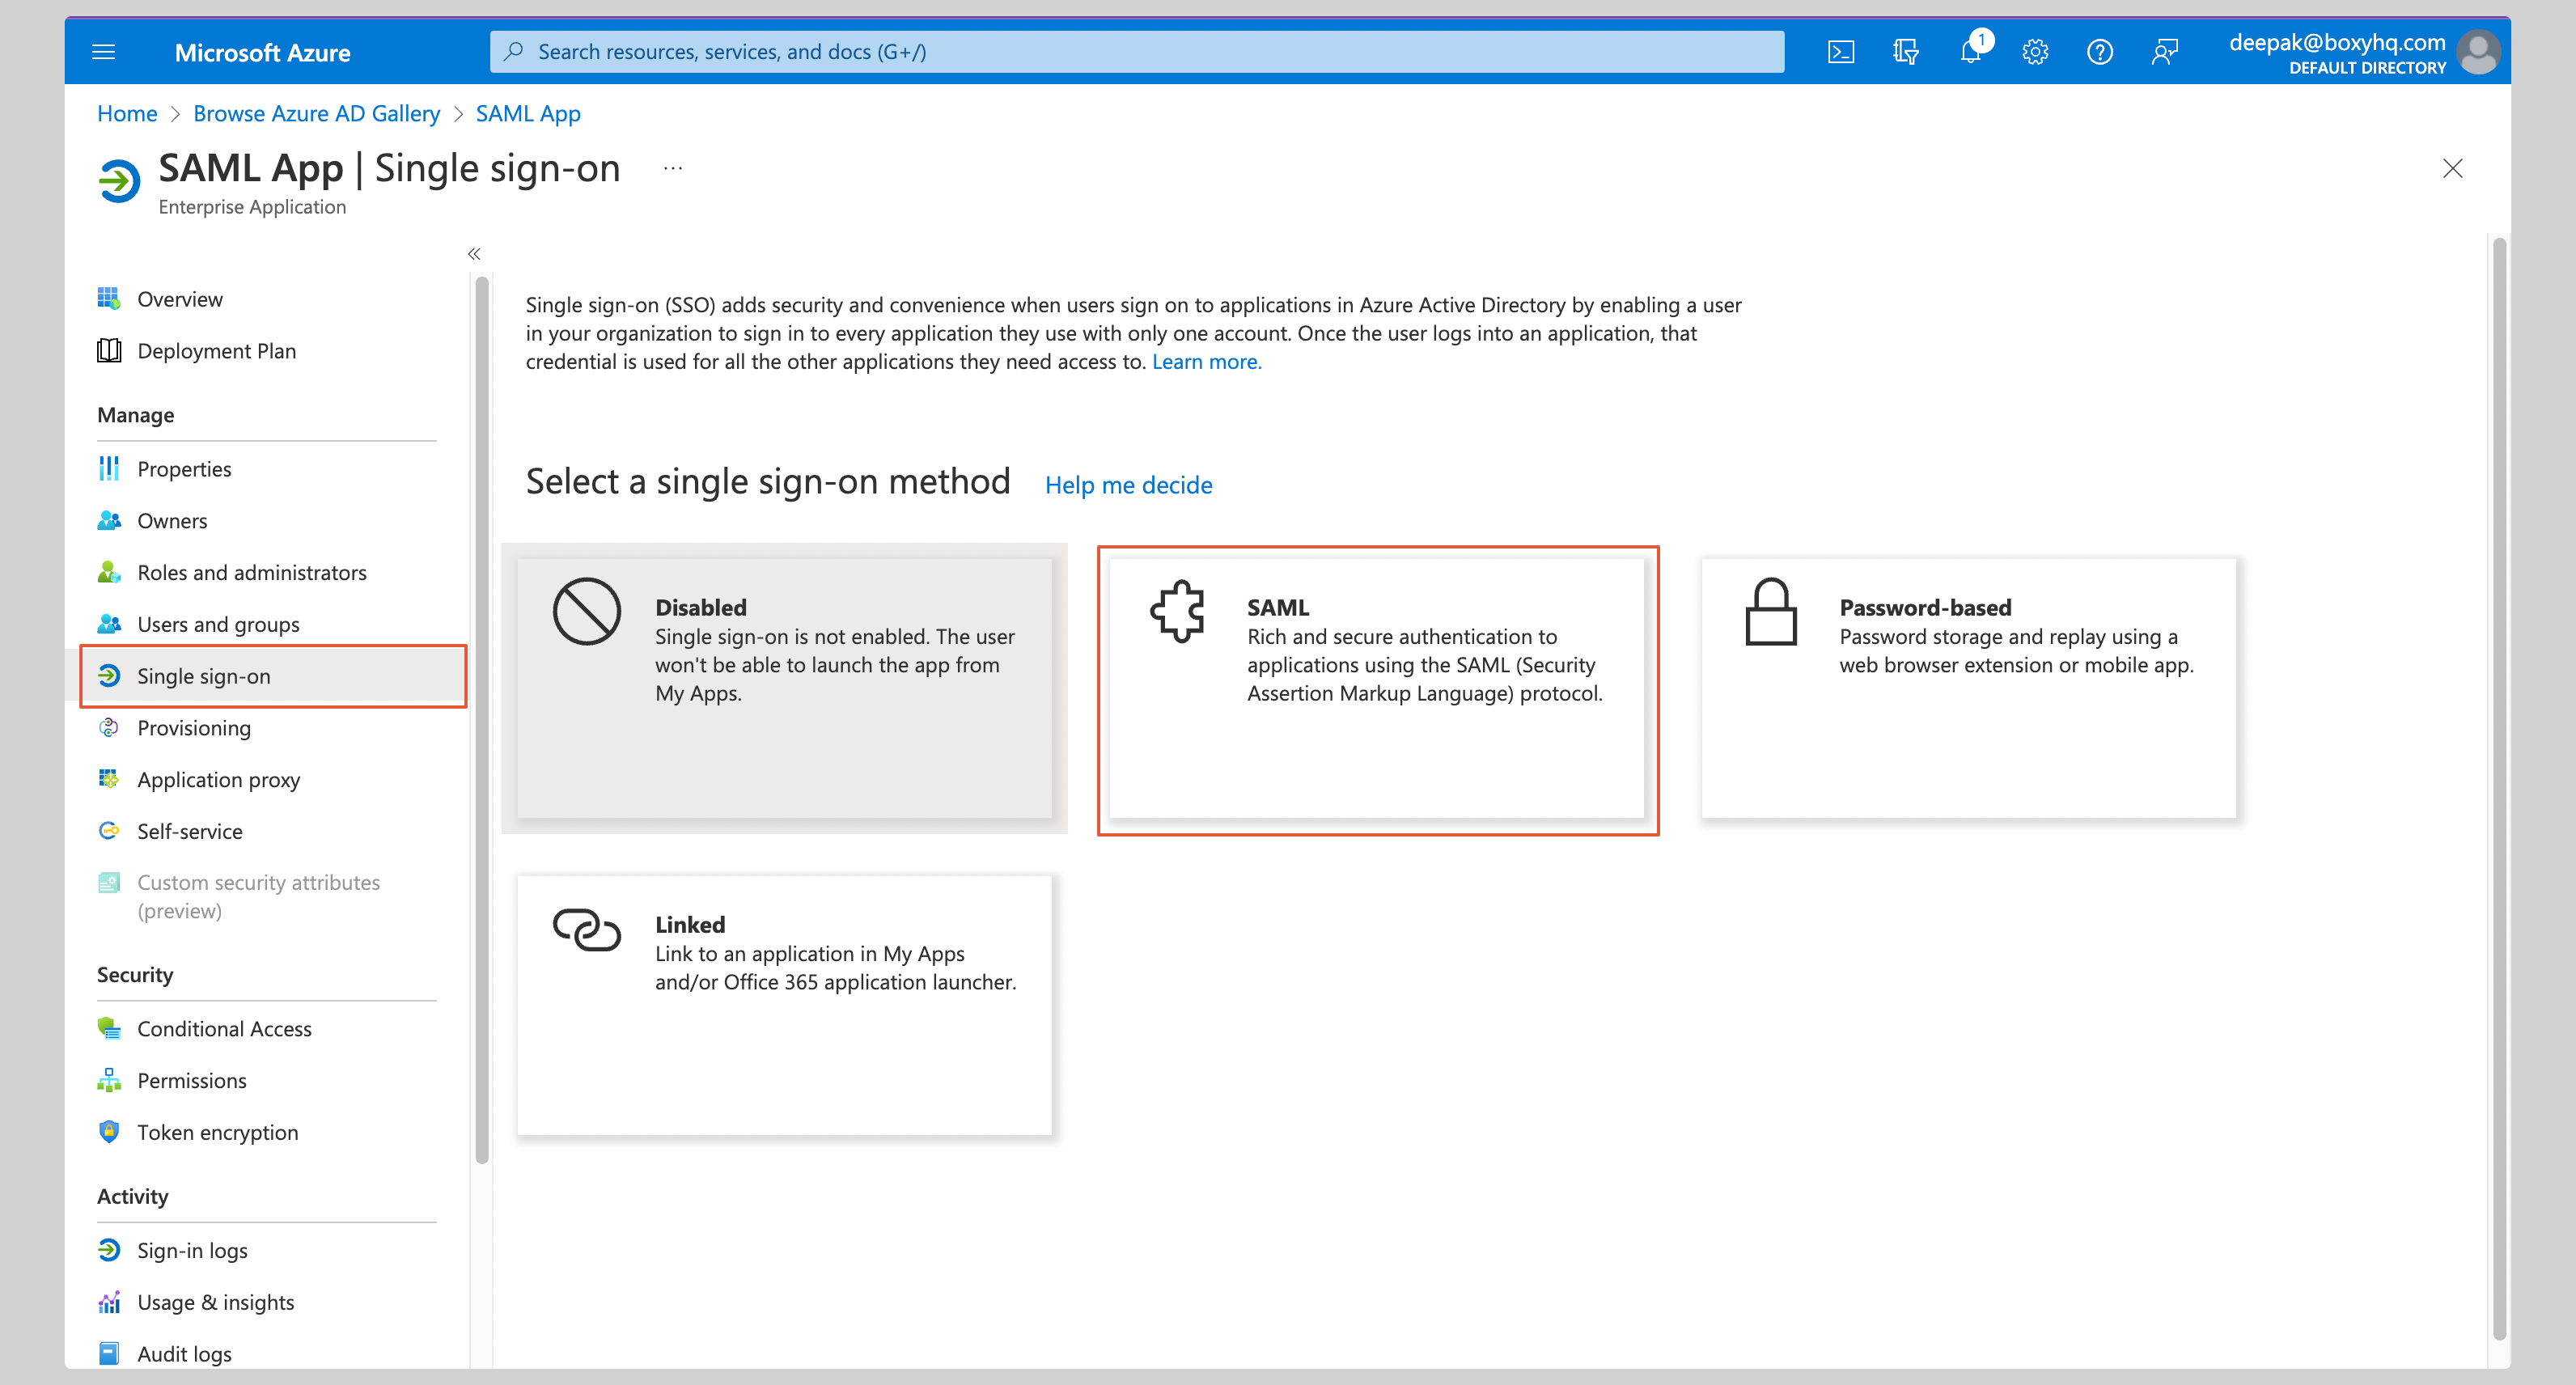
- Under Manage, select Single Sign-On → click SAML
- Click Edit in the Basic SAML Configuration section
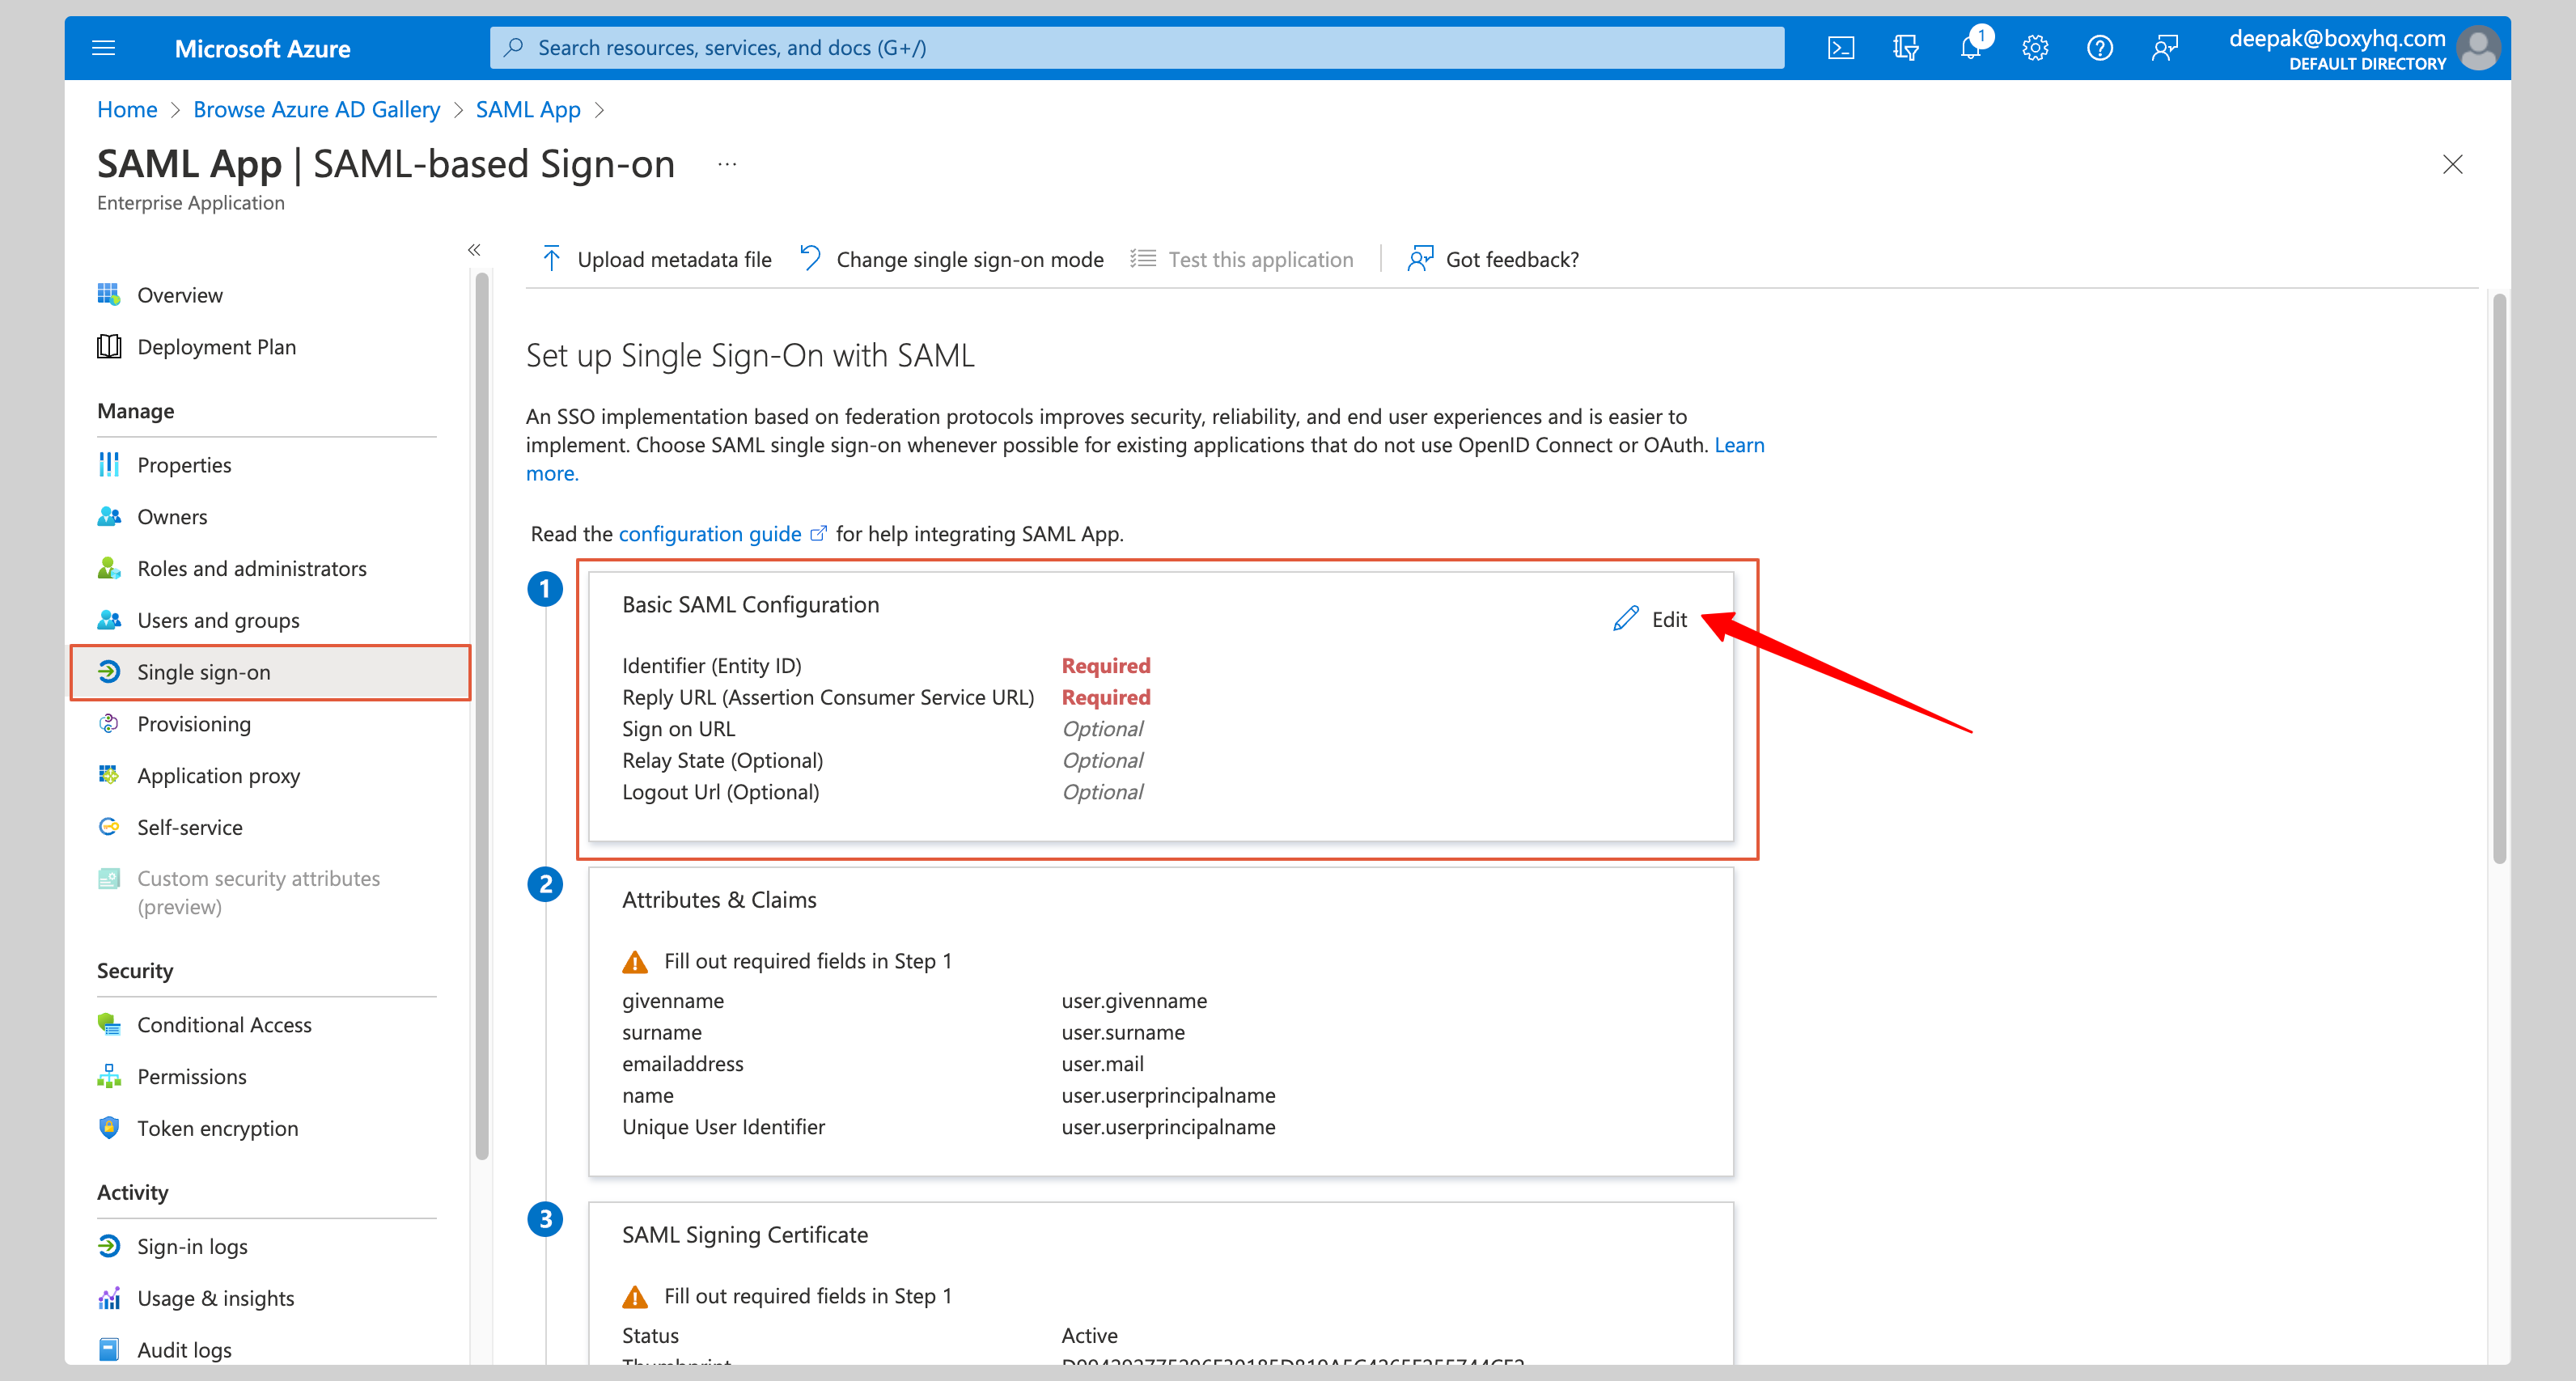
- Enter the following:
- Identifier (Entity ID):
https://saml.boxyhq.com - Reply URL (Assertion Consumer Service URL):
https://saml-auth.goodnotes.com/api/oauth/saml
- Identifier (Entity ID):
- Click Save
C. Configure attribute mapping
- Click Edit in the Attributes & Claims section
- Ensure the following claims are configured:
| Name | Value |
|---|---|
…/claims/emailaddress |
user.mail |
…/claims/givenname |
user.givenname |
…/claims/name |
user.userprincipalname |
…/claims/surname |
user.surname |
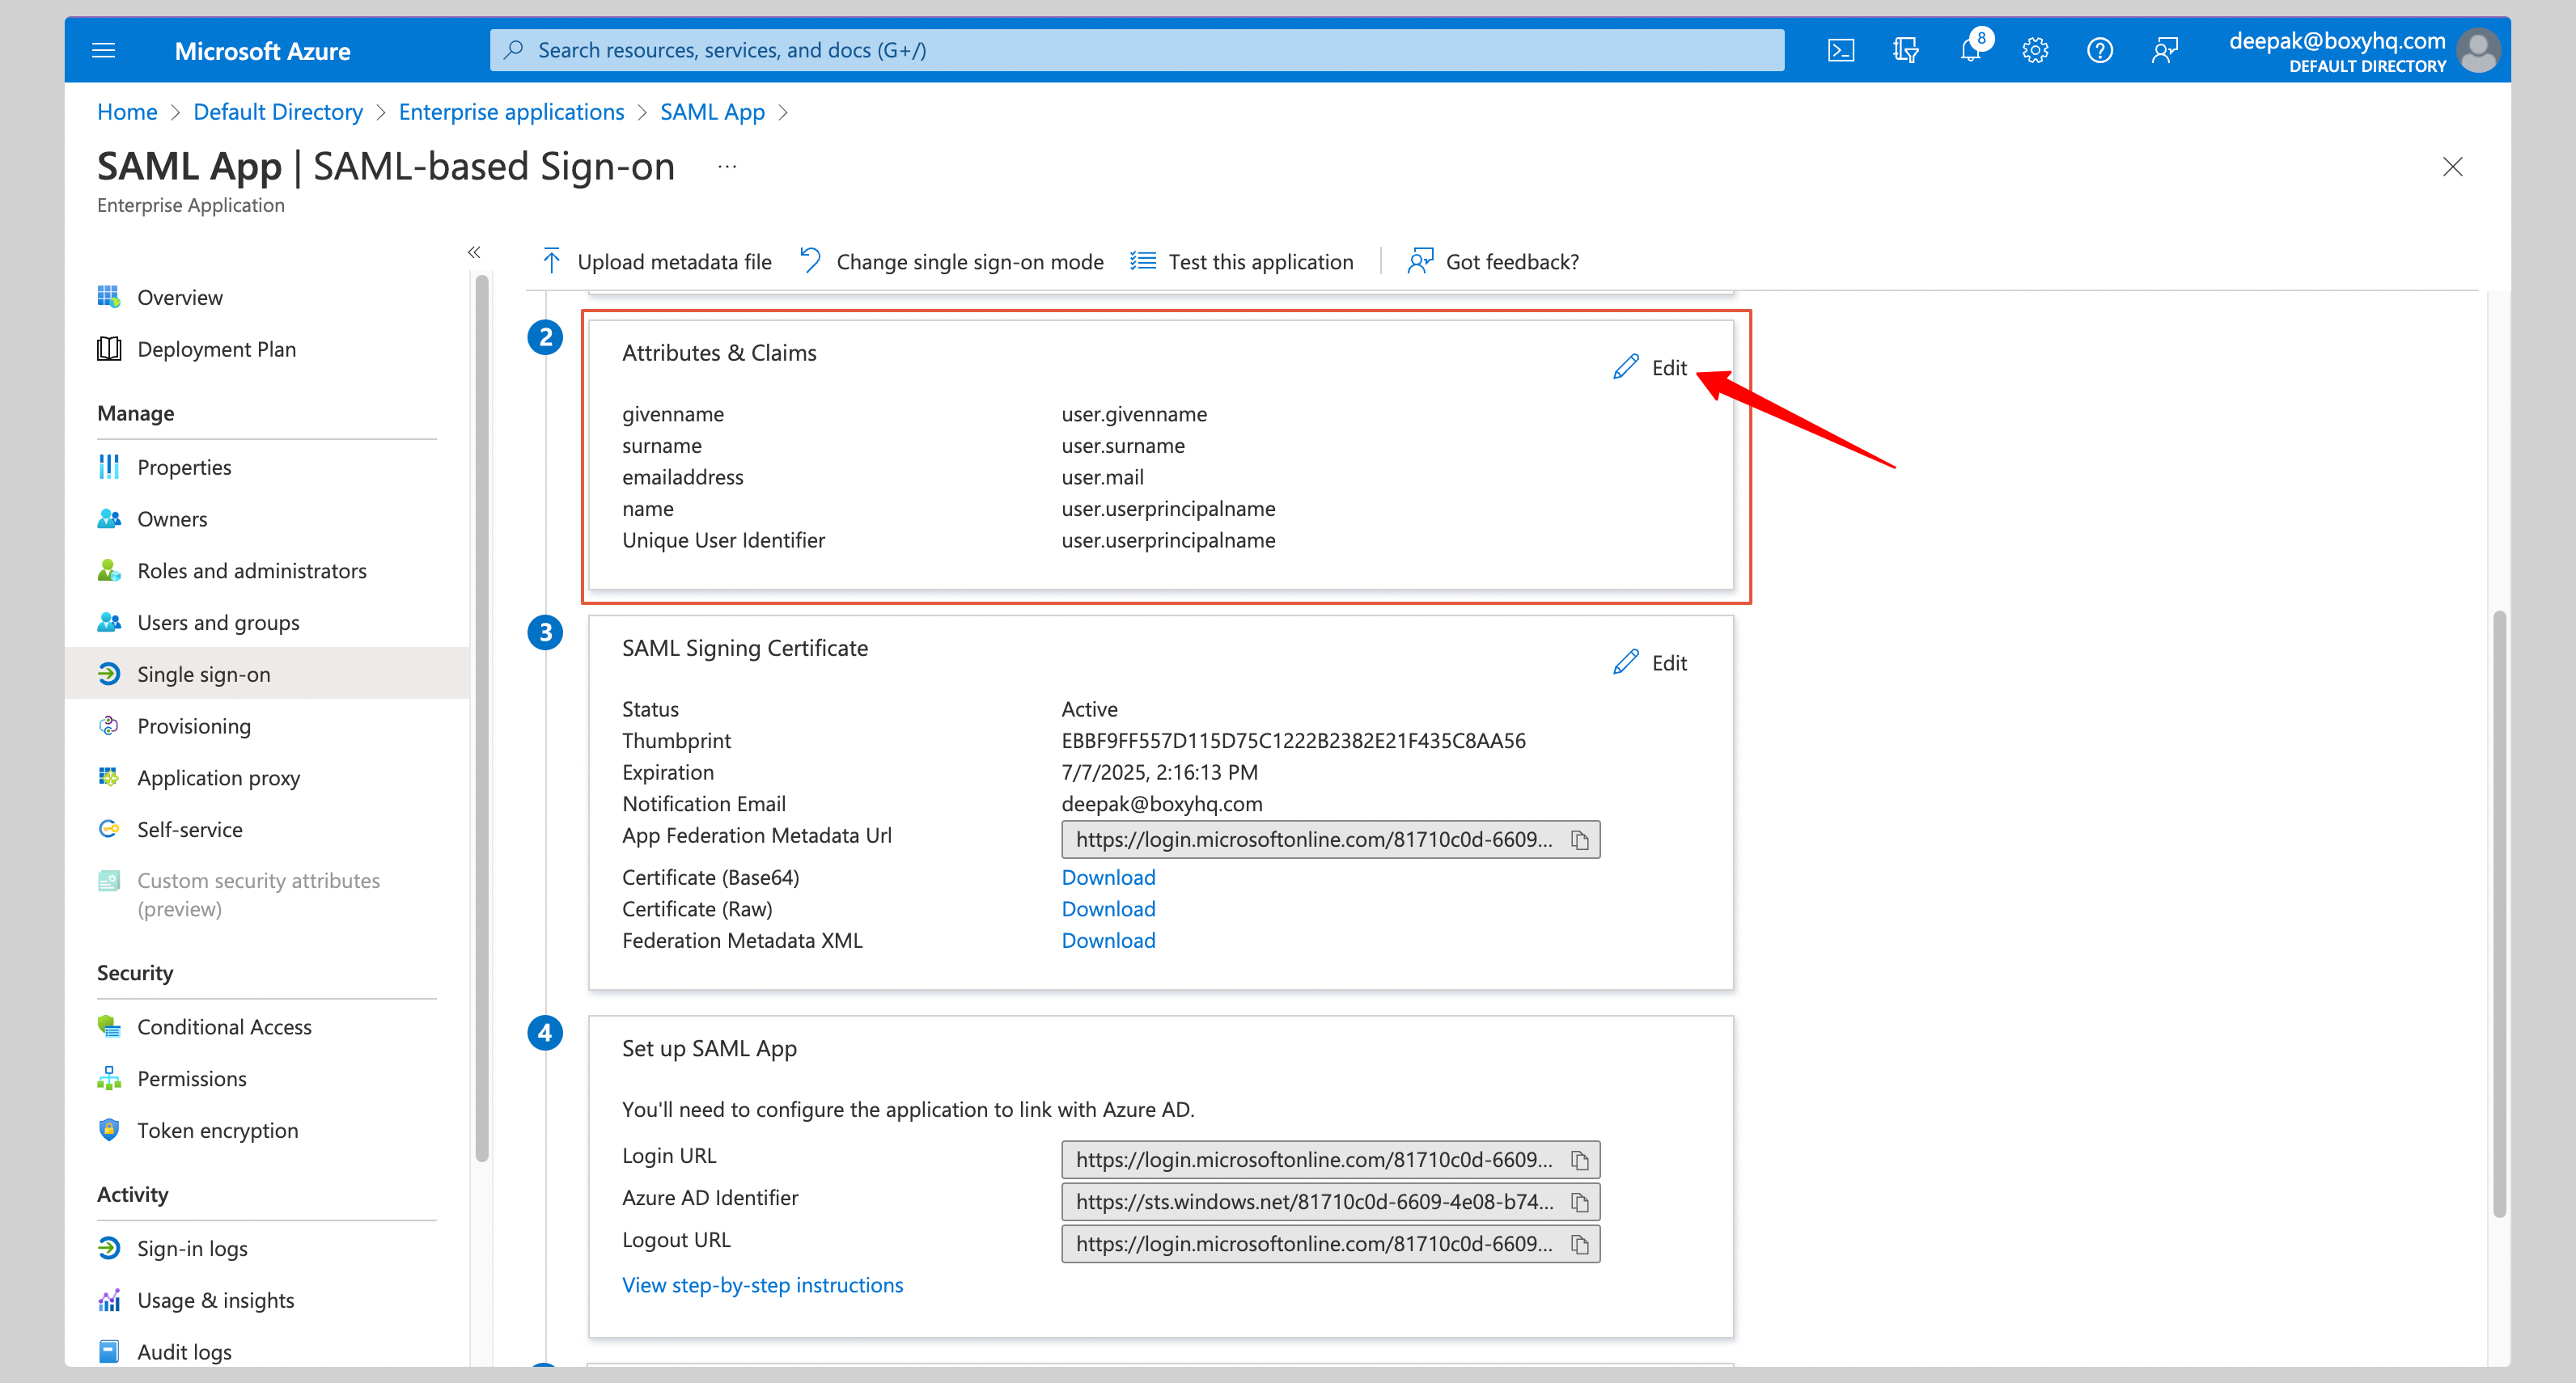
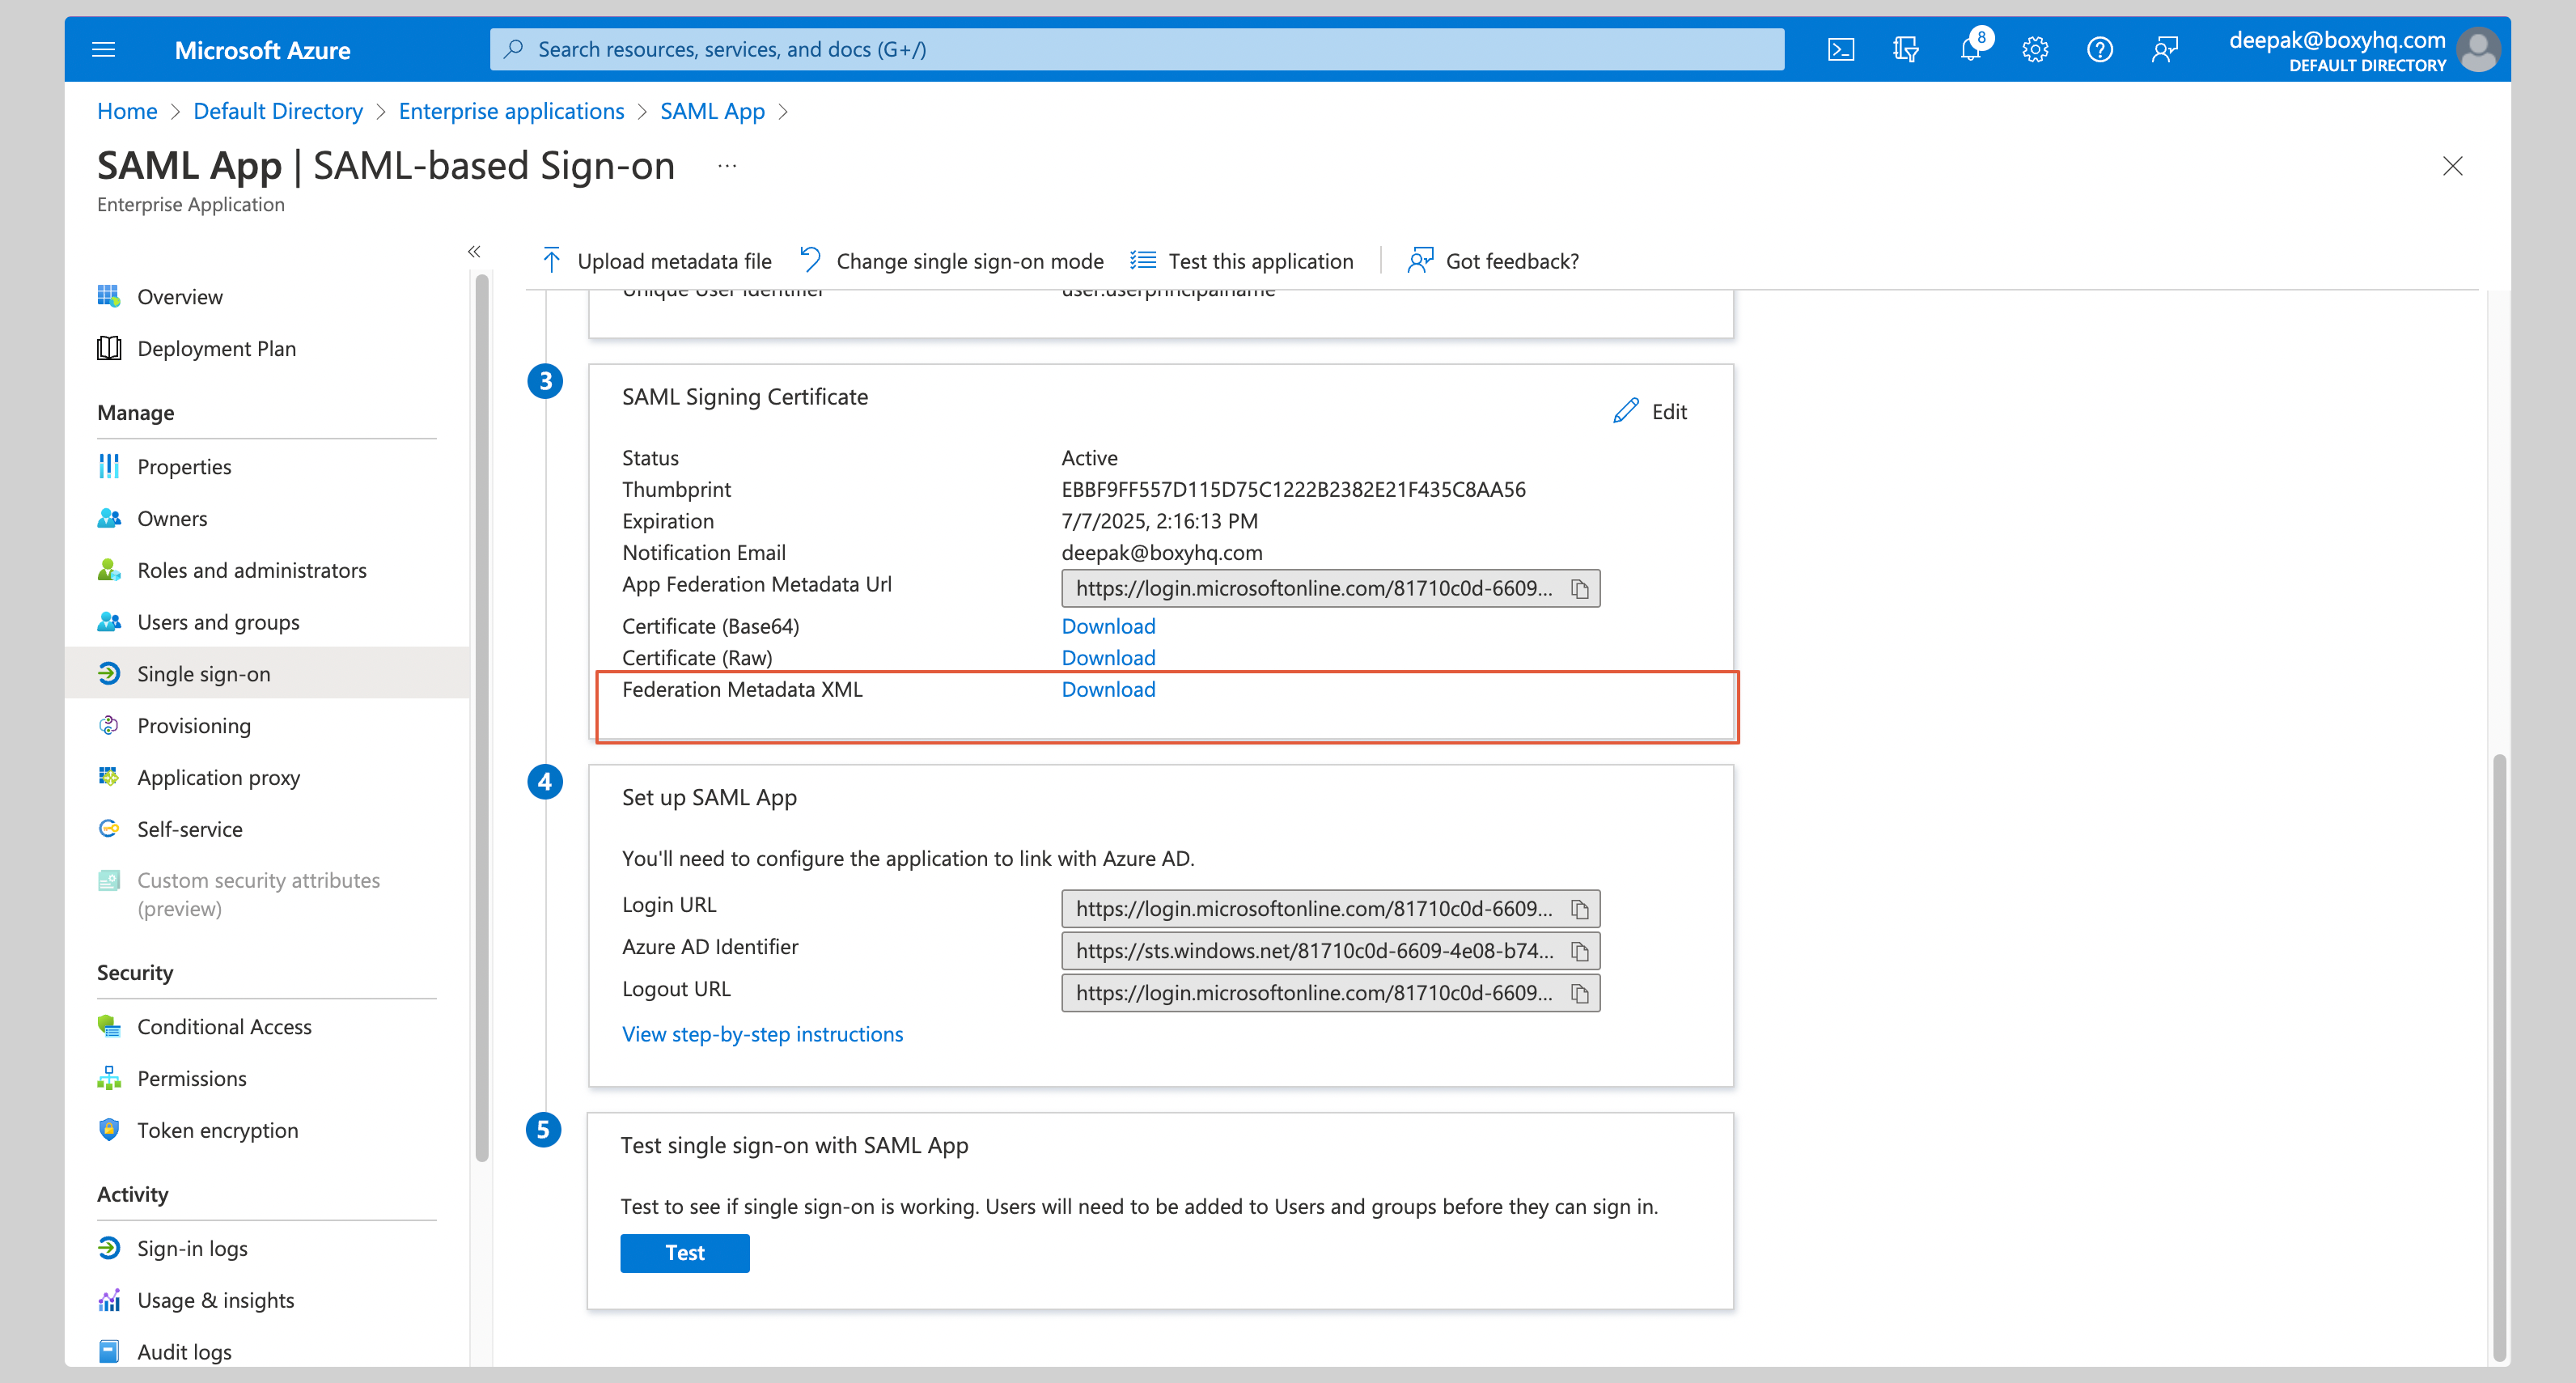
D. Download the metadata file
In the SAML Signing Certificate section, click Download next to Federation Metadata XML and save the file.
Step 3: Register Your IdP in Goodnotes
- Return to the Goodnotes Admin Console
- Select your verified domain (complete domain verification first if needed)
- Upload the Federation Metadata XML file you downloaded
- Click Save Settings
Test Your Setup
- Open https://org-admin.goodnotes.com in your browser
- Click Sign in with SSO
- Enter your domain and sign in
⚠️ Important: Do not sign in using the Entra ID app icon or tile — this will result in a 403 error. Always navigate directly to the URL in your browser. If you are currently signed in via OIDC (e.g. as an admin), see Changing your sign-in method from OIDC to SAML SSO.
Okta
📚 For more detail, see the Okta SAML documentation.
Required permission: Okta Administrator
Step 2: Configure Okta
A. Create the application
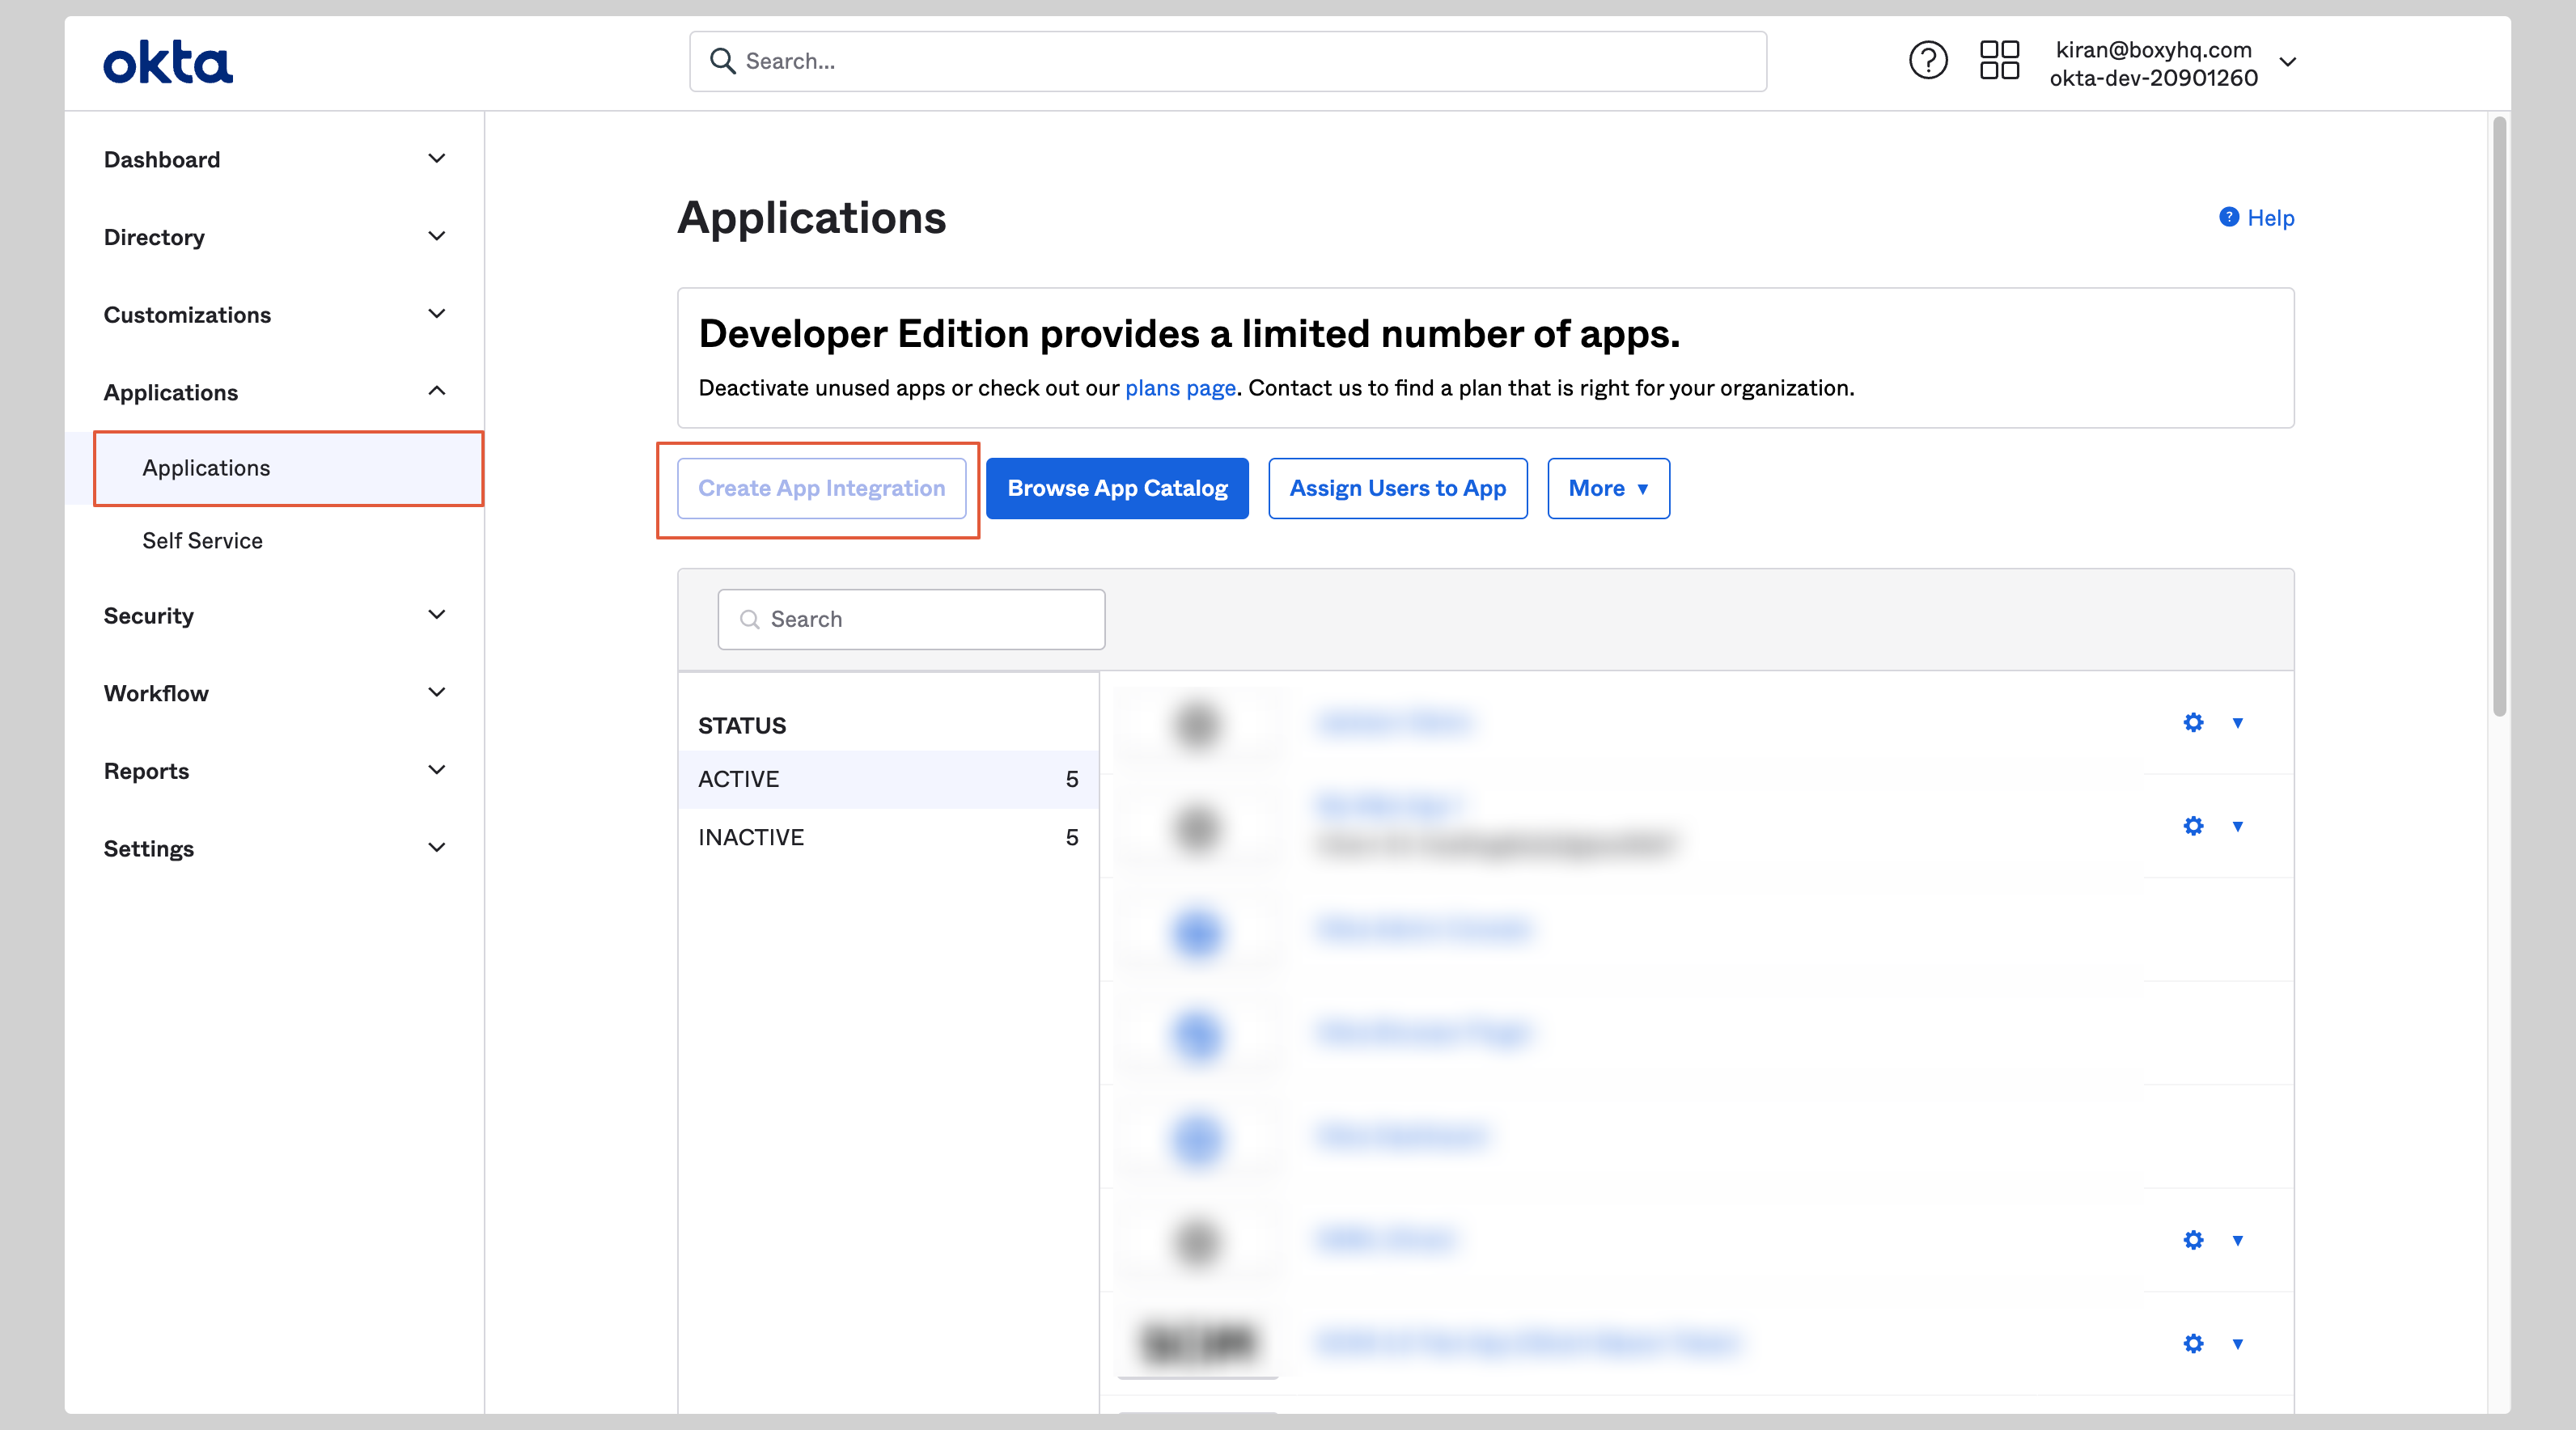
- In your Okta Admin Console, go to Applications → Create App Integration
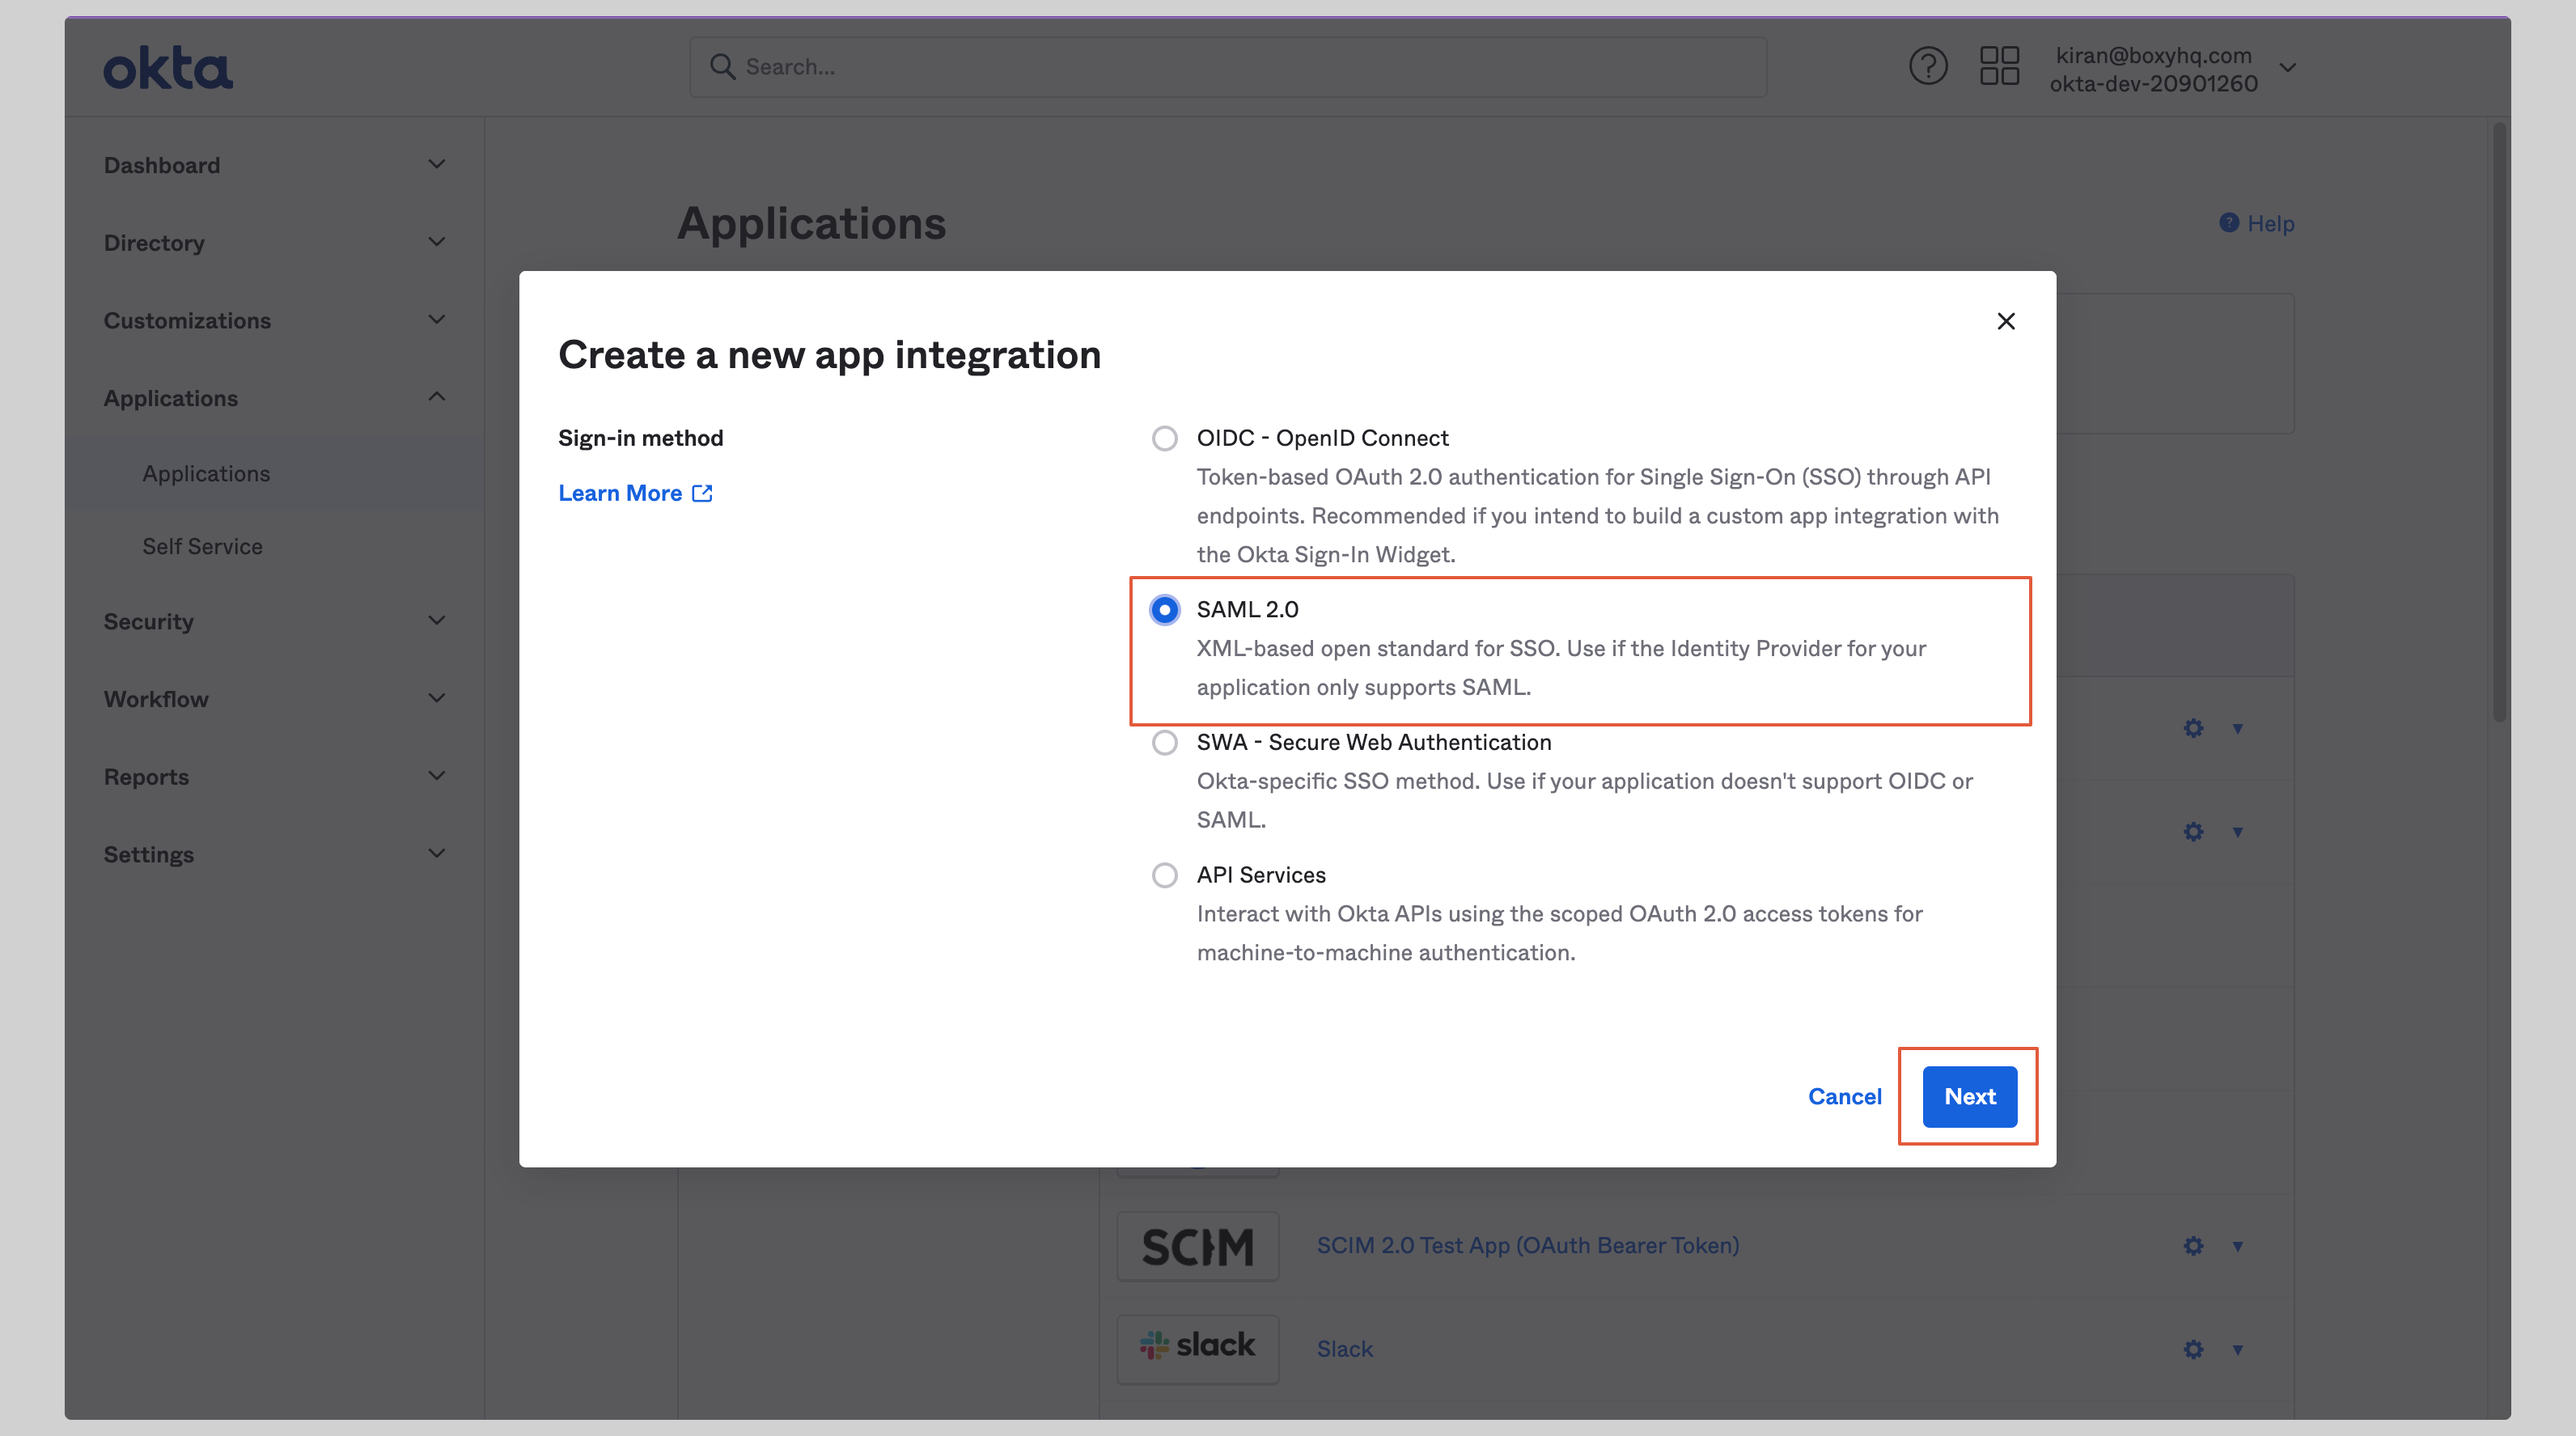
- Select SAML 2.0 and click Next
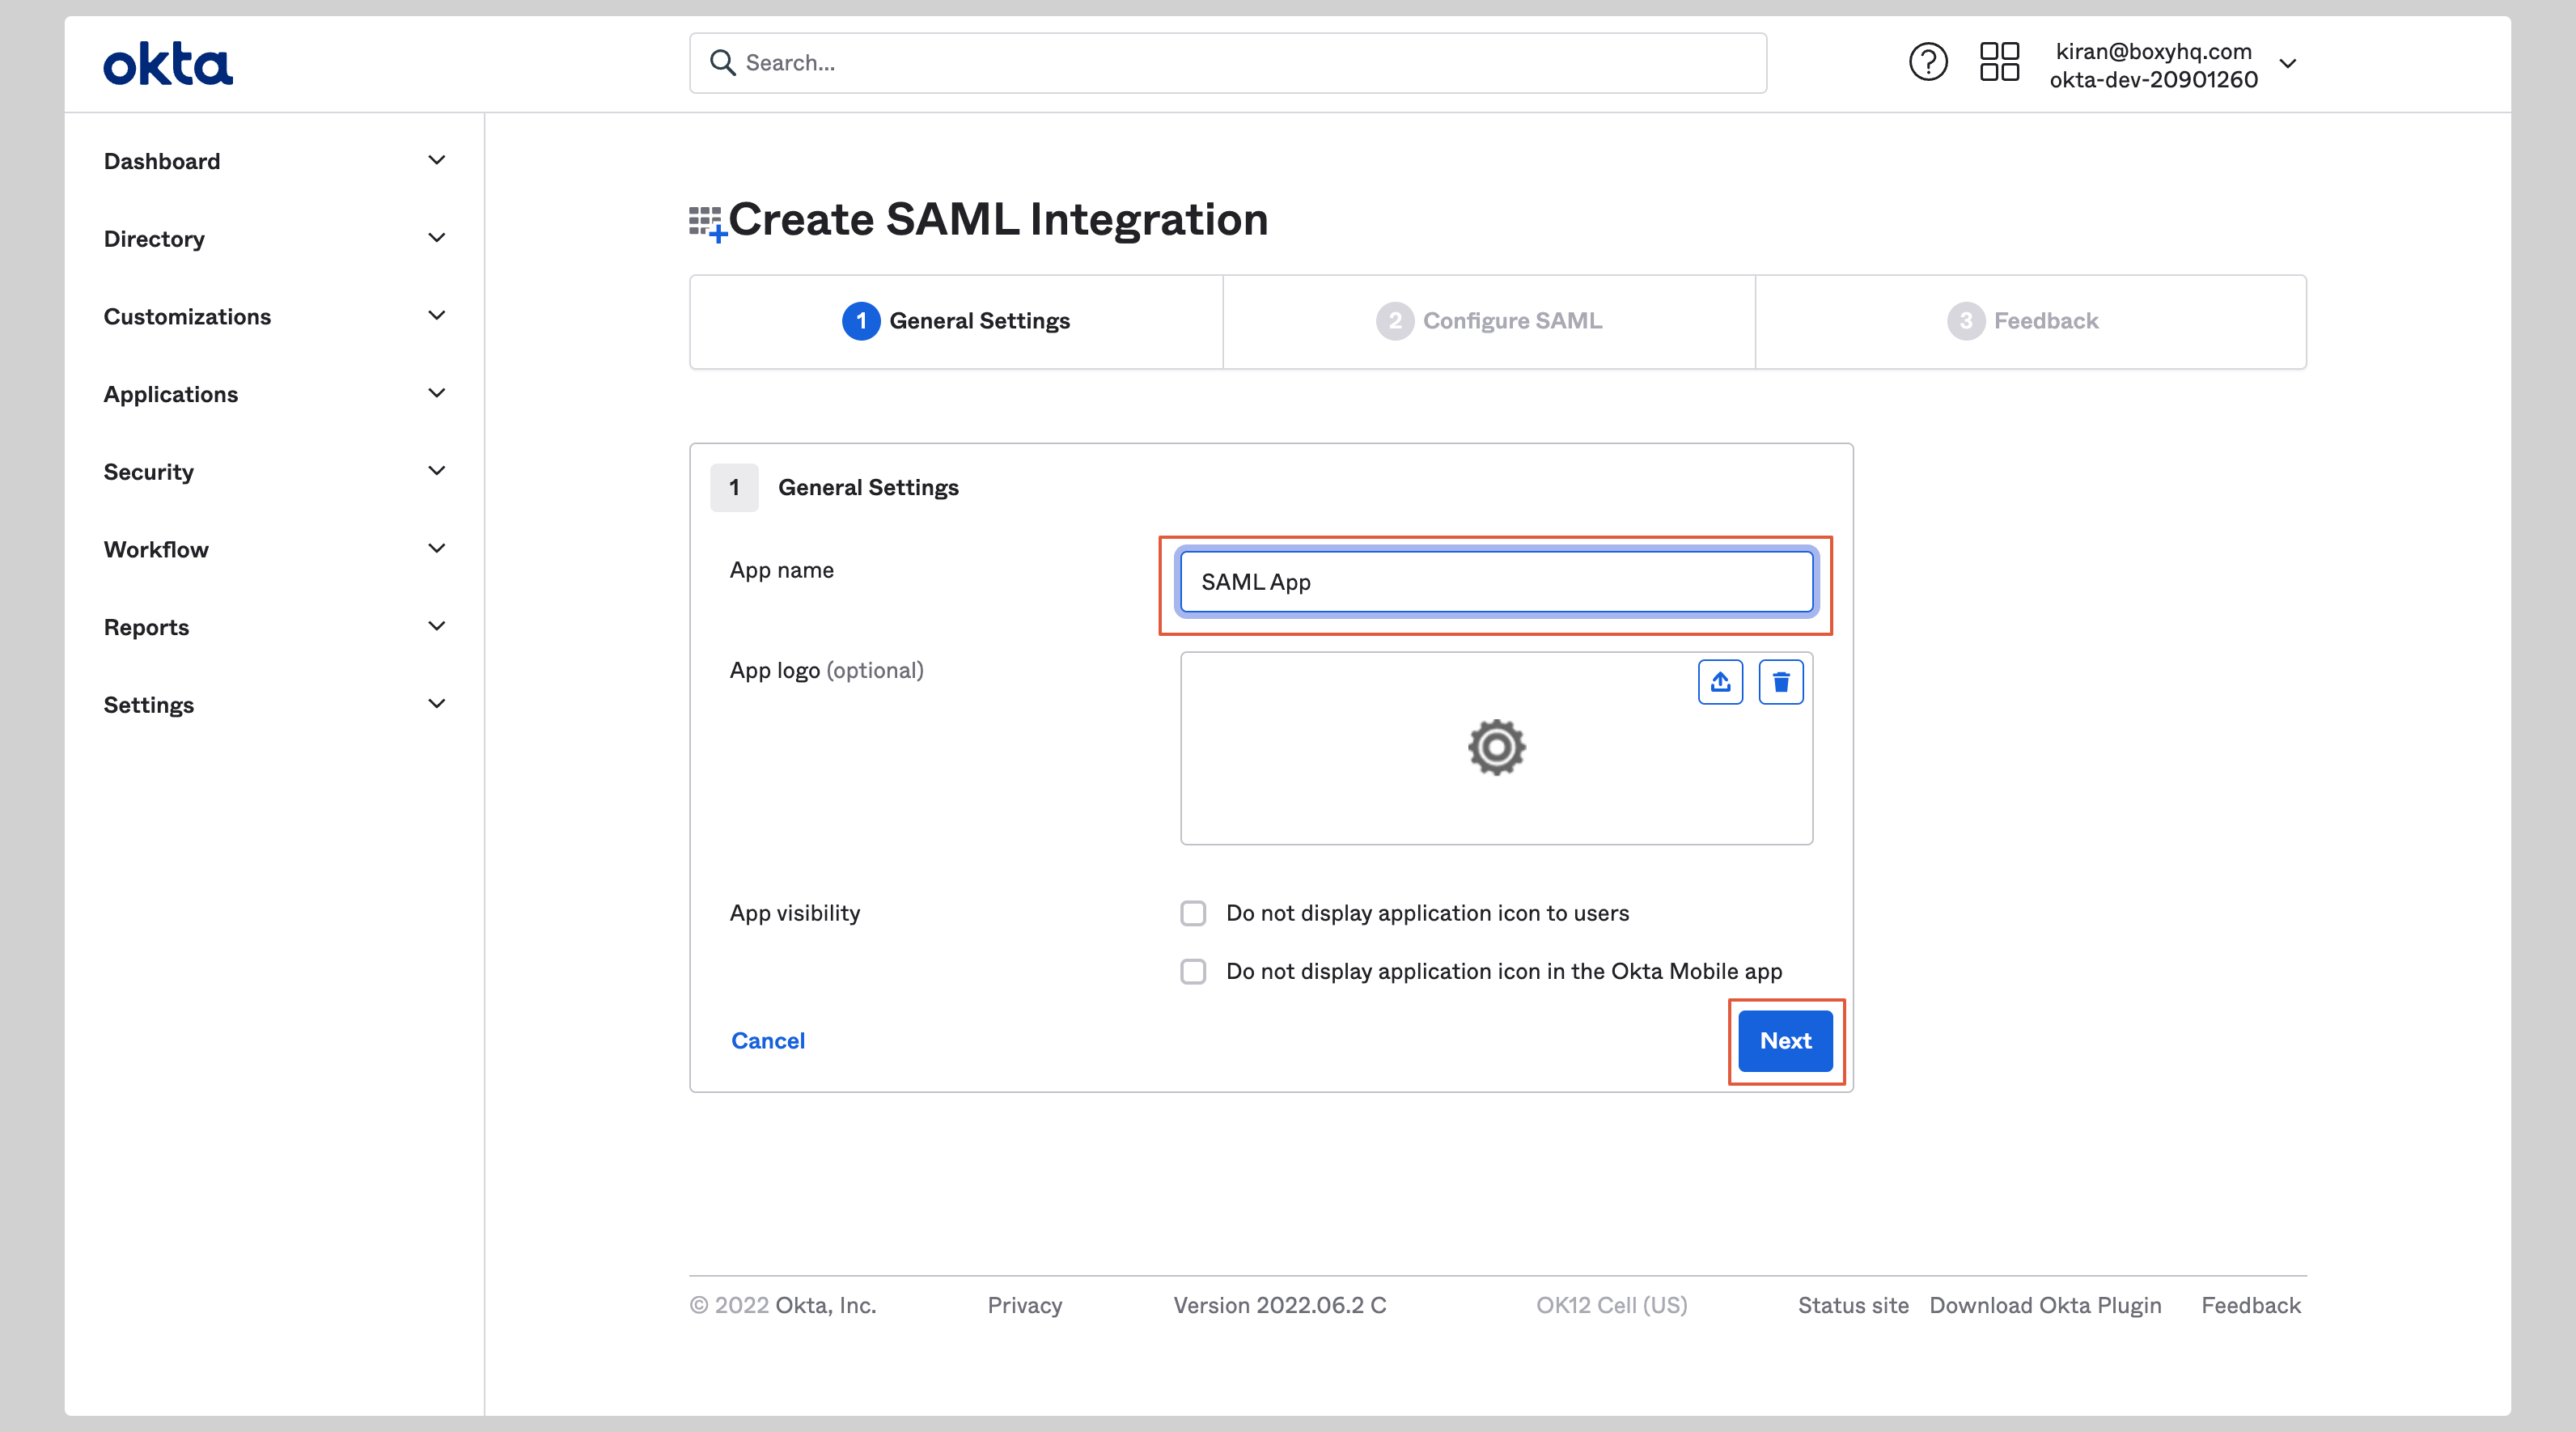
- Enter an app name ( Goodnotes SAML) and click Next
B. Configure SAML settings
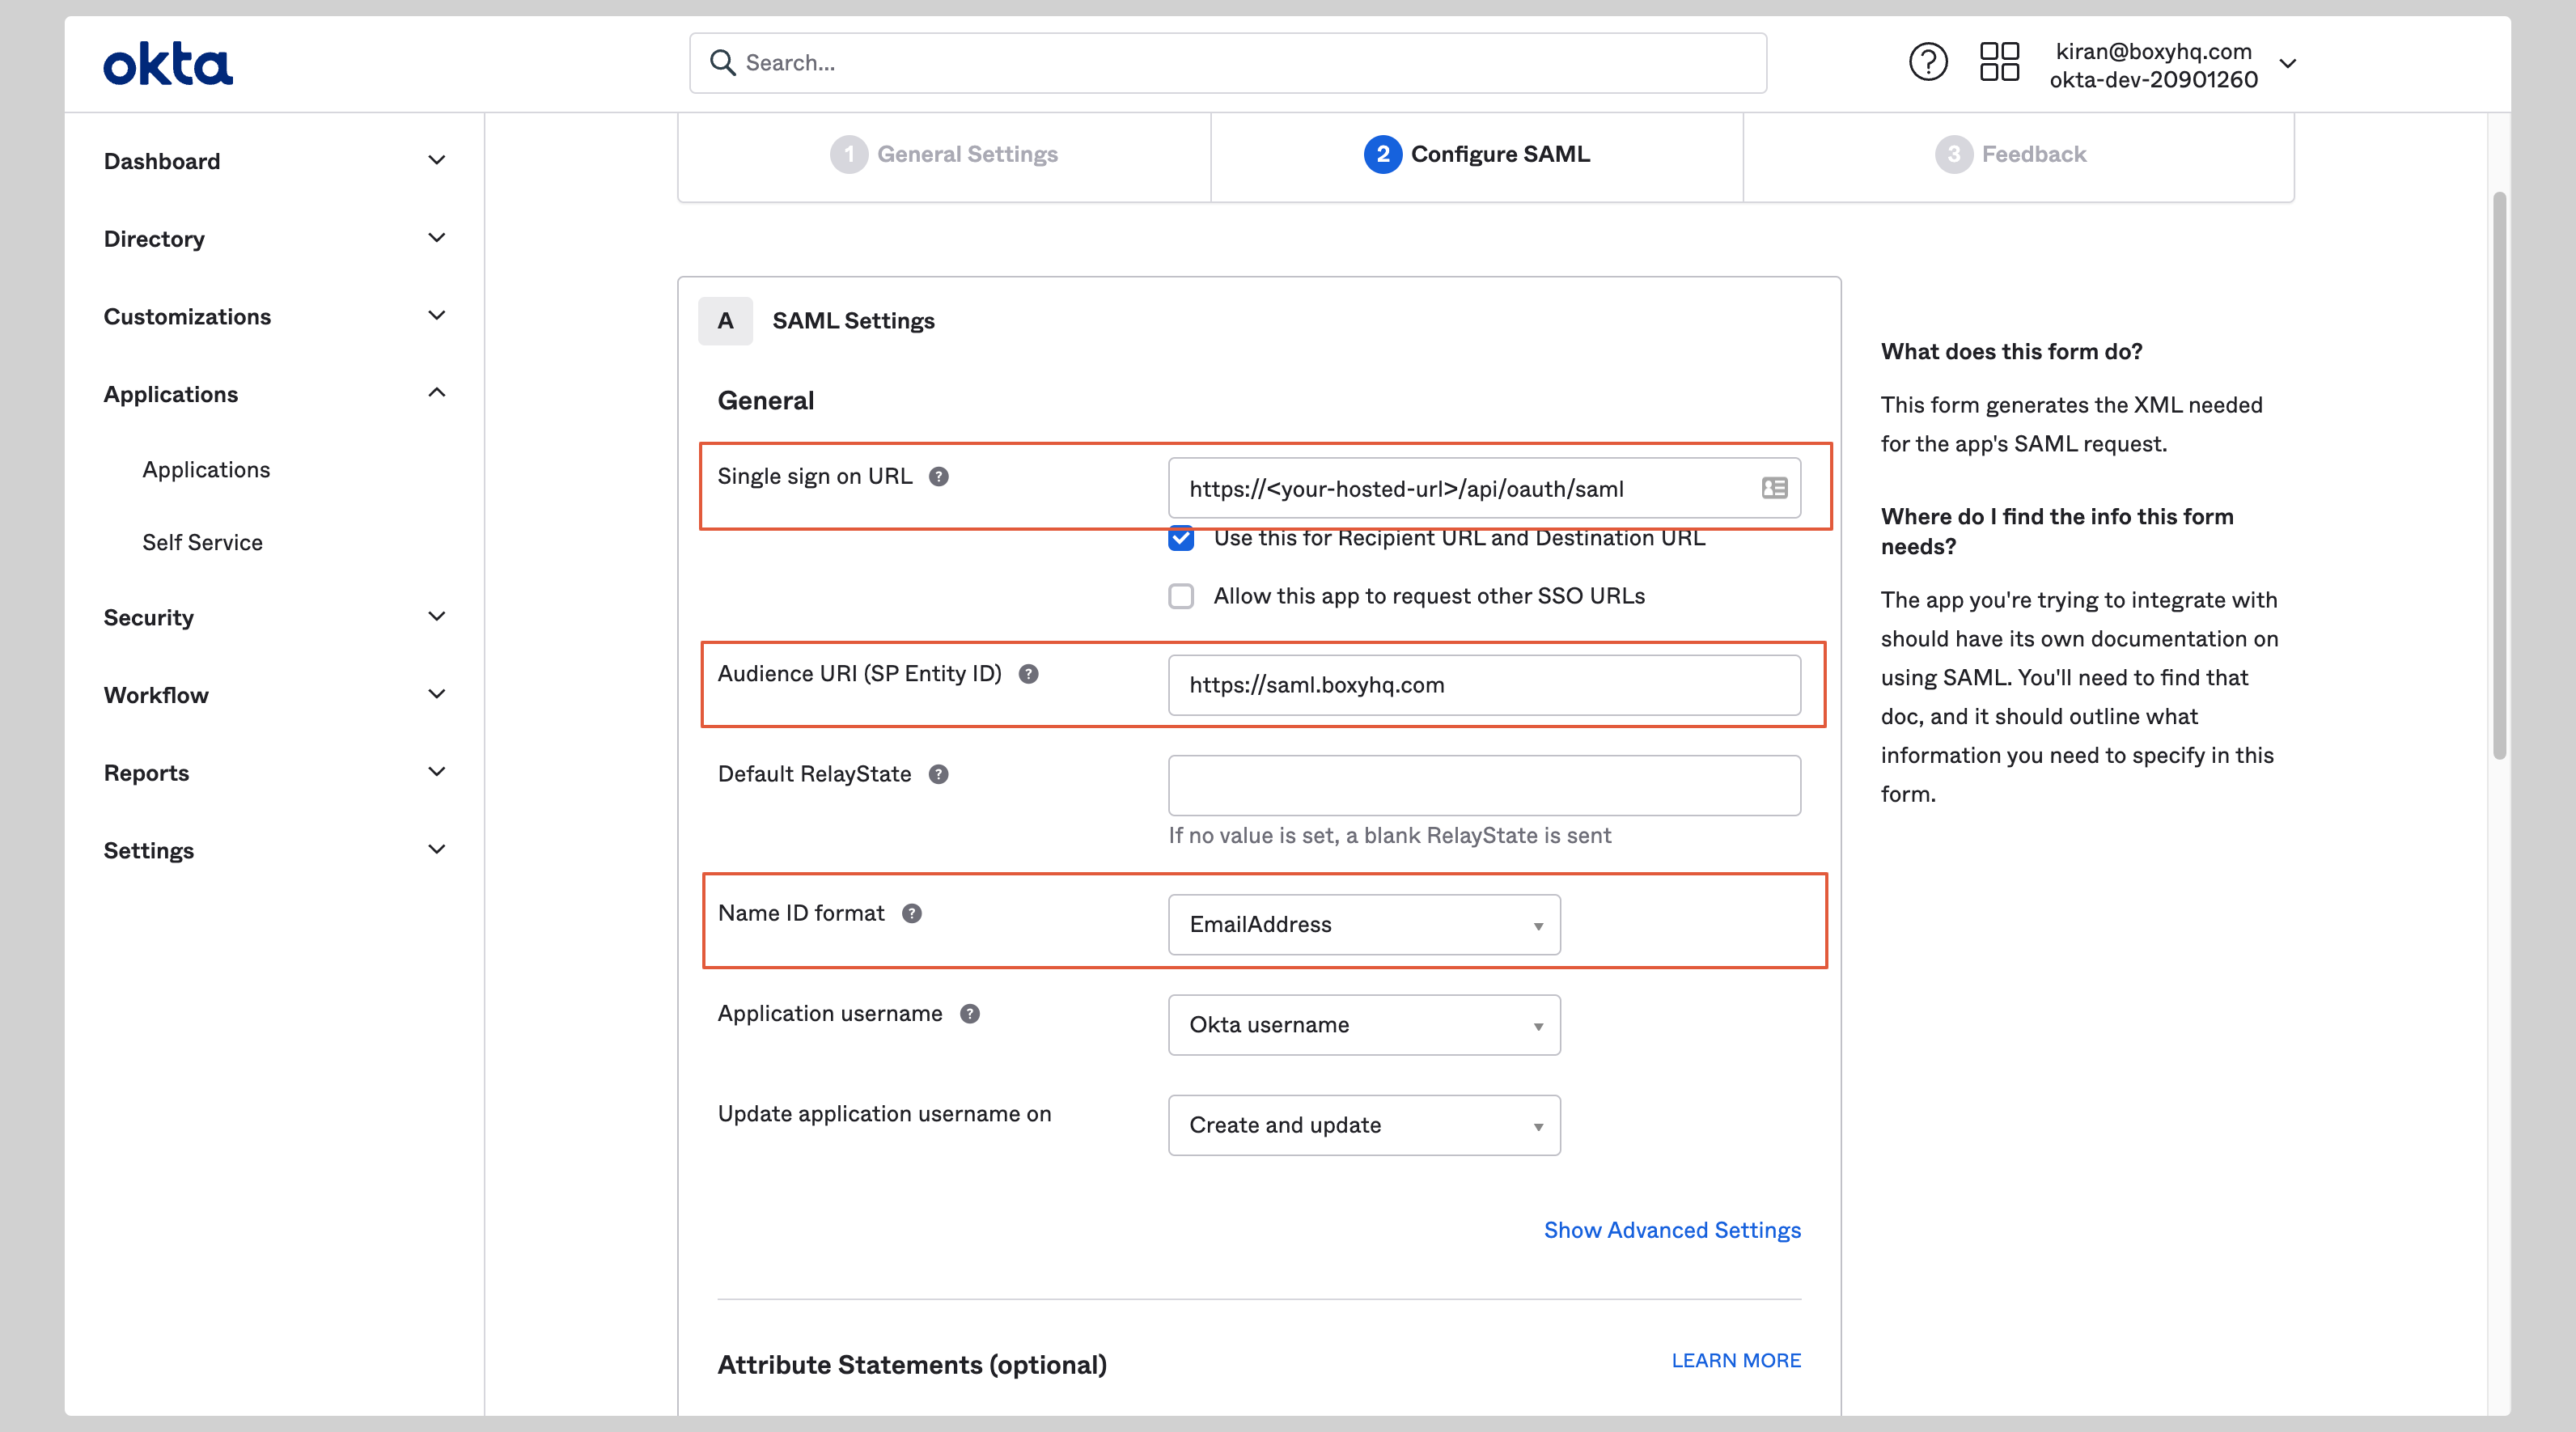
Under SAML Settings, enter the following:
- Single sign on URL:
https://saml-auth.goodnotes.com/api/oauth/saml - Audience URI (SP Entity ID):
https://saml.boxyhq.com - Name ID format:
EmailAddress
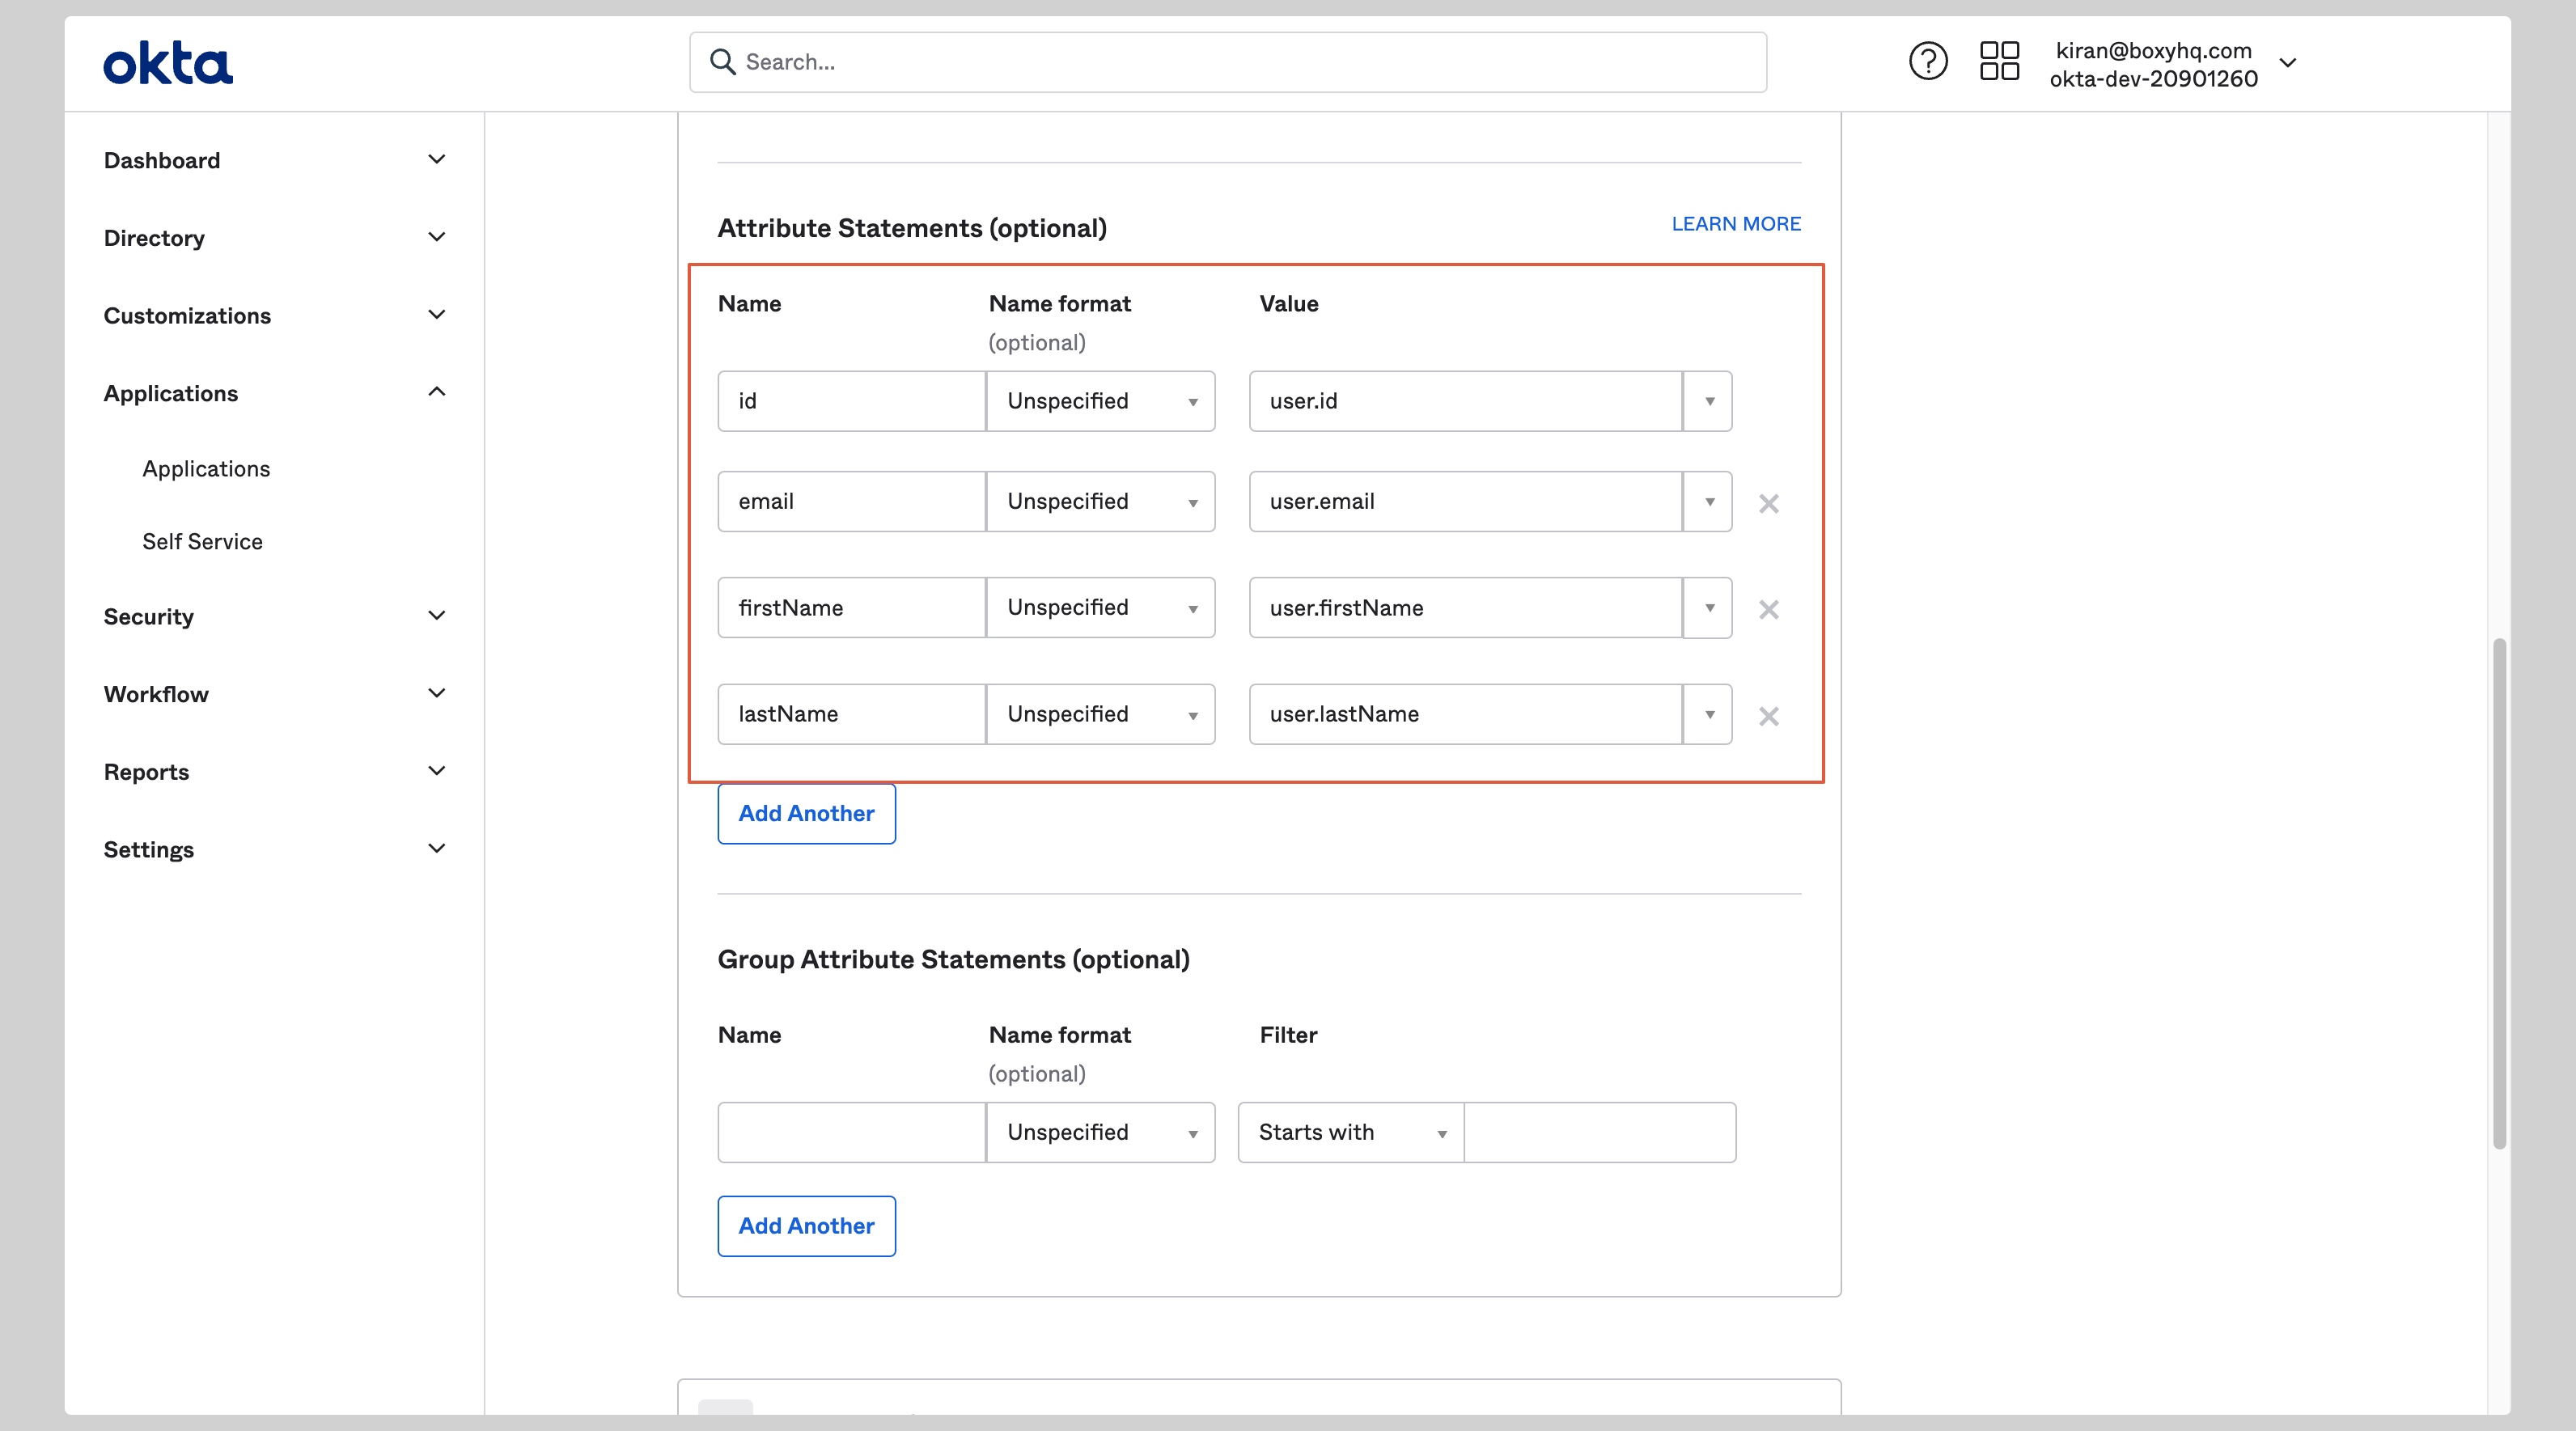
C. Configure attribute mapping
Under Attribute Statements, add the following:
| Name | Value |
|---|---|
| id | user.id |
| user.email | |
| firstName | user.firstName |
| lastName | user.lastName |
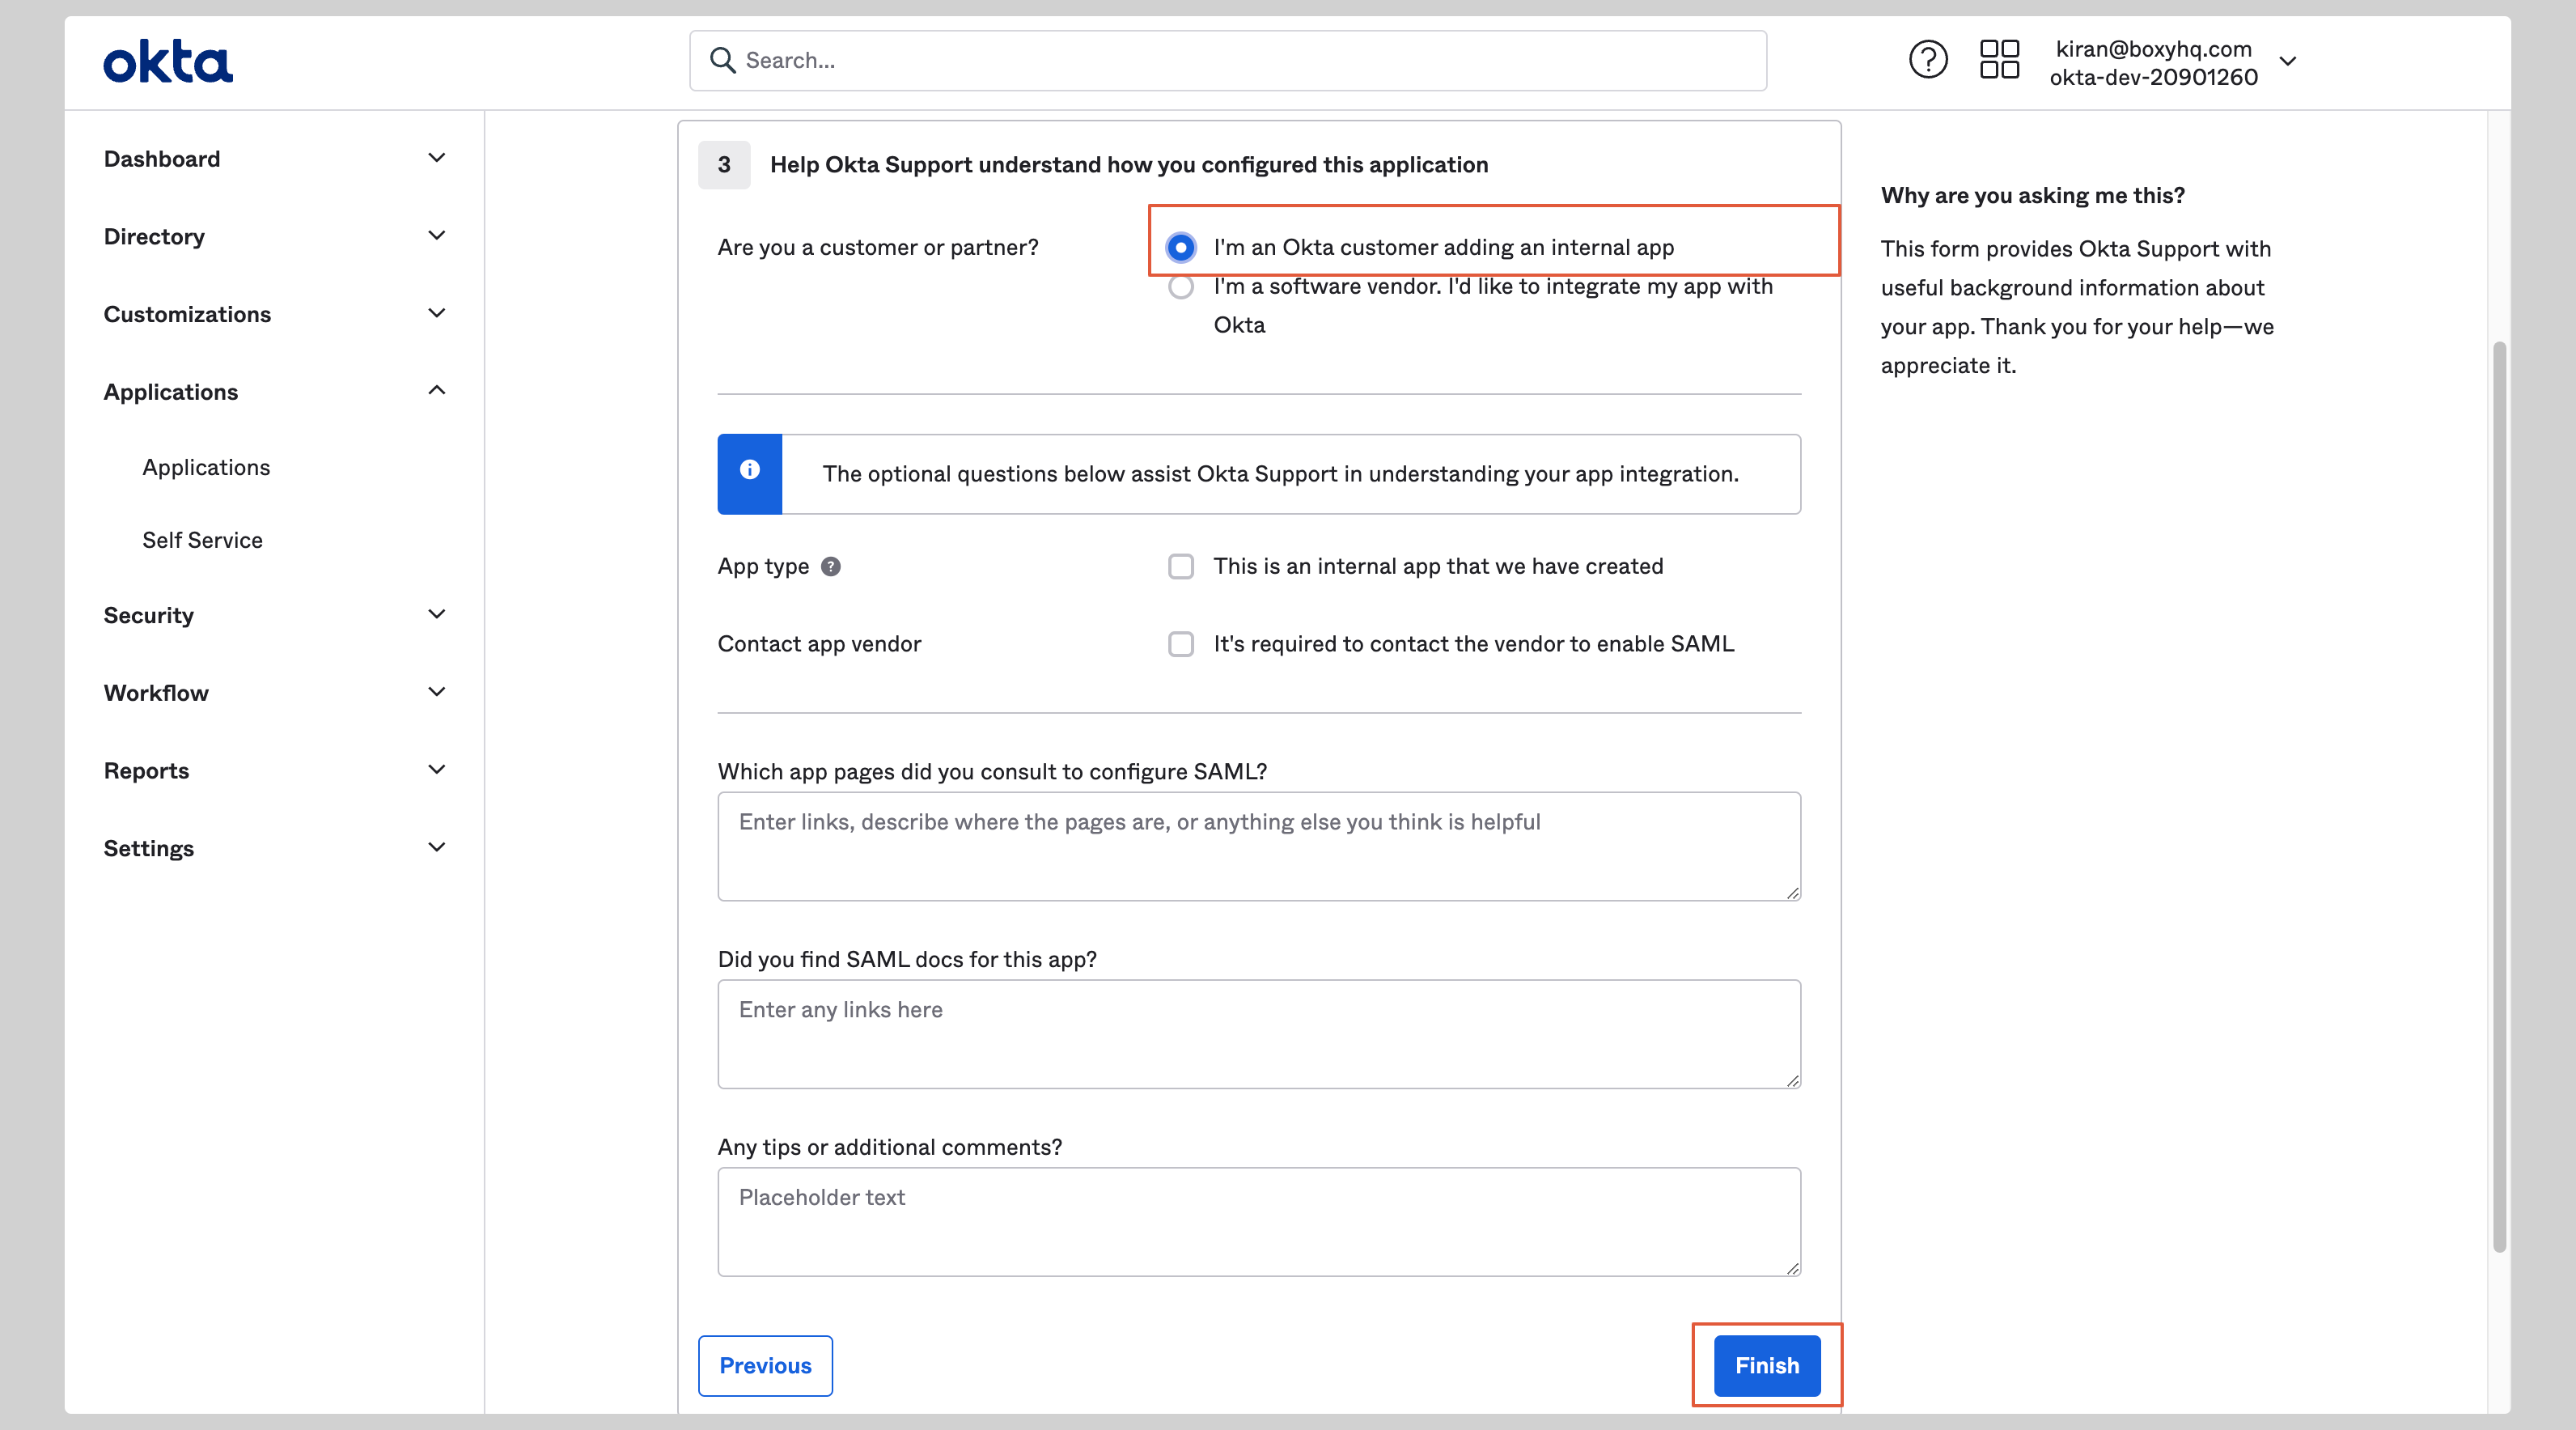
D. Finish
Select I'm an Okta customer adding an internal app and click Finish.
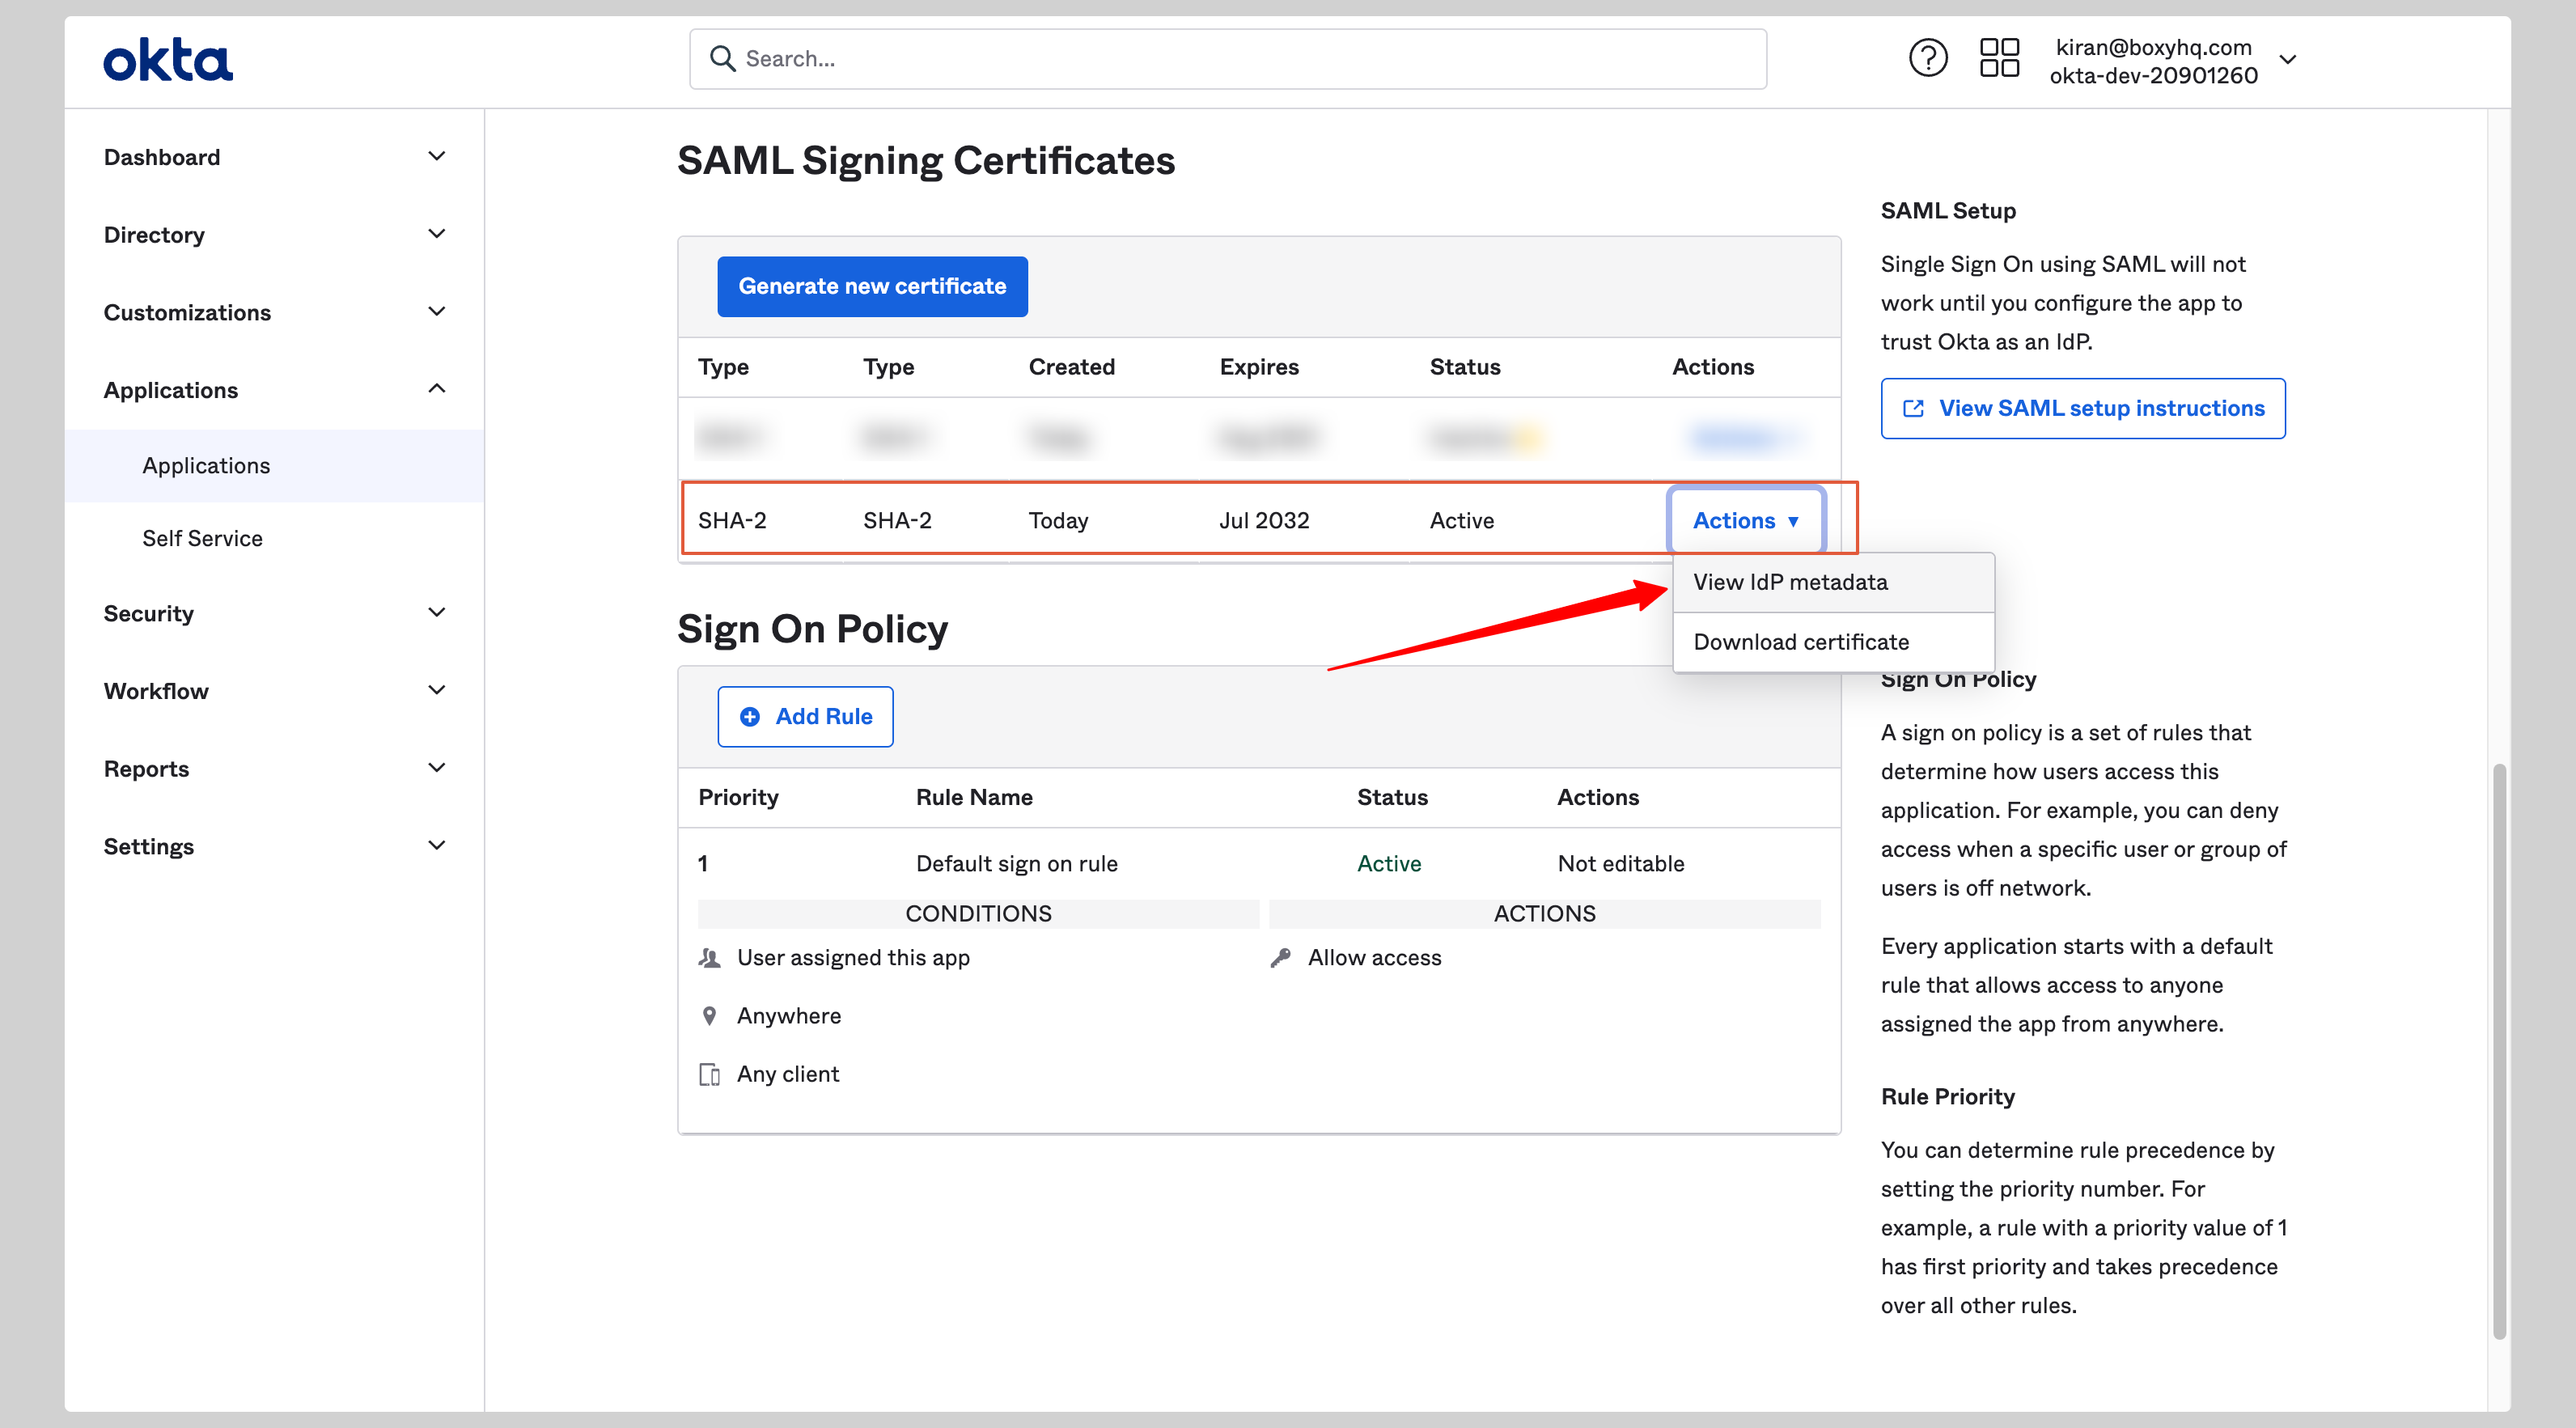
E. Get your metadata
- Go to the Sign On tab of your application
- Under SAML Signing Certificates, click Actions → View IdP metadata for the active certificate
- Copy the XML that opens in the new window
Step 3: Register Your IdP in Goodnotes
- Return to the Goodnotes Admin Console
- Select your verified domain
- Paste or upload the metadata XML
- Click Save Settings
Test Your Setup
- Open https://org-admin.goodnotes.com in your browser
- Click Sign in with SSO
- Enter your domain and sign in
⚠️ Important: Do not use the Okta app tile or dashboard to initiate sign-in, as this may cause errors. Always navigate directly to the URL in your browser. If you are currently signed in via OIDC (e.g. as an admin), see Changing your sign-in method from OIDC to SAML SSO.
Google Workspace
📚 For more detail, see the Google SAML documentation.
Required permission: Google Workspace Super Administrator
Step 2: Configure Google Workspace
A. Create the application
- Sign in to the Google Admin Console
- Go to Apps → Web and mobile apps
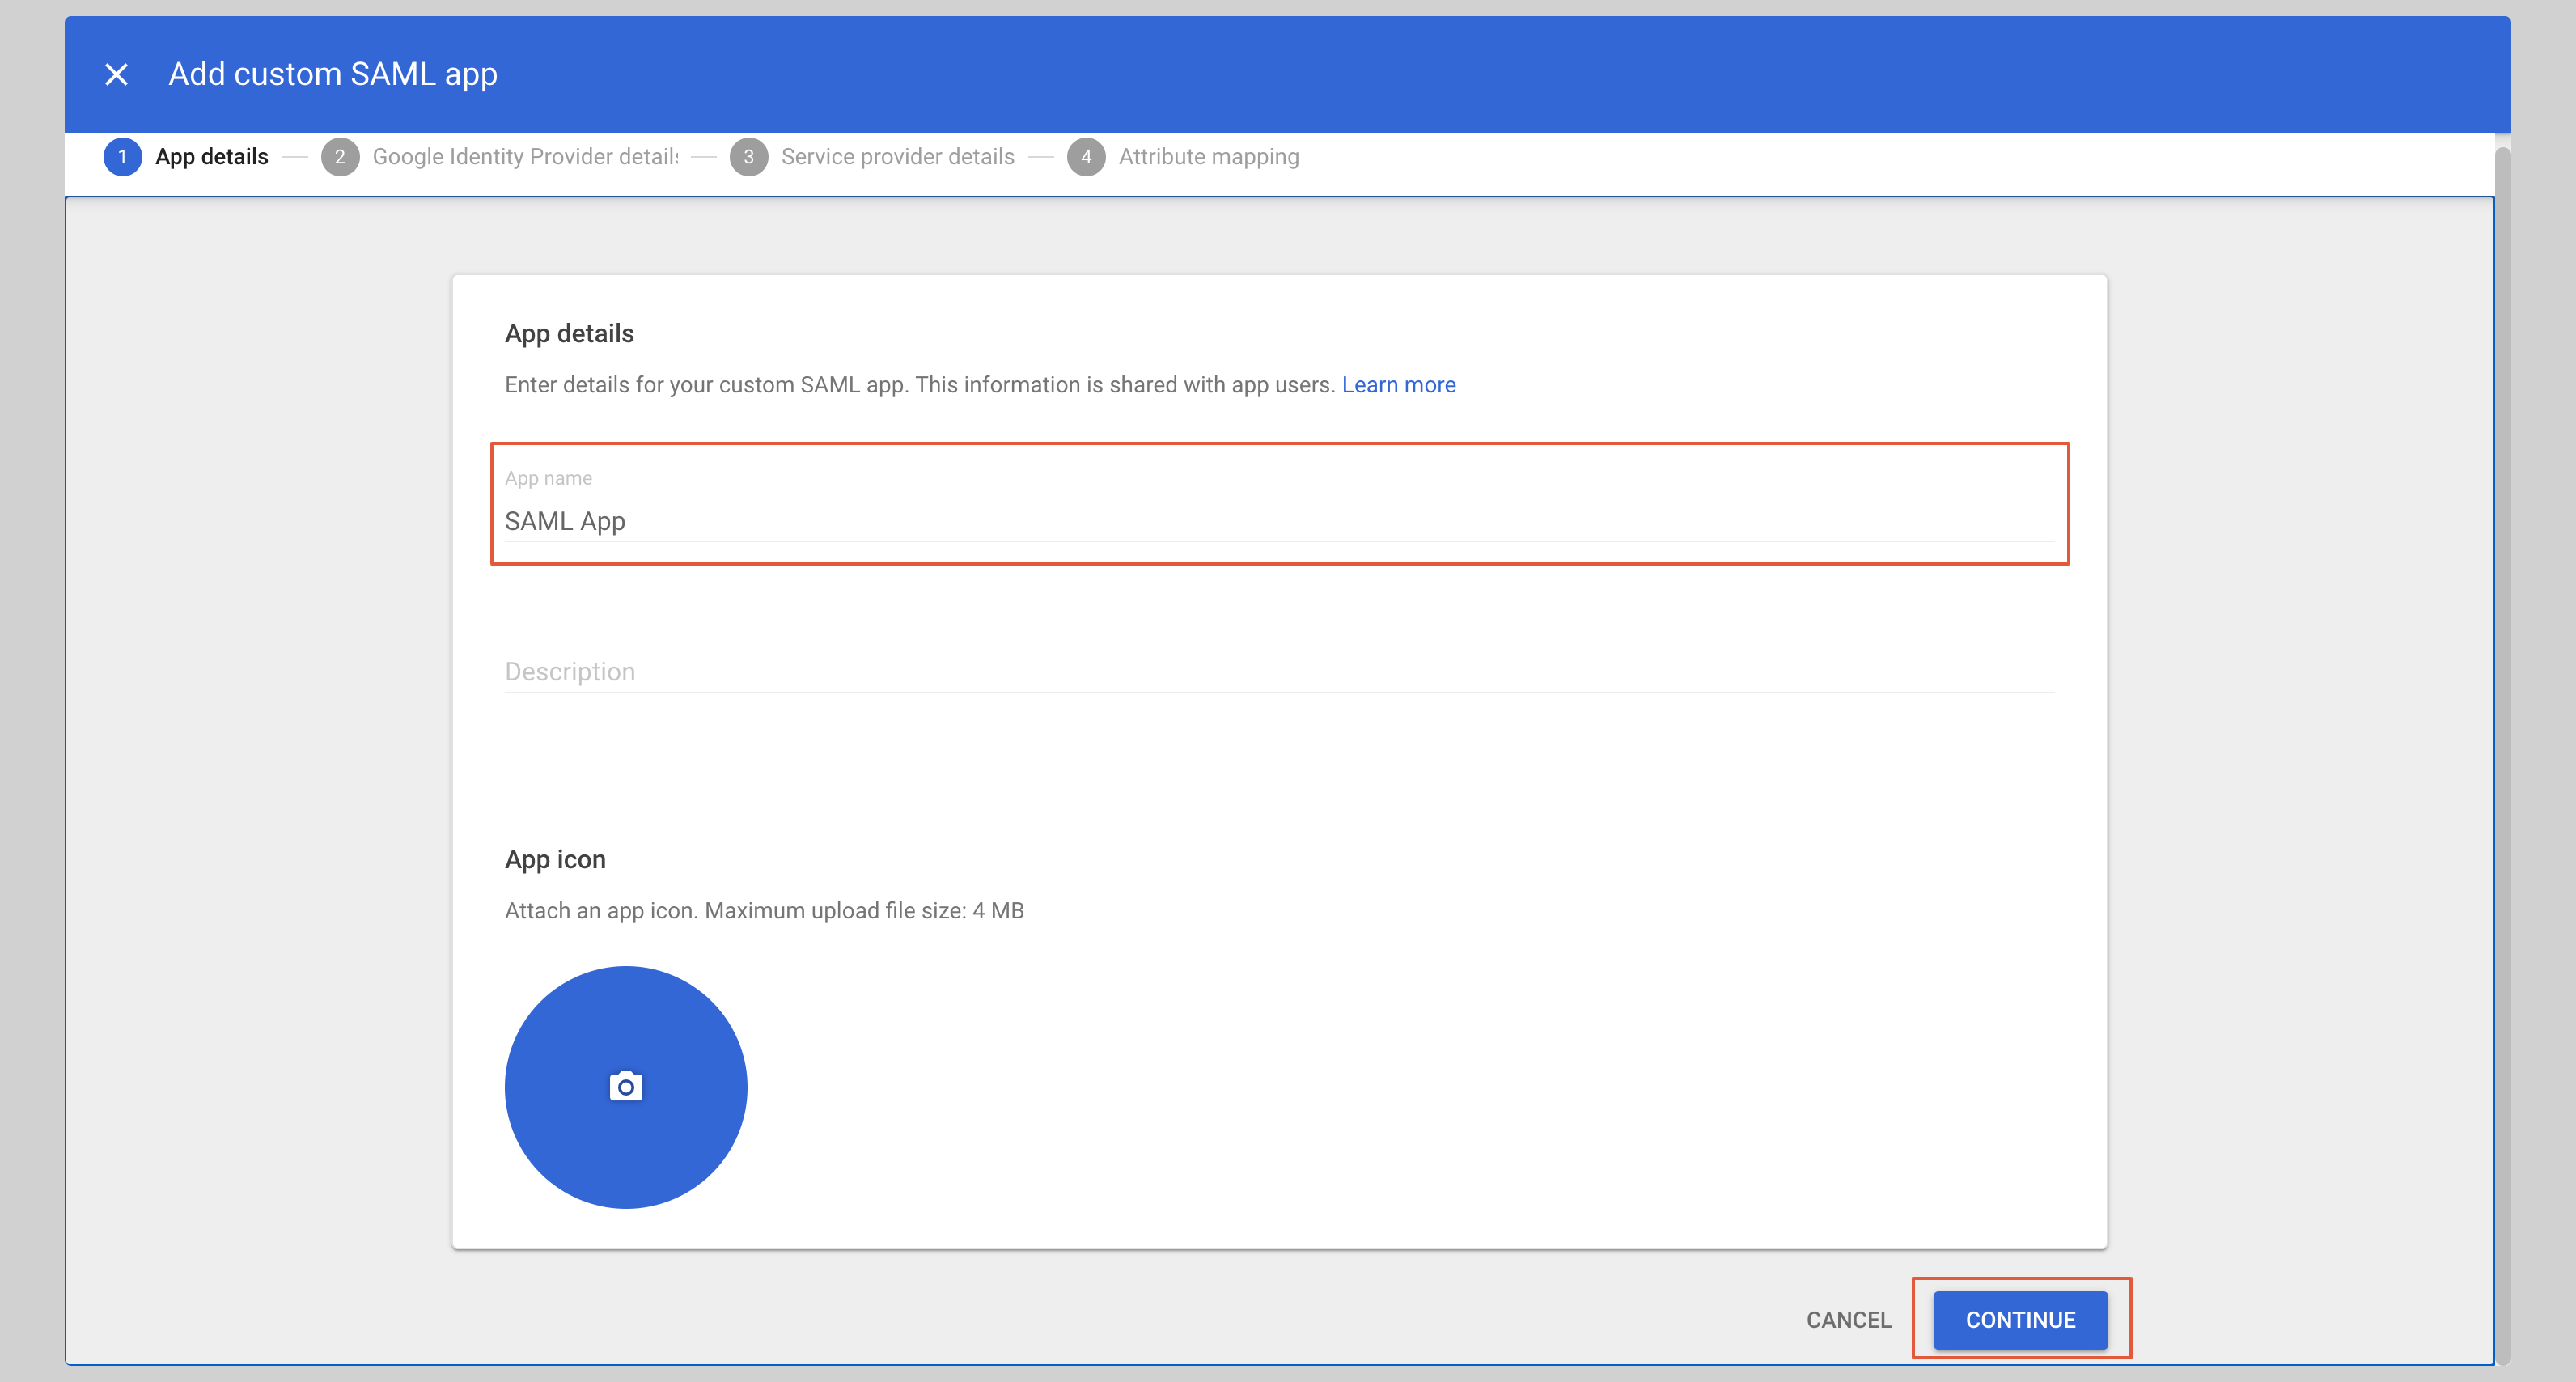
- Click Add App → Add custom SAML app
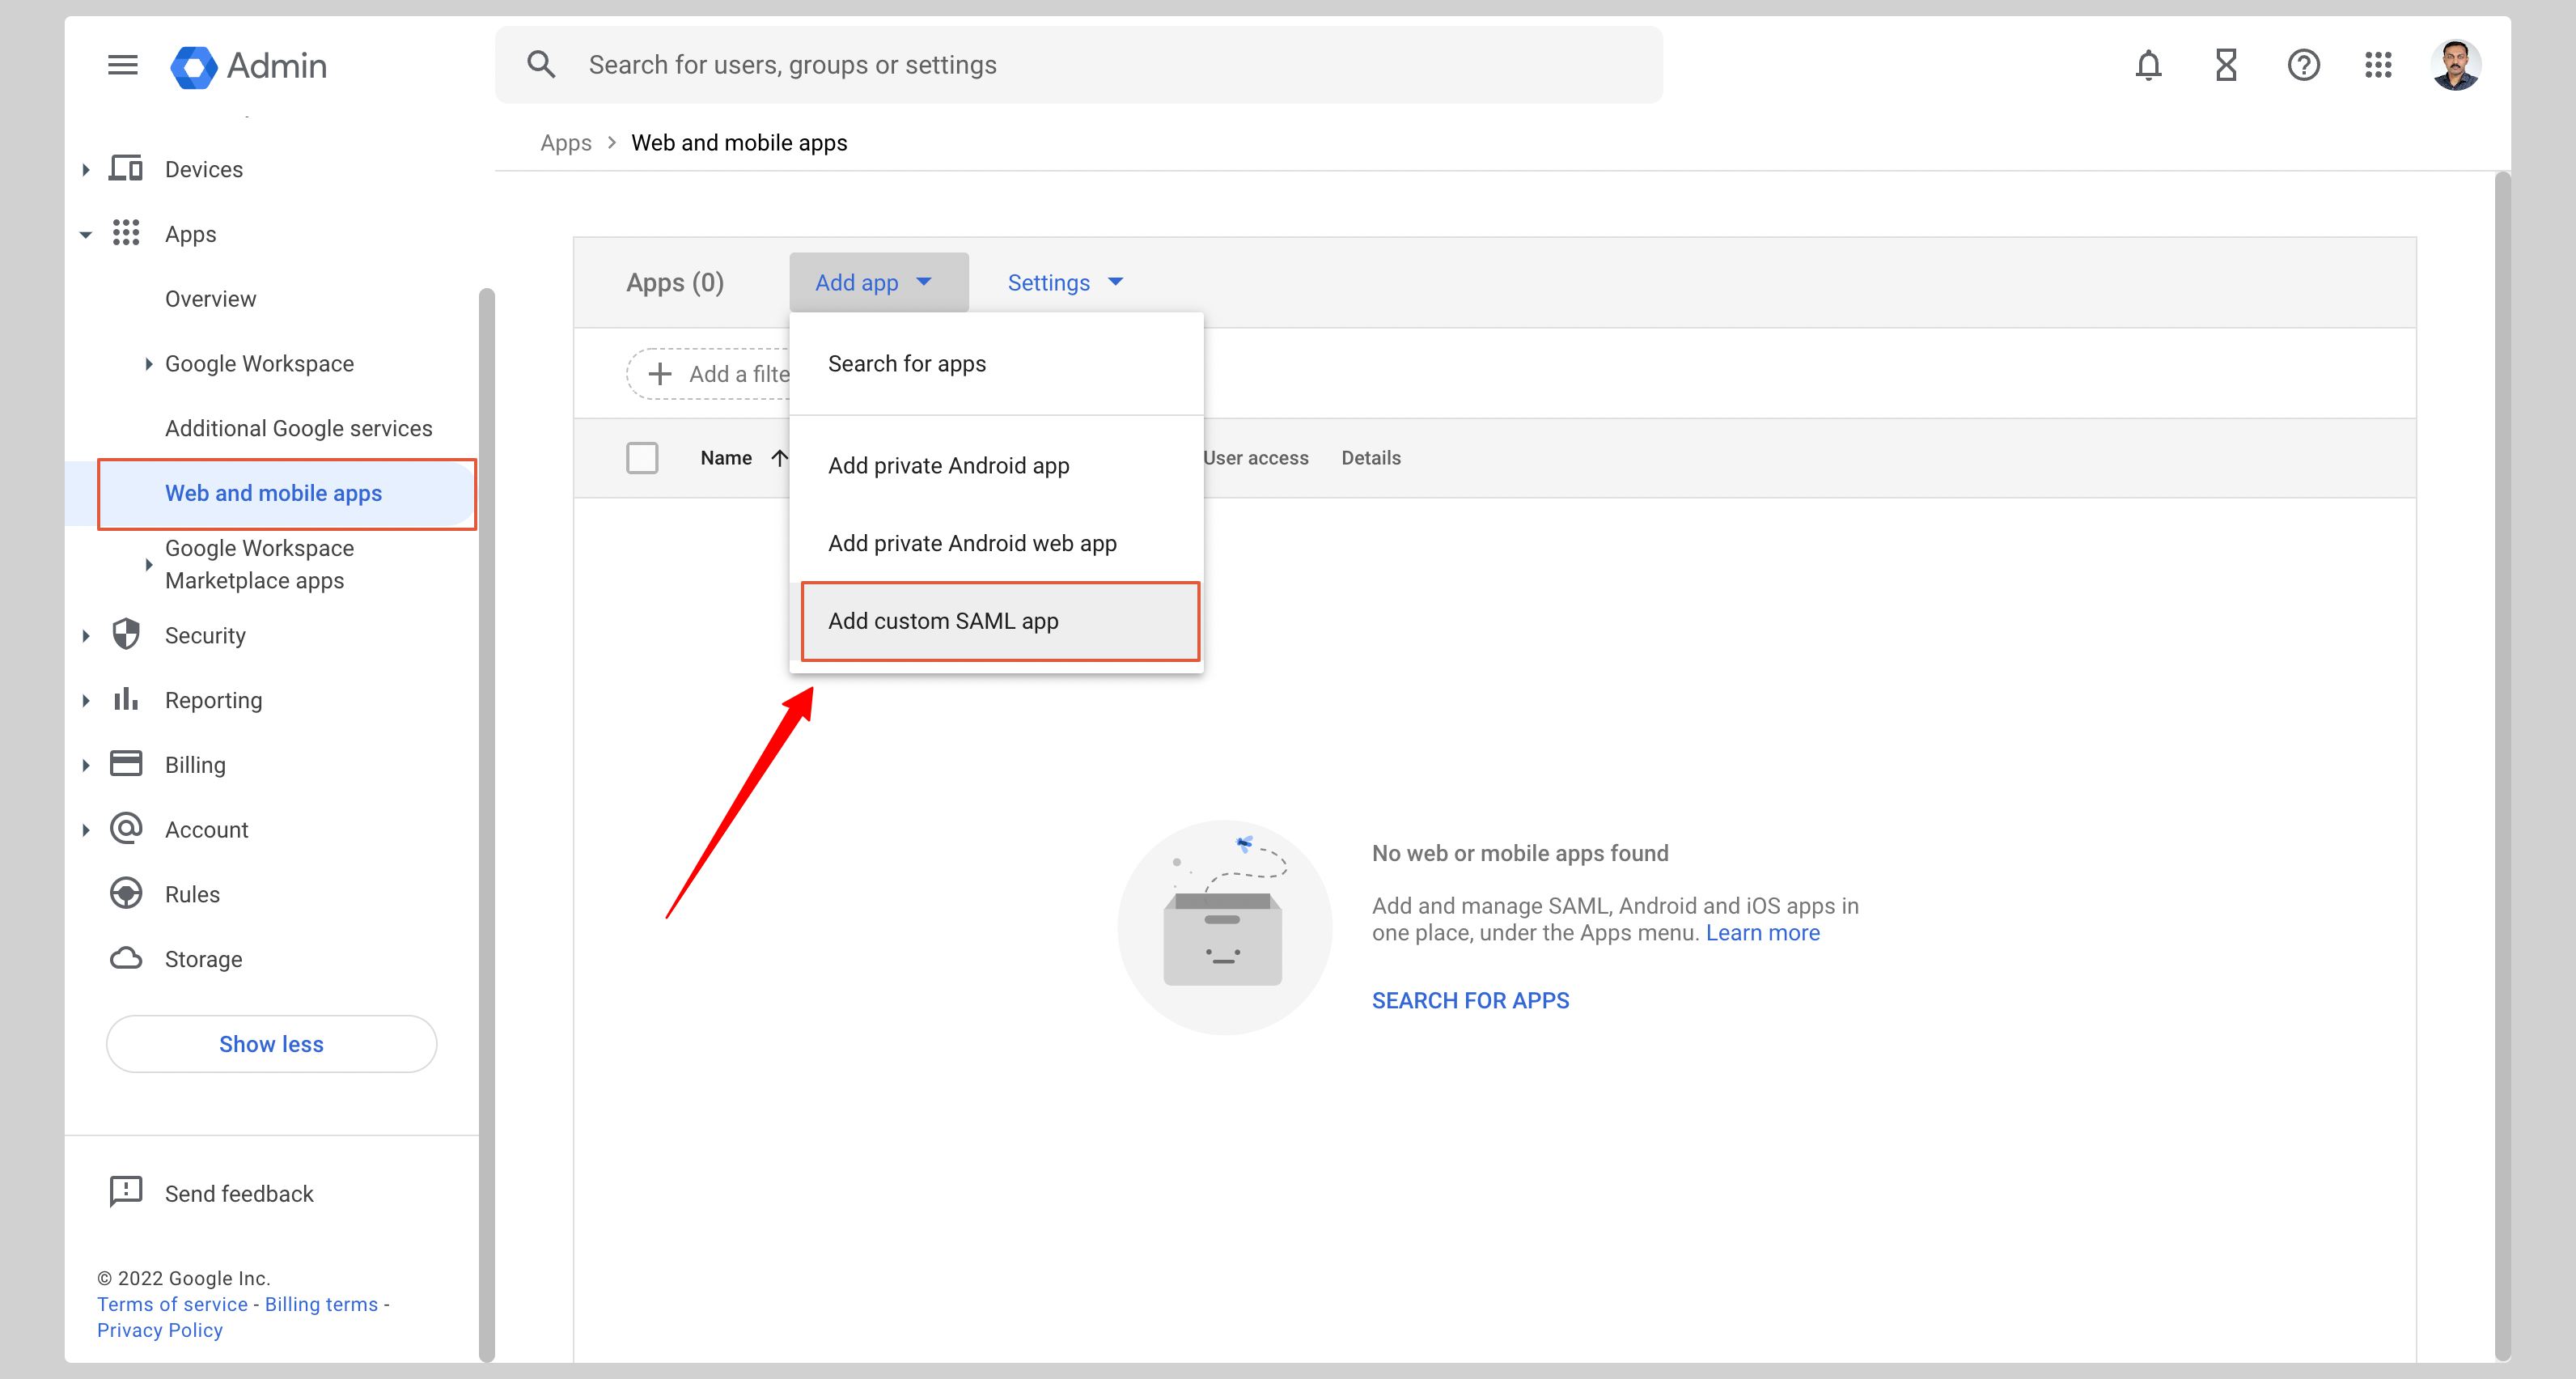
- Enter an app name (e.g. Goodnotes SAML) and click Continue
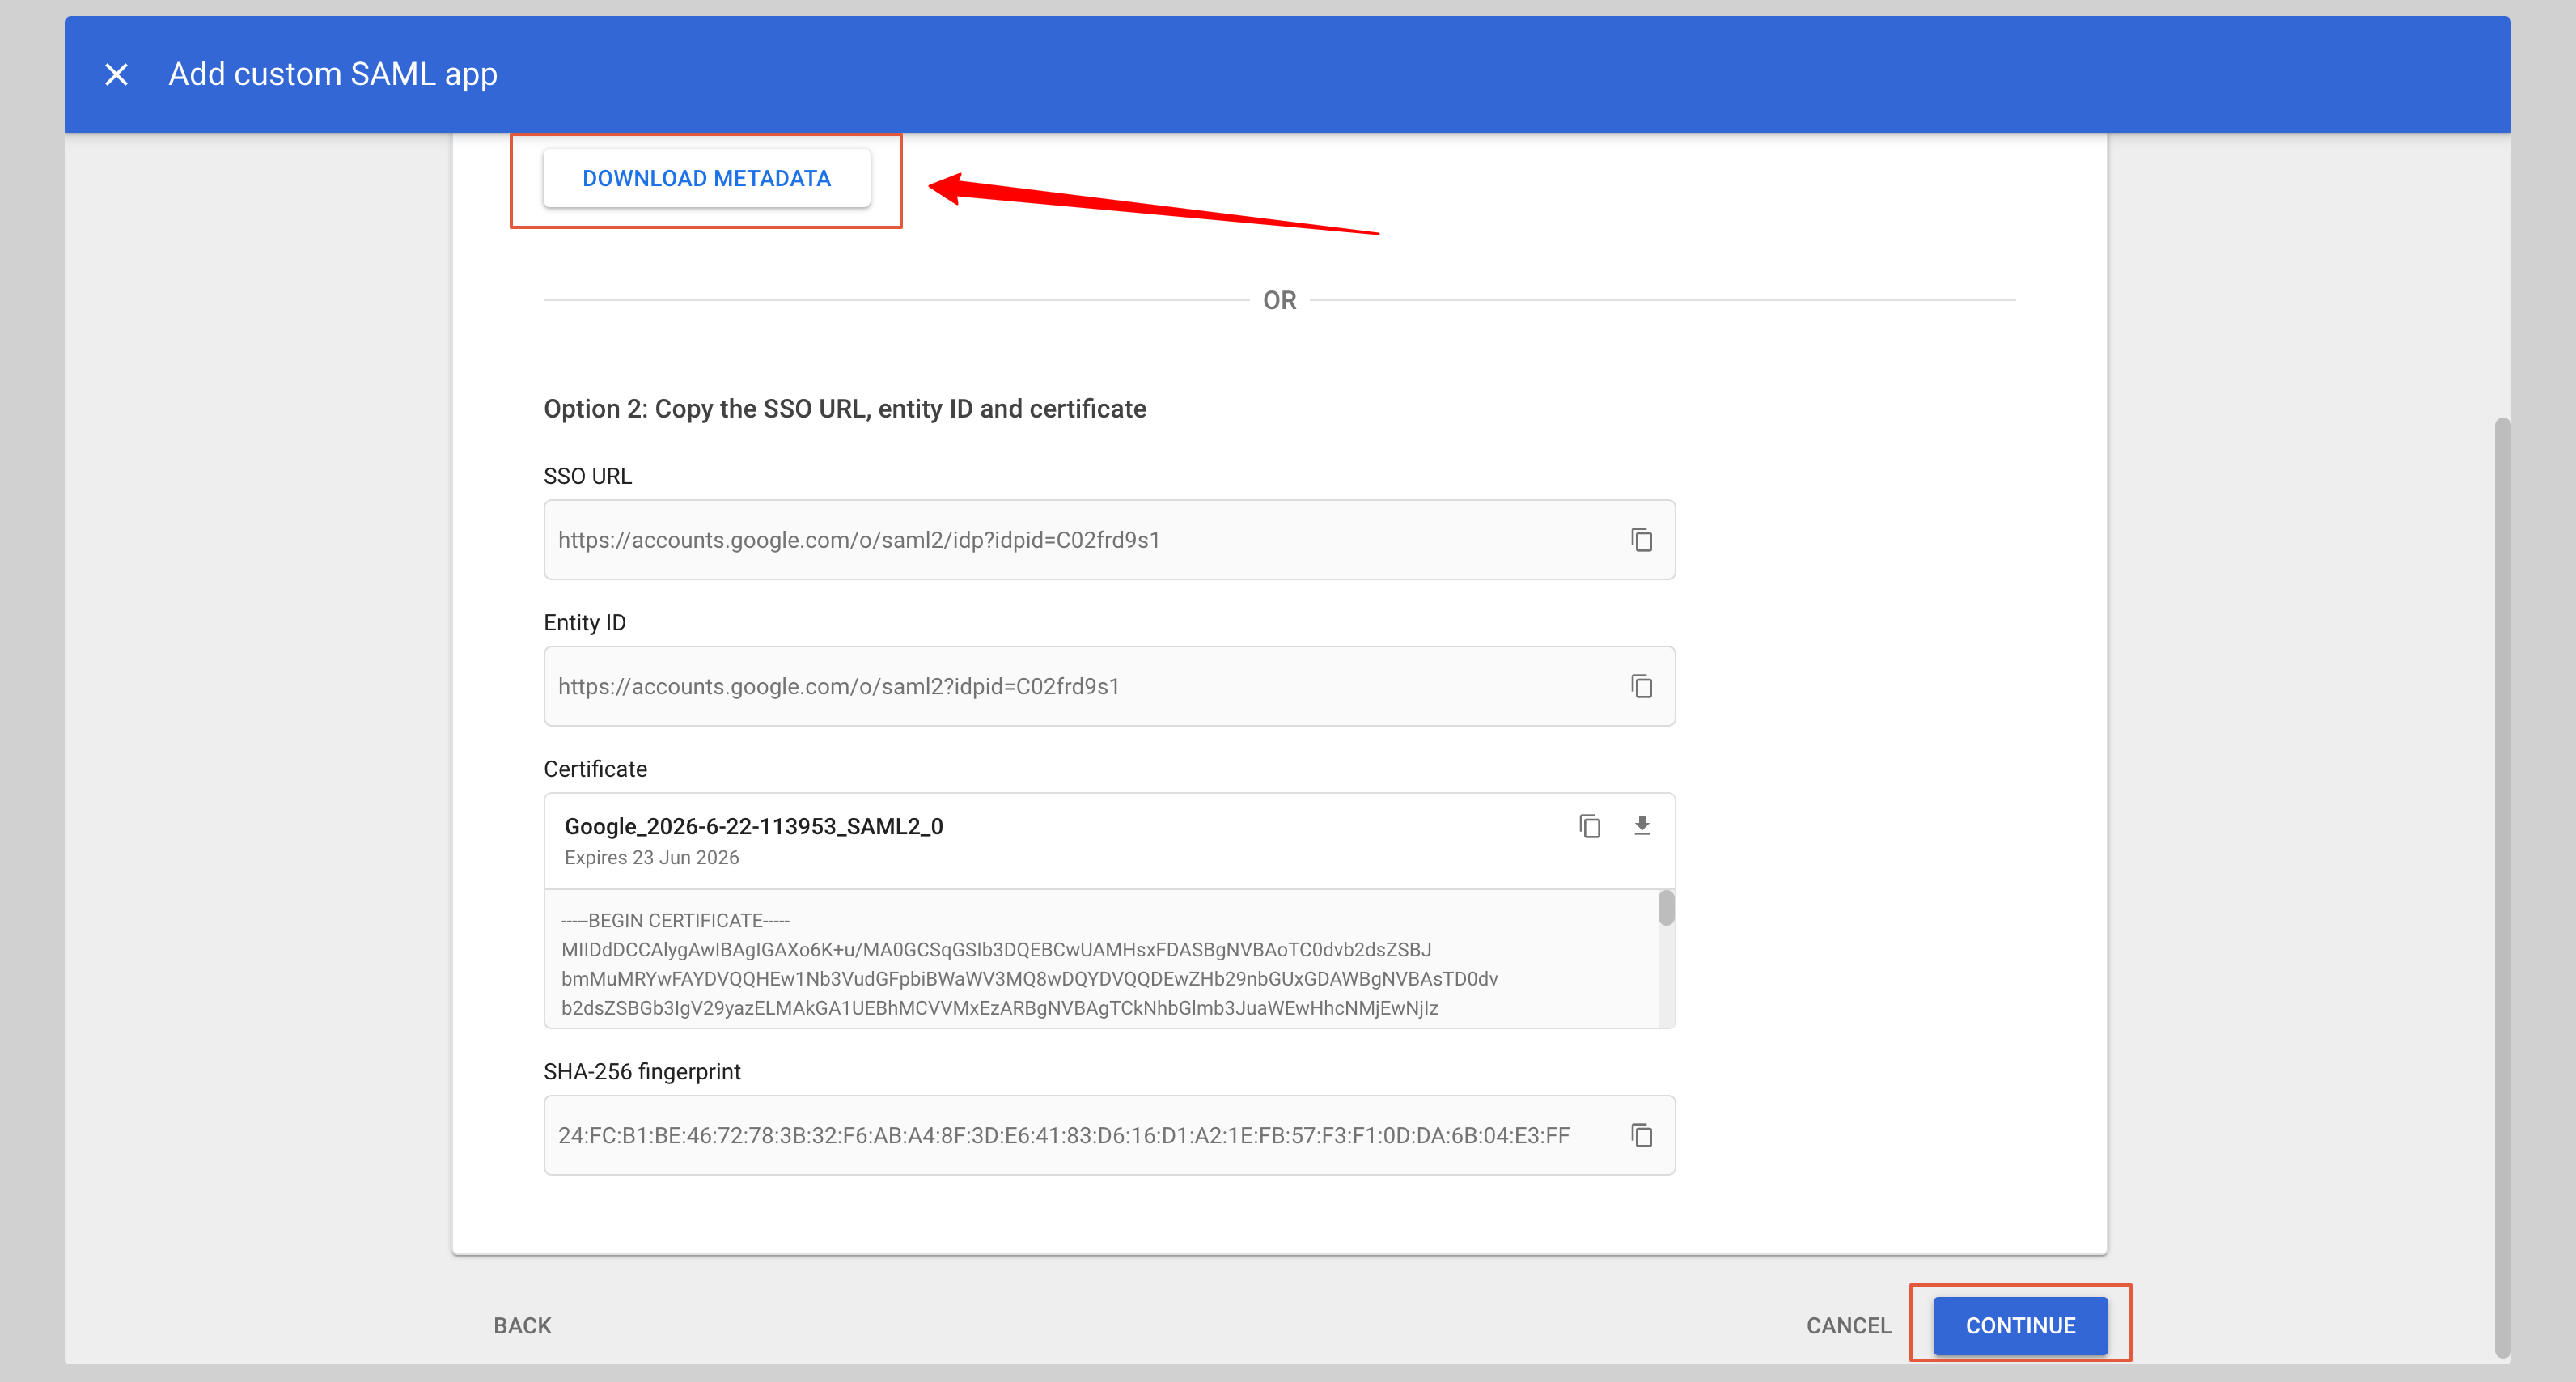
B. Download your metadata
On the next screen, click DOWNLOAD METADATA to save the XML file, then click Continue.
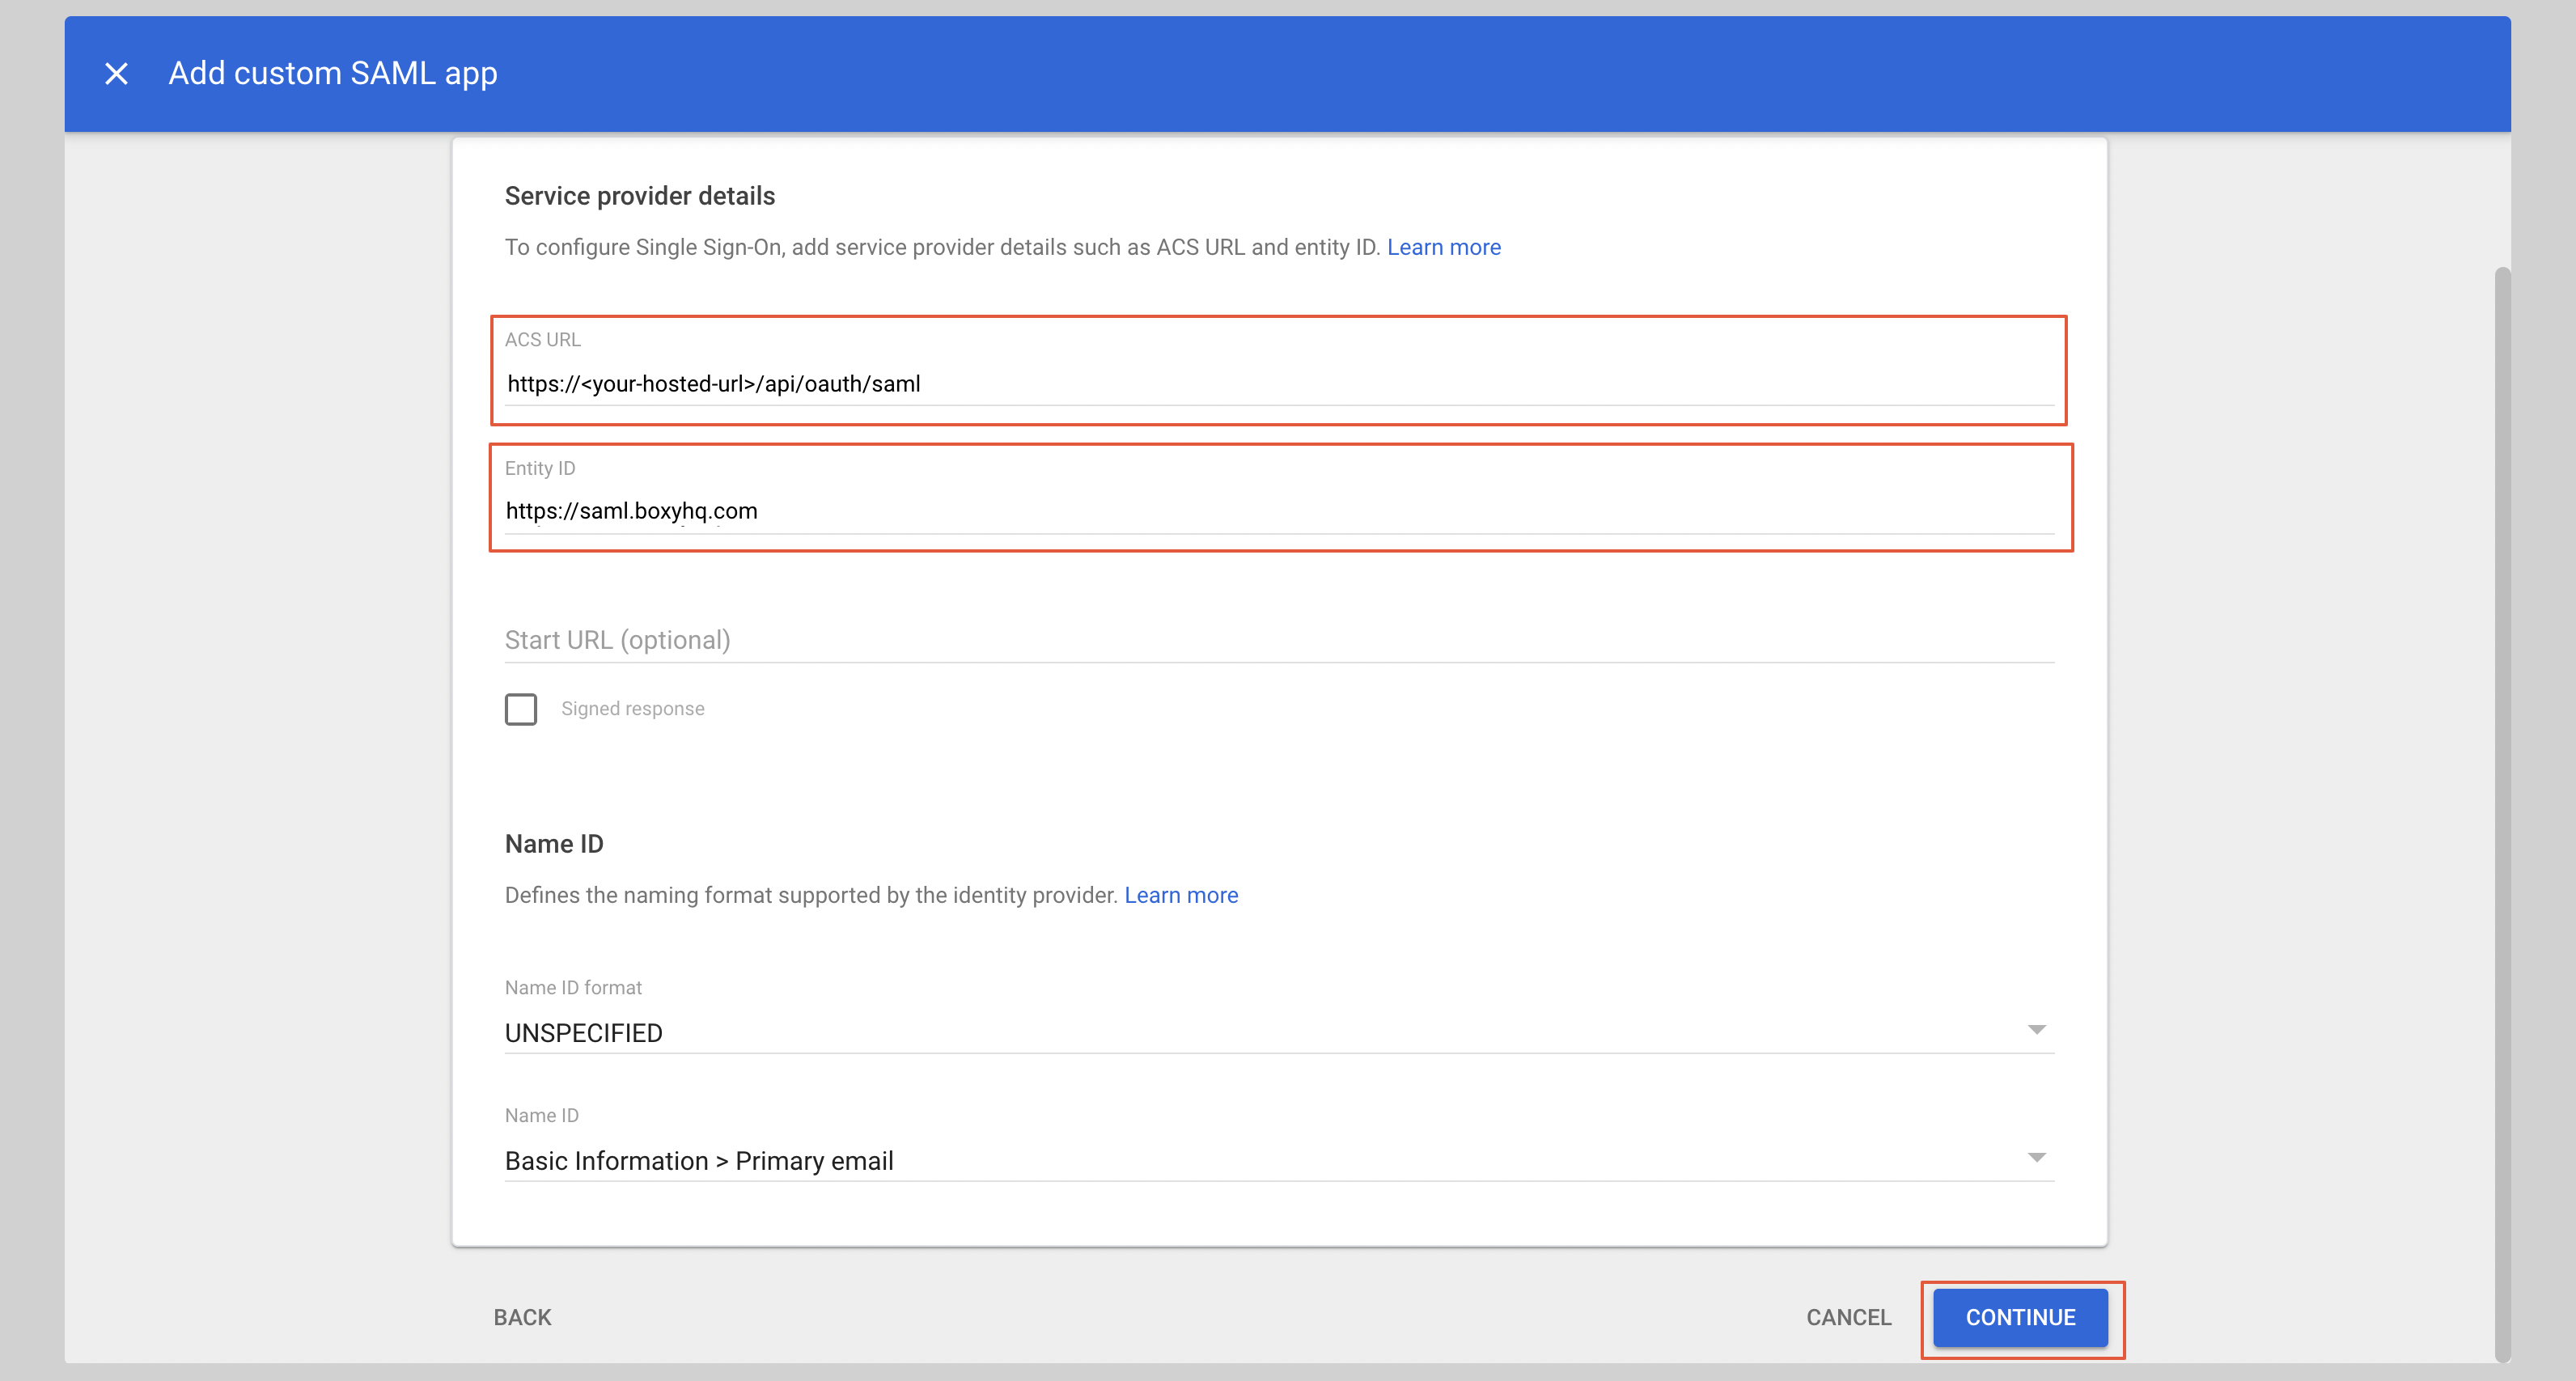
C. Enter Service Provider details
Under Service provider details, enter the following:
- ACS URL:
https://saml-auth.goodnotes.com/api/oauth/saml - Entity ID:
https://saml.boxyhq.com
Click Continue
 .
.
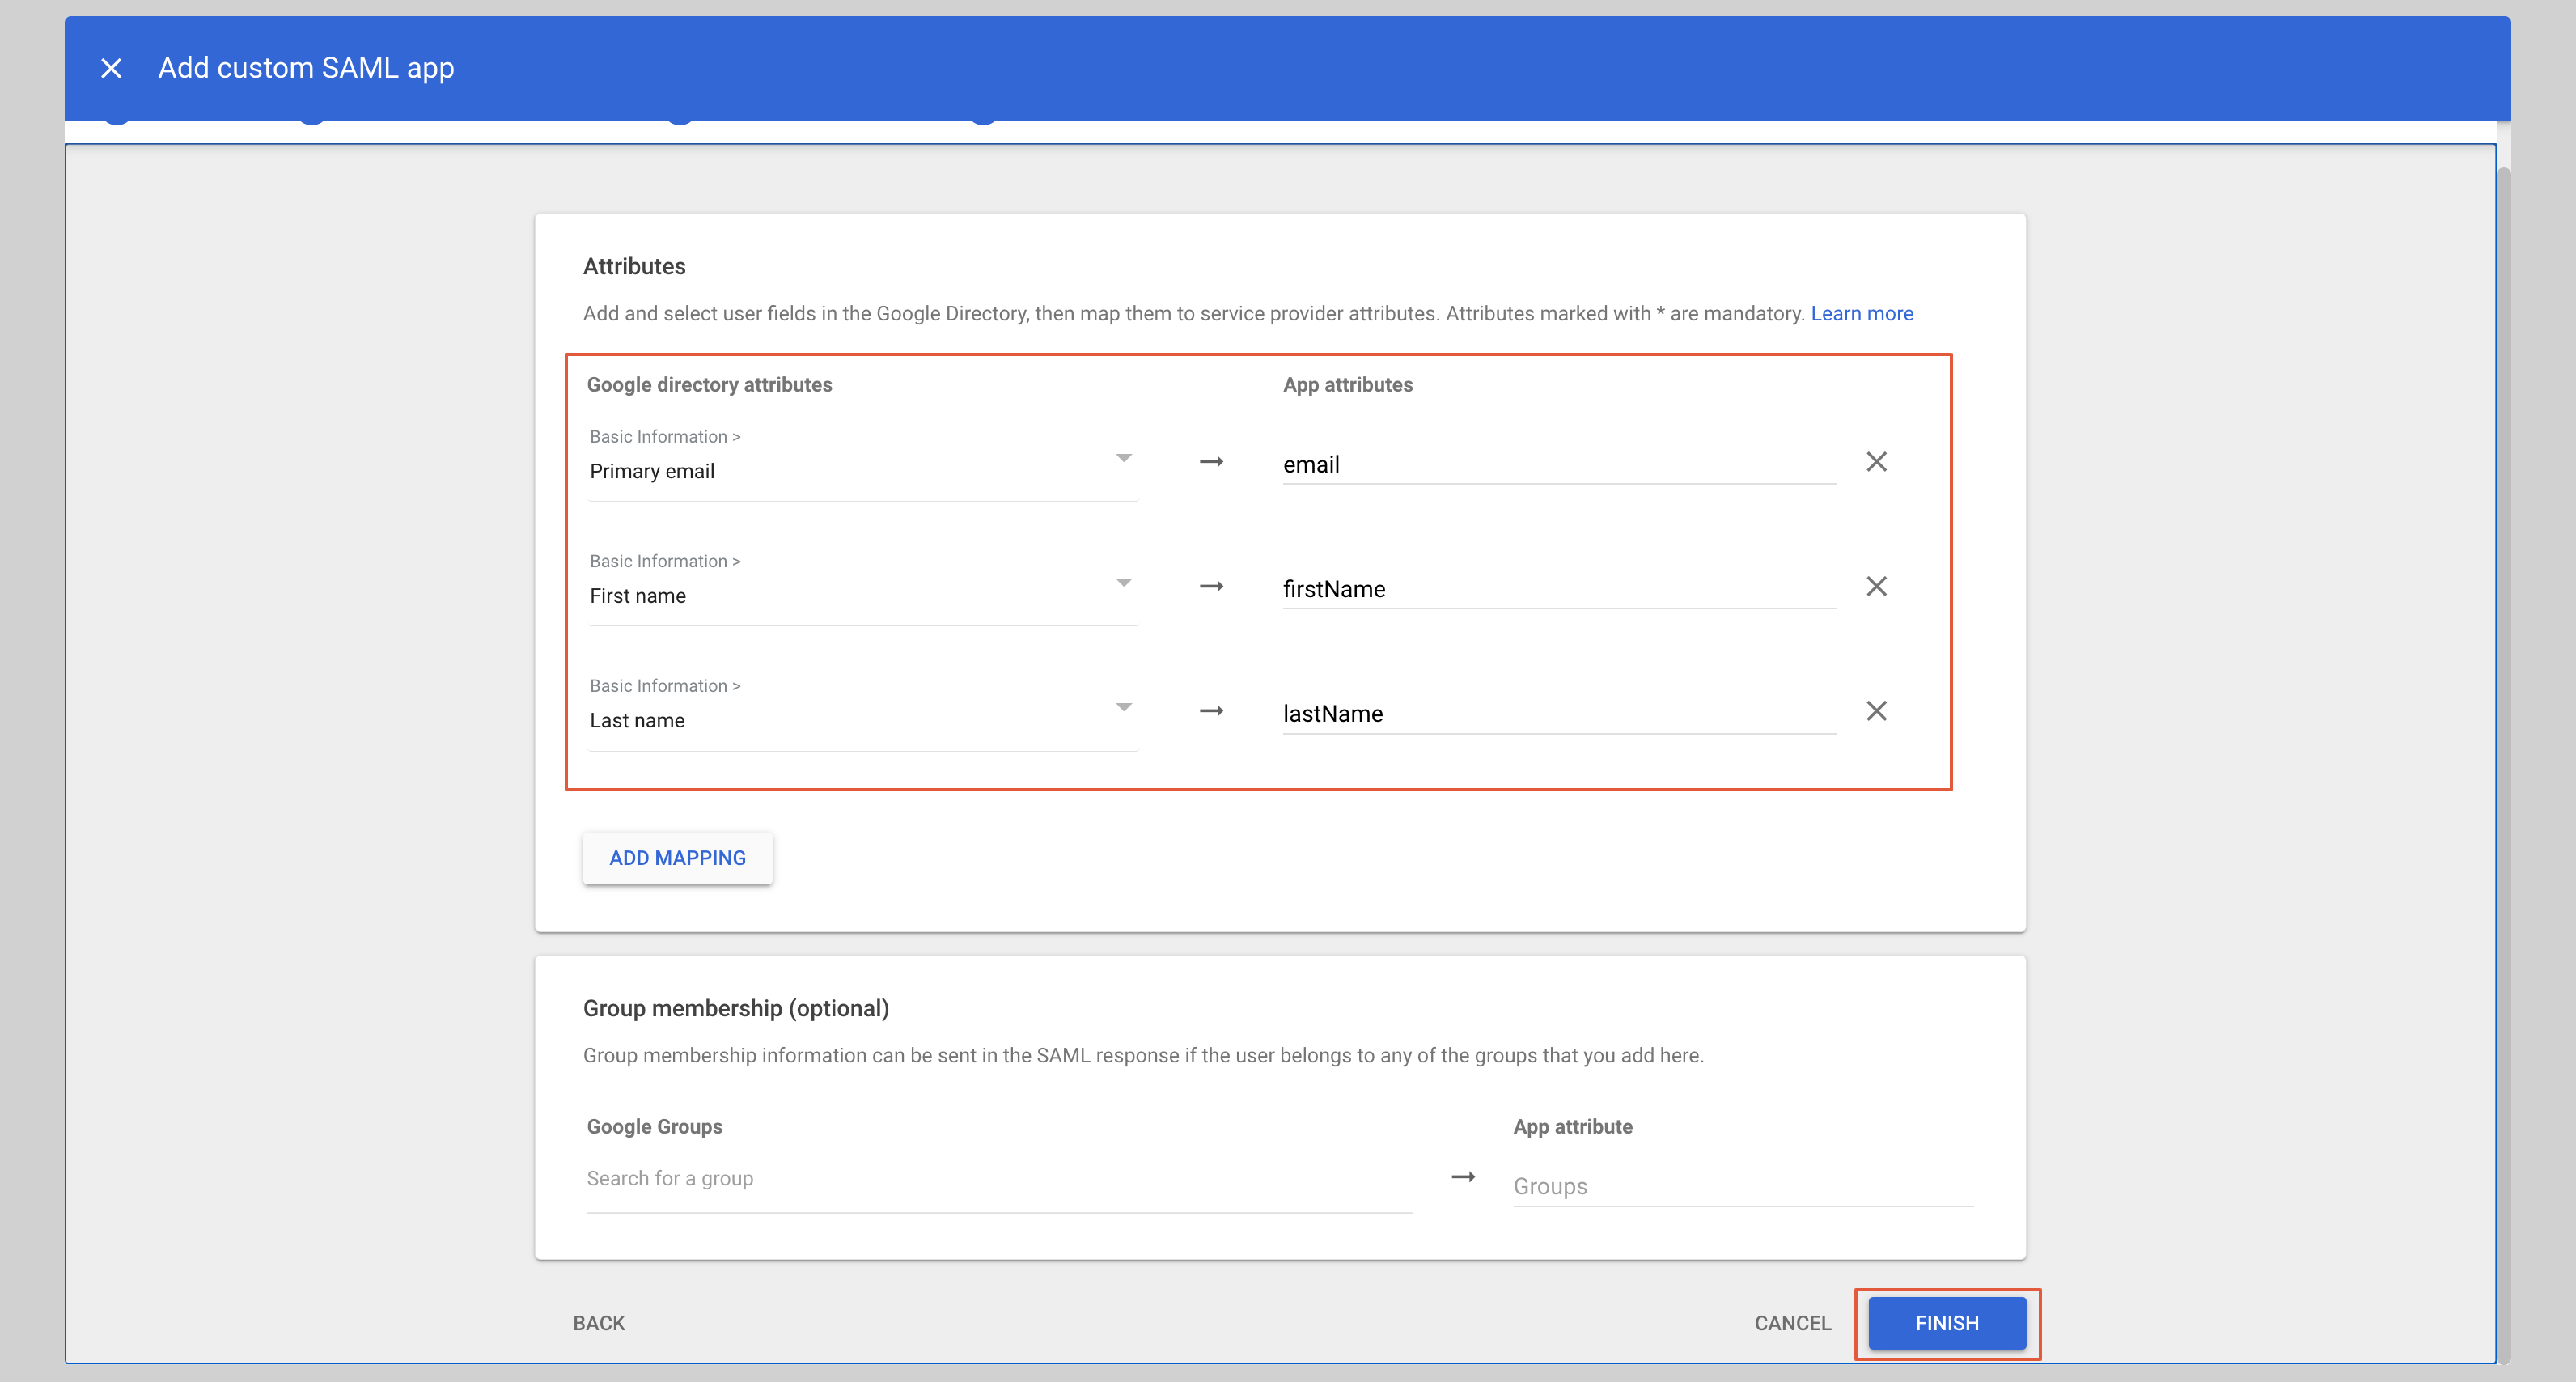
Configure attribute mapping
Under Attributes, add the following mappings:
| App attribute | Google directory attribute |
|---|---|
| Primary email | |
| firstName | First name |
| lastName | Last name |
Click Finish.
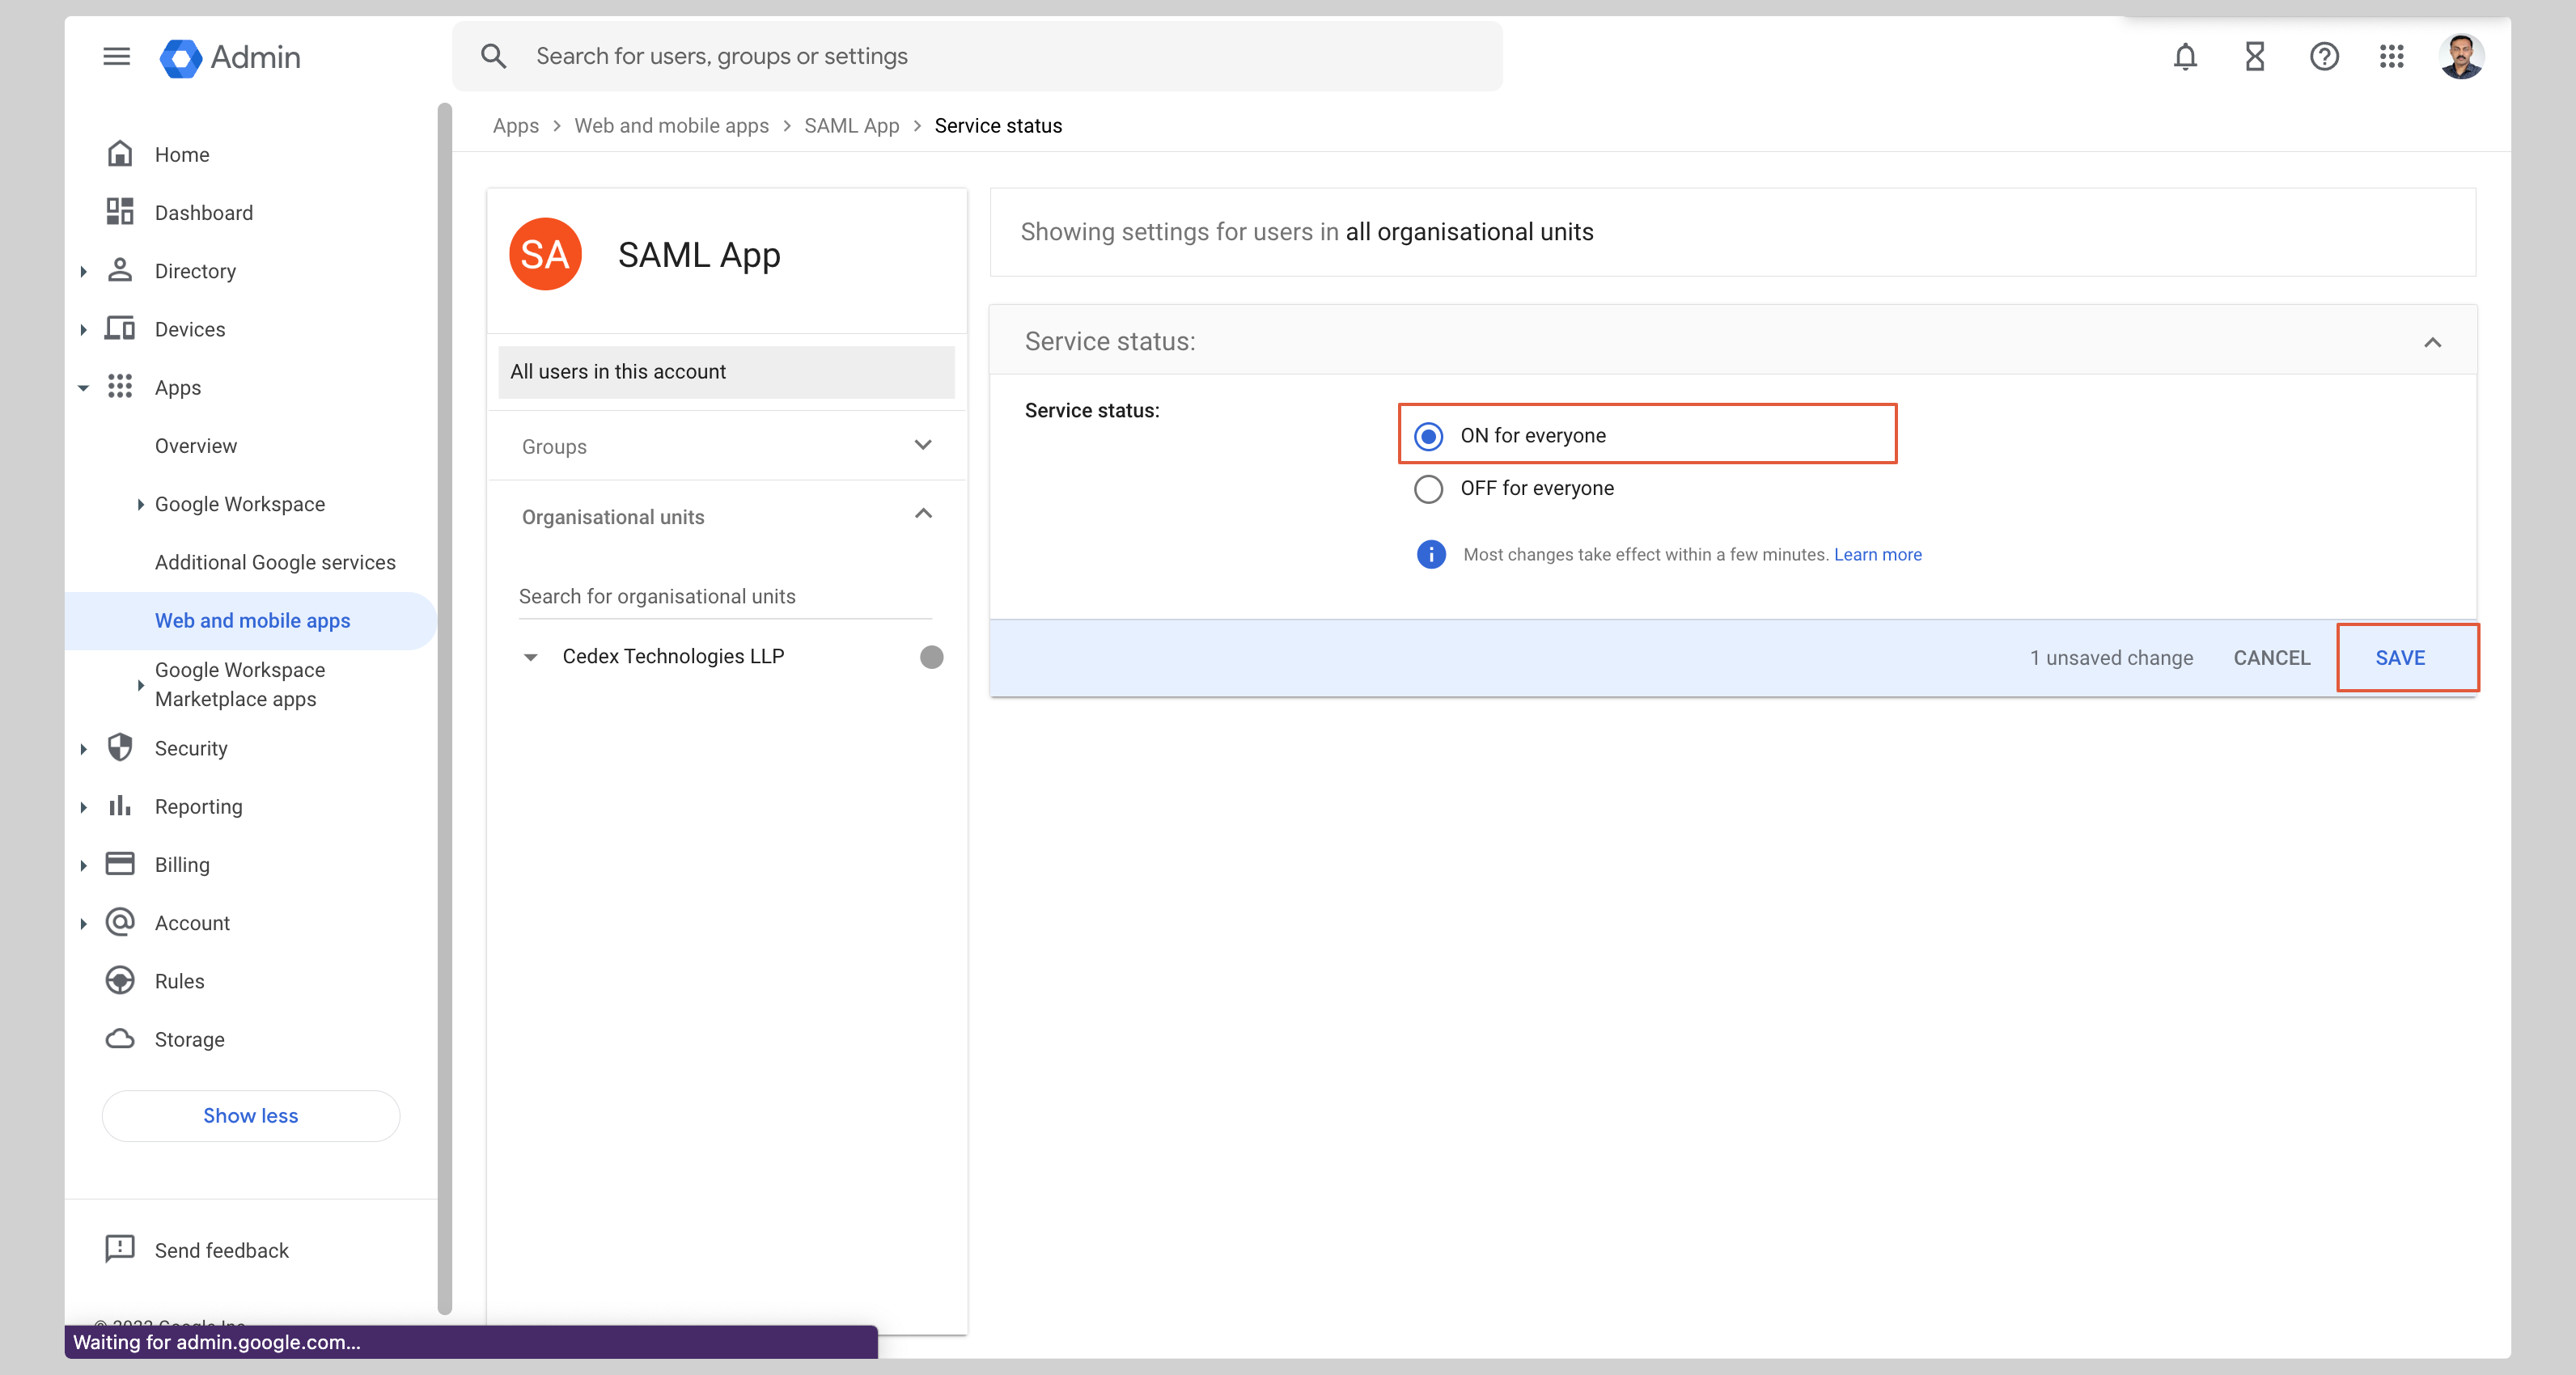
E. Enable user access
- From the app page, click User access
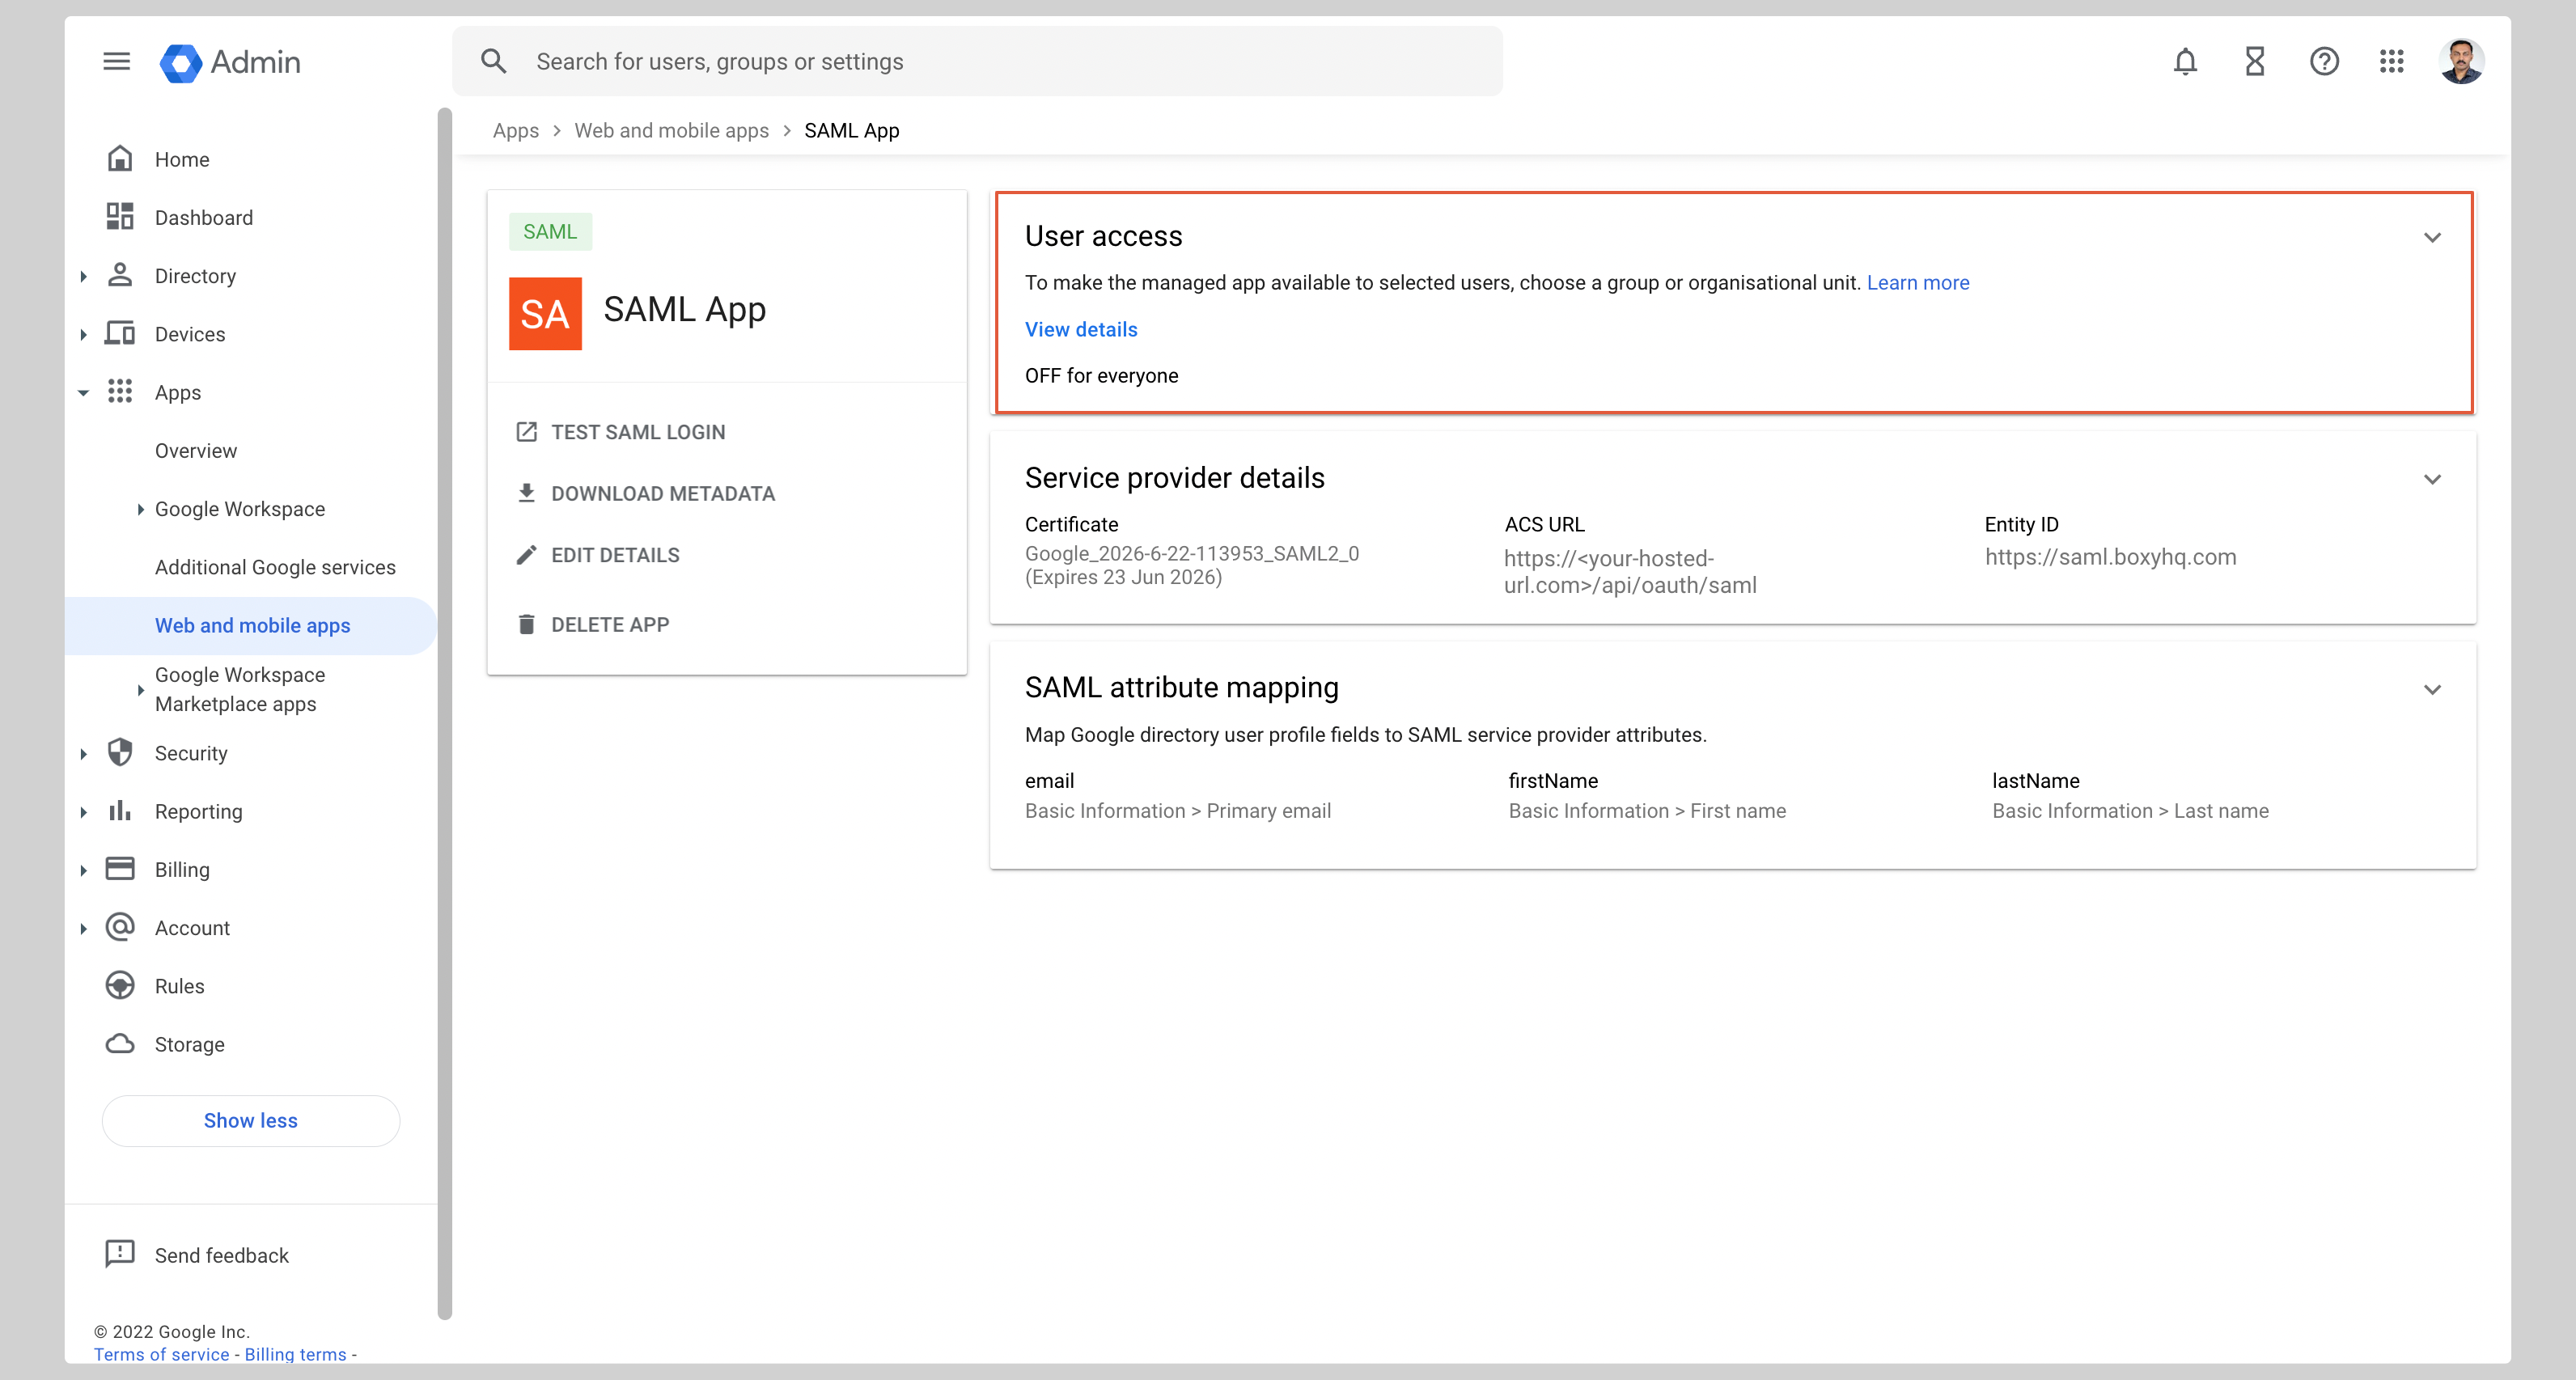
- Select ON for everyone and click Save
Step 3: Register Your IdP in Goodnotes
- Return to the Goodnotes Admin Console
- Select your verified domain
- Upload the metadata XML downloaded from Google
- Click Save Settings
Test Your Setup
- Open https://org-admin.goodnotes.com in your browser
- Click Sign in with SSO
- Enter your domain and sign in
⚠️ Important: Do not use the Google app launcher to initiate sign-in. Always navigate directly to the URL in your browser. If you are currently signed in via OIDC (e.g. as an admin), see Changing your sign-in method from OIDC to SAML SSO.
❓ Frequently Asked Questions
What about Apple?
Apple is not a SAML Identity Provider and cannot be configured as an IdP in the Goodnotes Admin Console. "Sign in with Apple" uses OpenID Connect (OIDC) — a different protocol from SAML — and is not part of this setup.
If your team uses Apple devices (Mac, iPhone, iPad), they can still sign in via SAML SSO through your company's IdP (Entra ID, Okta, or Google Workspace). The device type does not affect which IdP you use.
💬 Need help? If you run into any issues during setup, please contact Goodnotes Support.